Can your Headlights be too Bright?
In short, they most certainly can be too bright. When driving, it is important to always exercise caution and to be mindful of other drivers, road rules, and external factors like road debris and animal crossings. At night, this whole process is exemplified, and having headlights that are both bright and minimize glare for other drivers is very important.
Today we will look at what attributes are conducive to a quality headlight. These guidelines, so to speak, will apply to any car, truck, SUV, or other road-going vehicles. They are also not limited to just aftermarket headlight housings, fancy LED bulbs, or even HID bulbs.
ABOUT
From a mechanical aspect, your headlights could be too bright for themselves. Many cheap, marketplace LED bulb sellers will market them as being 9,999,999 lumens or some other absurd number in hopes of getting you to buy them. Once you install them, they may be insanely bright, but they will quickly overheat. This can cause damage to your headlight housing, costing you hundreds at worst, or just fail entirely, putting you out $20-30 USD, at best.
Good LED bulbs are bright but have cooling systems to prevent them from overheating. Beyond that, you will want a bulb that follows the guidelines below.
NOTE: LED bulbs are illegal for road use in a headlight application, regardless of where you are in the United States. We do not recommend using them in a headlight application on your vehicle.
For non-LED bulbs, we recommend you check your local laws on headlight regulations to understand what you can or cannot do.
Table of Contents:
- How Does Color Temperature Affect Light Output
- Projector vs Reflector Headlight
- How to Aim Your Headlights
COLOR TEMPERATURE
Without going into the specifics, light operates on a color spectrum which is determined by the temperature of said light. If you think of it in the terms of an open flame, say a cutting torch in a welding shop can reach up to 5000° F = 3033.15K (‘K’ is the symbol for Kelvin). If you were to project that same temperature in light onto a wall, you would see a light that matched the color of the flame on the welding torch.

When testing the brightness of headlights, you will typically measure the maximum Lux rating, which is the number of lumens per square meter. The most visible and usable light, which is most effective for driving at night, will be found in the center of the spectrum.
Therefore you will see most LED bulbs, or at least the good ones, offered in a cool white color. The OEM bulbs, typically incandescent ones, operate around 3,500K – 4,000K giving a warm white color that sometimes leans closer to a yellow or light orange.

Without a doubt, the color temperature of the light you are running affects your visibility. However, the way it causes glare for oncoming drivers is dependent on two factors: the housing type and the height of your headlights.
HEADLIGHT HOUSINGS: PROJECTOR VS REFLECTOR
Most headlights are going to fall under two styles, a reflector, and a projector. In a reflector headlight, the beam pattern is created with the light bouncing off of the inside of the headlight, which is lined with reflective material in a way that is meant to craft that pattern.
| Reflector Headlight | Projector Headlight |
 |
 |
With a projector light, the bulb shines through a lens, which then creates the beam pattern. Projector lenses will give a sharper beam pattern and one that is more intense across the whole beam. Reflector headlights will have hot spots, but none as defined as in a projector headlight.
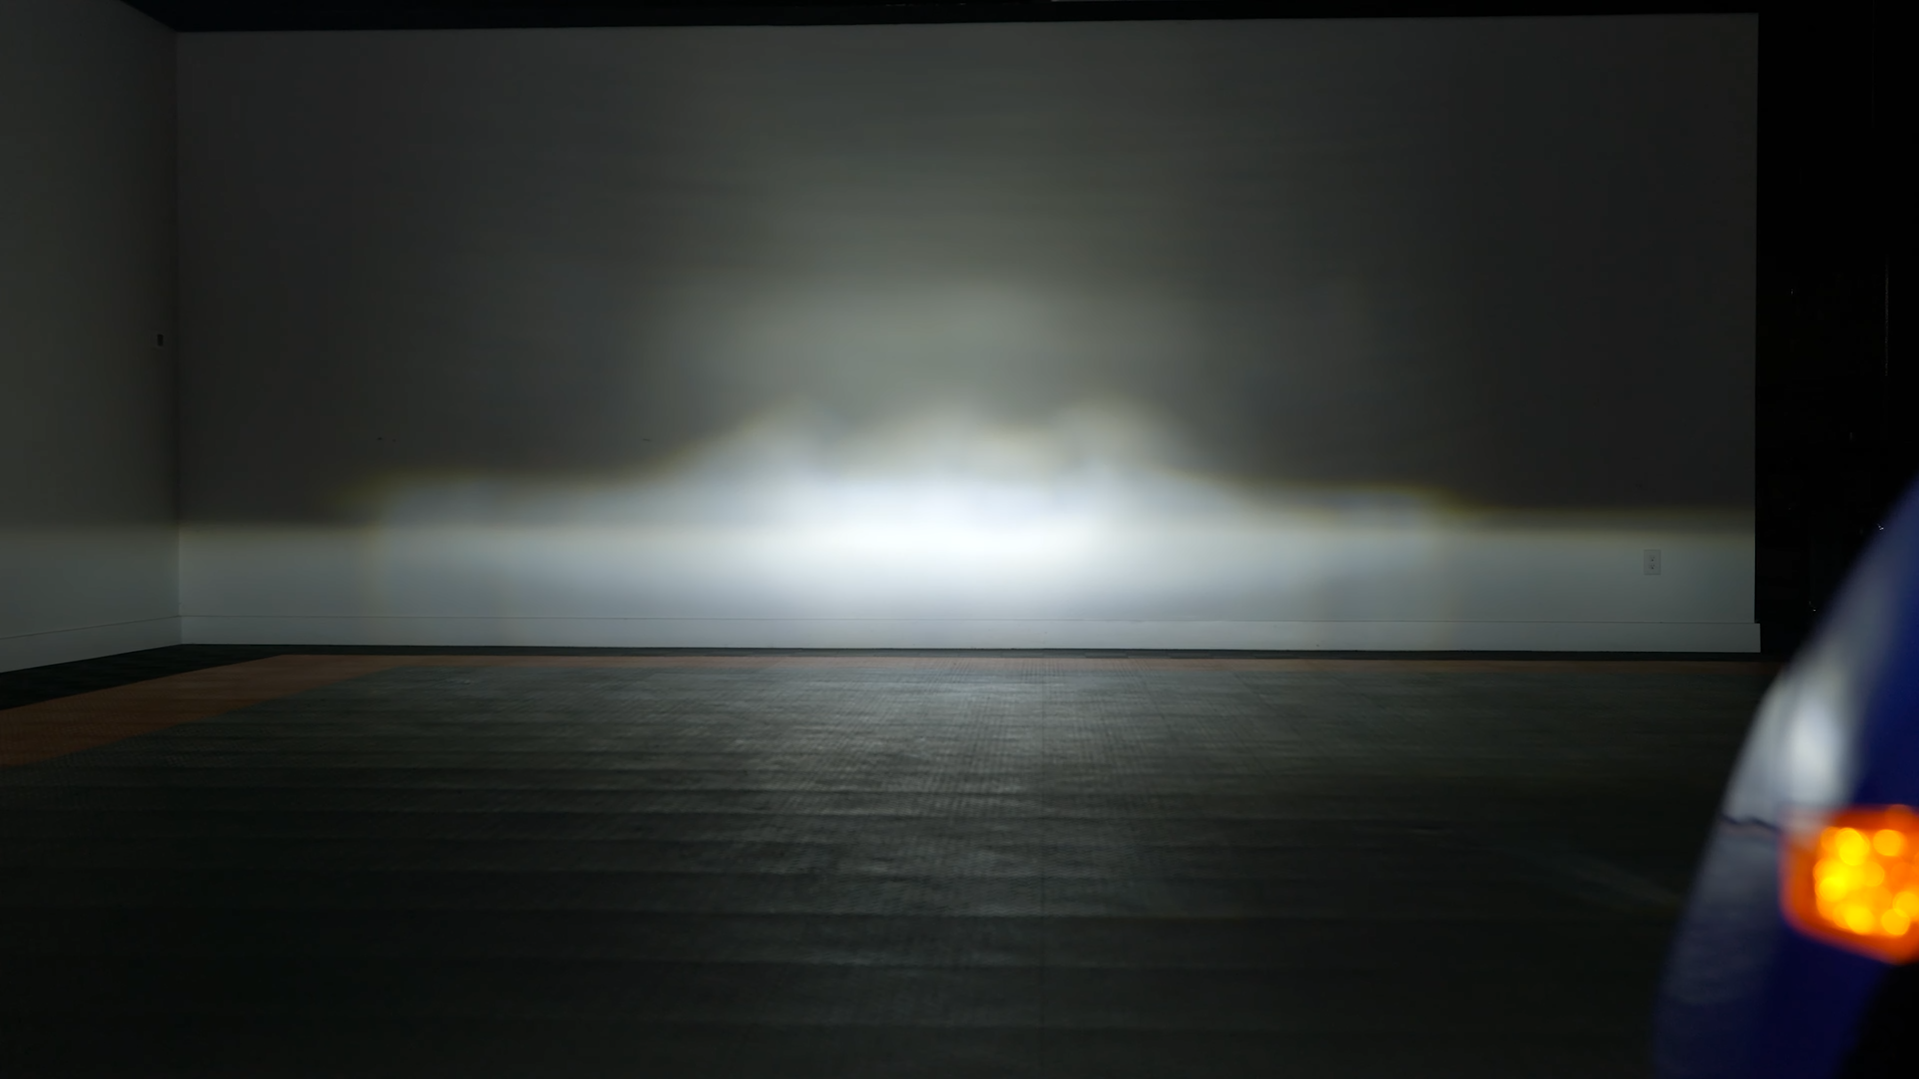
For comparison, here is a side-by-side of the different beam patterns emitted by projector and reflector headlights.
| Low Beam | High Beam | |
| Reflector (LED) | %20Crop.jpg?width=3982&name=Honda%20Fit%20GTR%20Lighting%20LED%20%20(6)%20Crop.jpg) |
%20Crop.jpg?width=3908&name=Honda%20Fit%20GTR%20Lighting%20LED%20%20(3)%20Crop.jpg) |
|
Projector (Halogen) |
 |
 |
| Morimoto XB LED (Projector) | 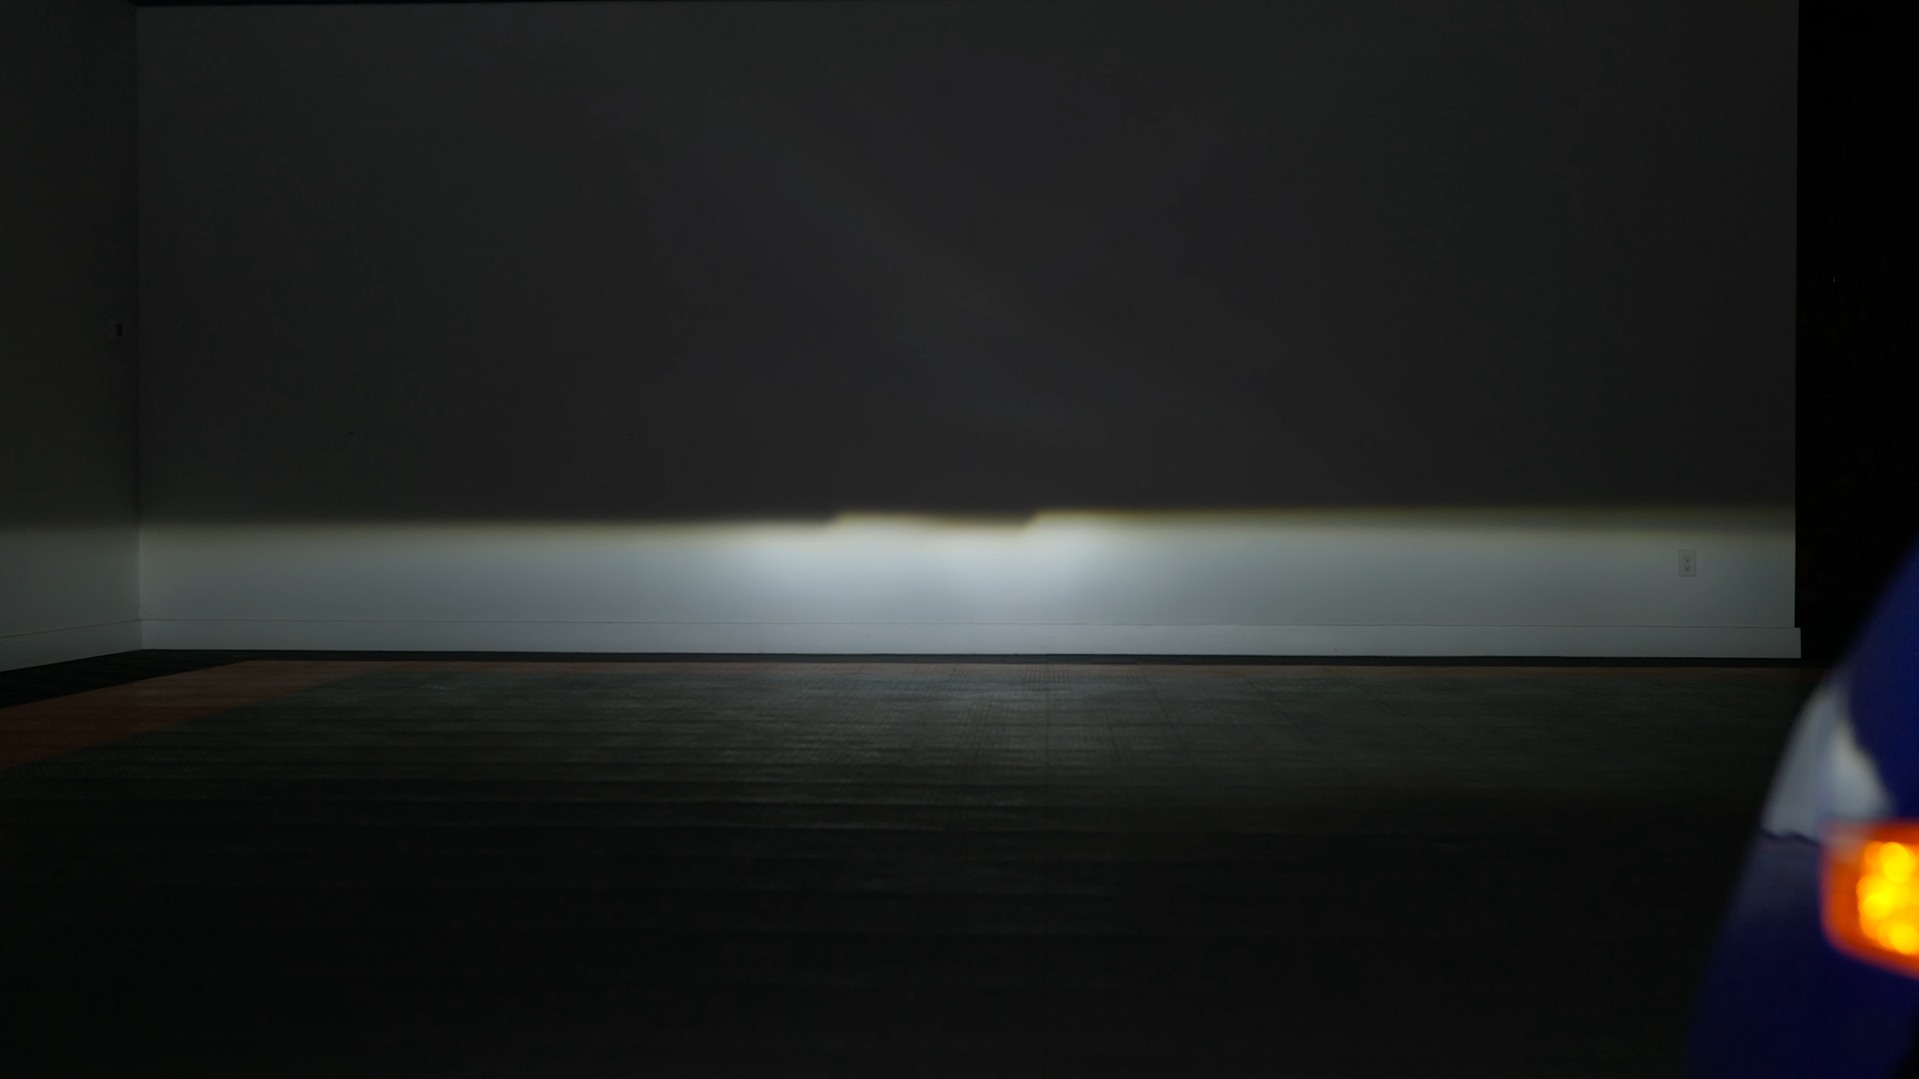 |
 |
The projector headlights clearly have more control over how the beam is constructed and in some cases, can be retrofitted to your own headlights, but that is a topic for another day. Something to note, is that reflector headlights are going to be more likely to produce glare in oncoming drivers. You can, however, prevent this by aiming your headlights properly.
AIMING YOUR HEADLIGHTS
Having your headlights aimed properly is arguably the most important factor when it comes to reducing glare to oncoming drivers. Follow these steps and you should be good to go.
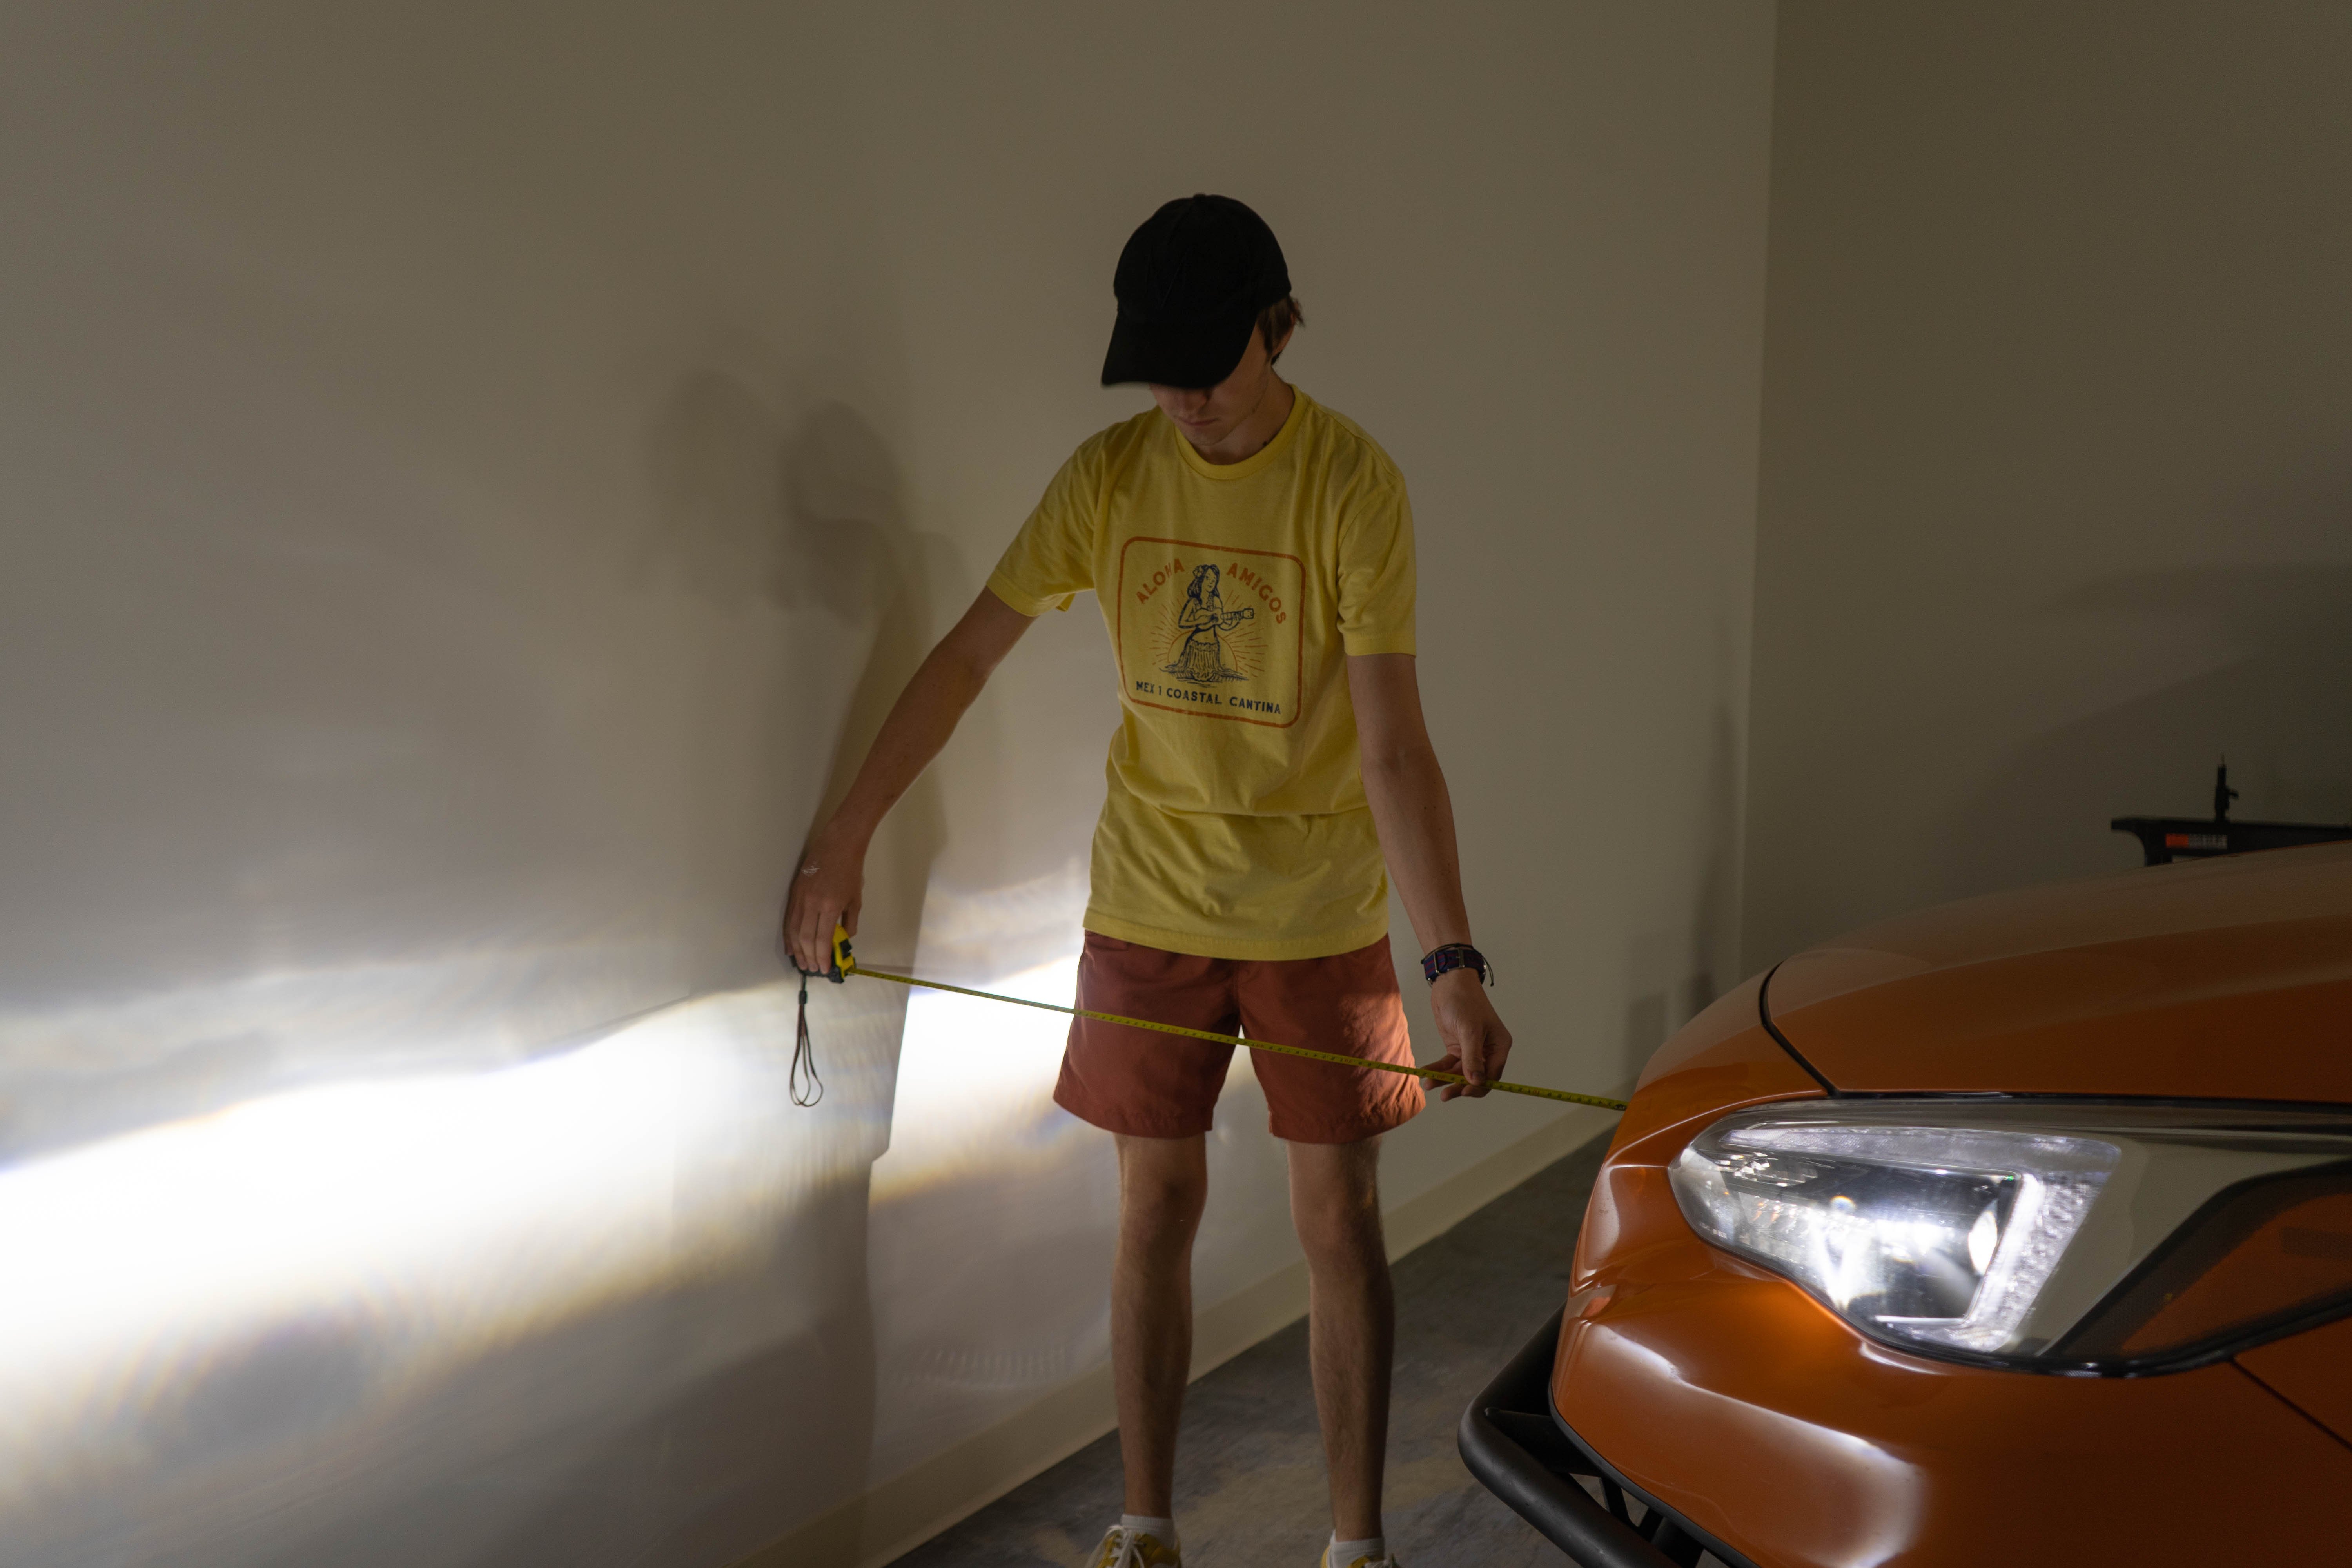
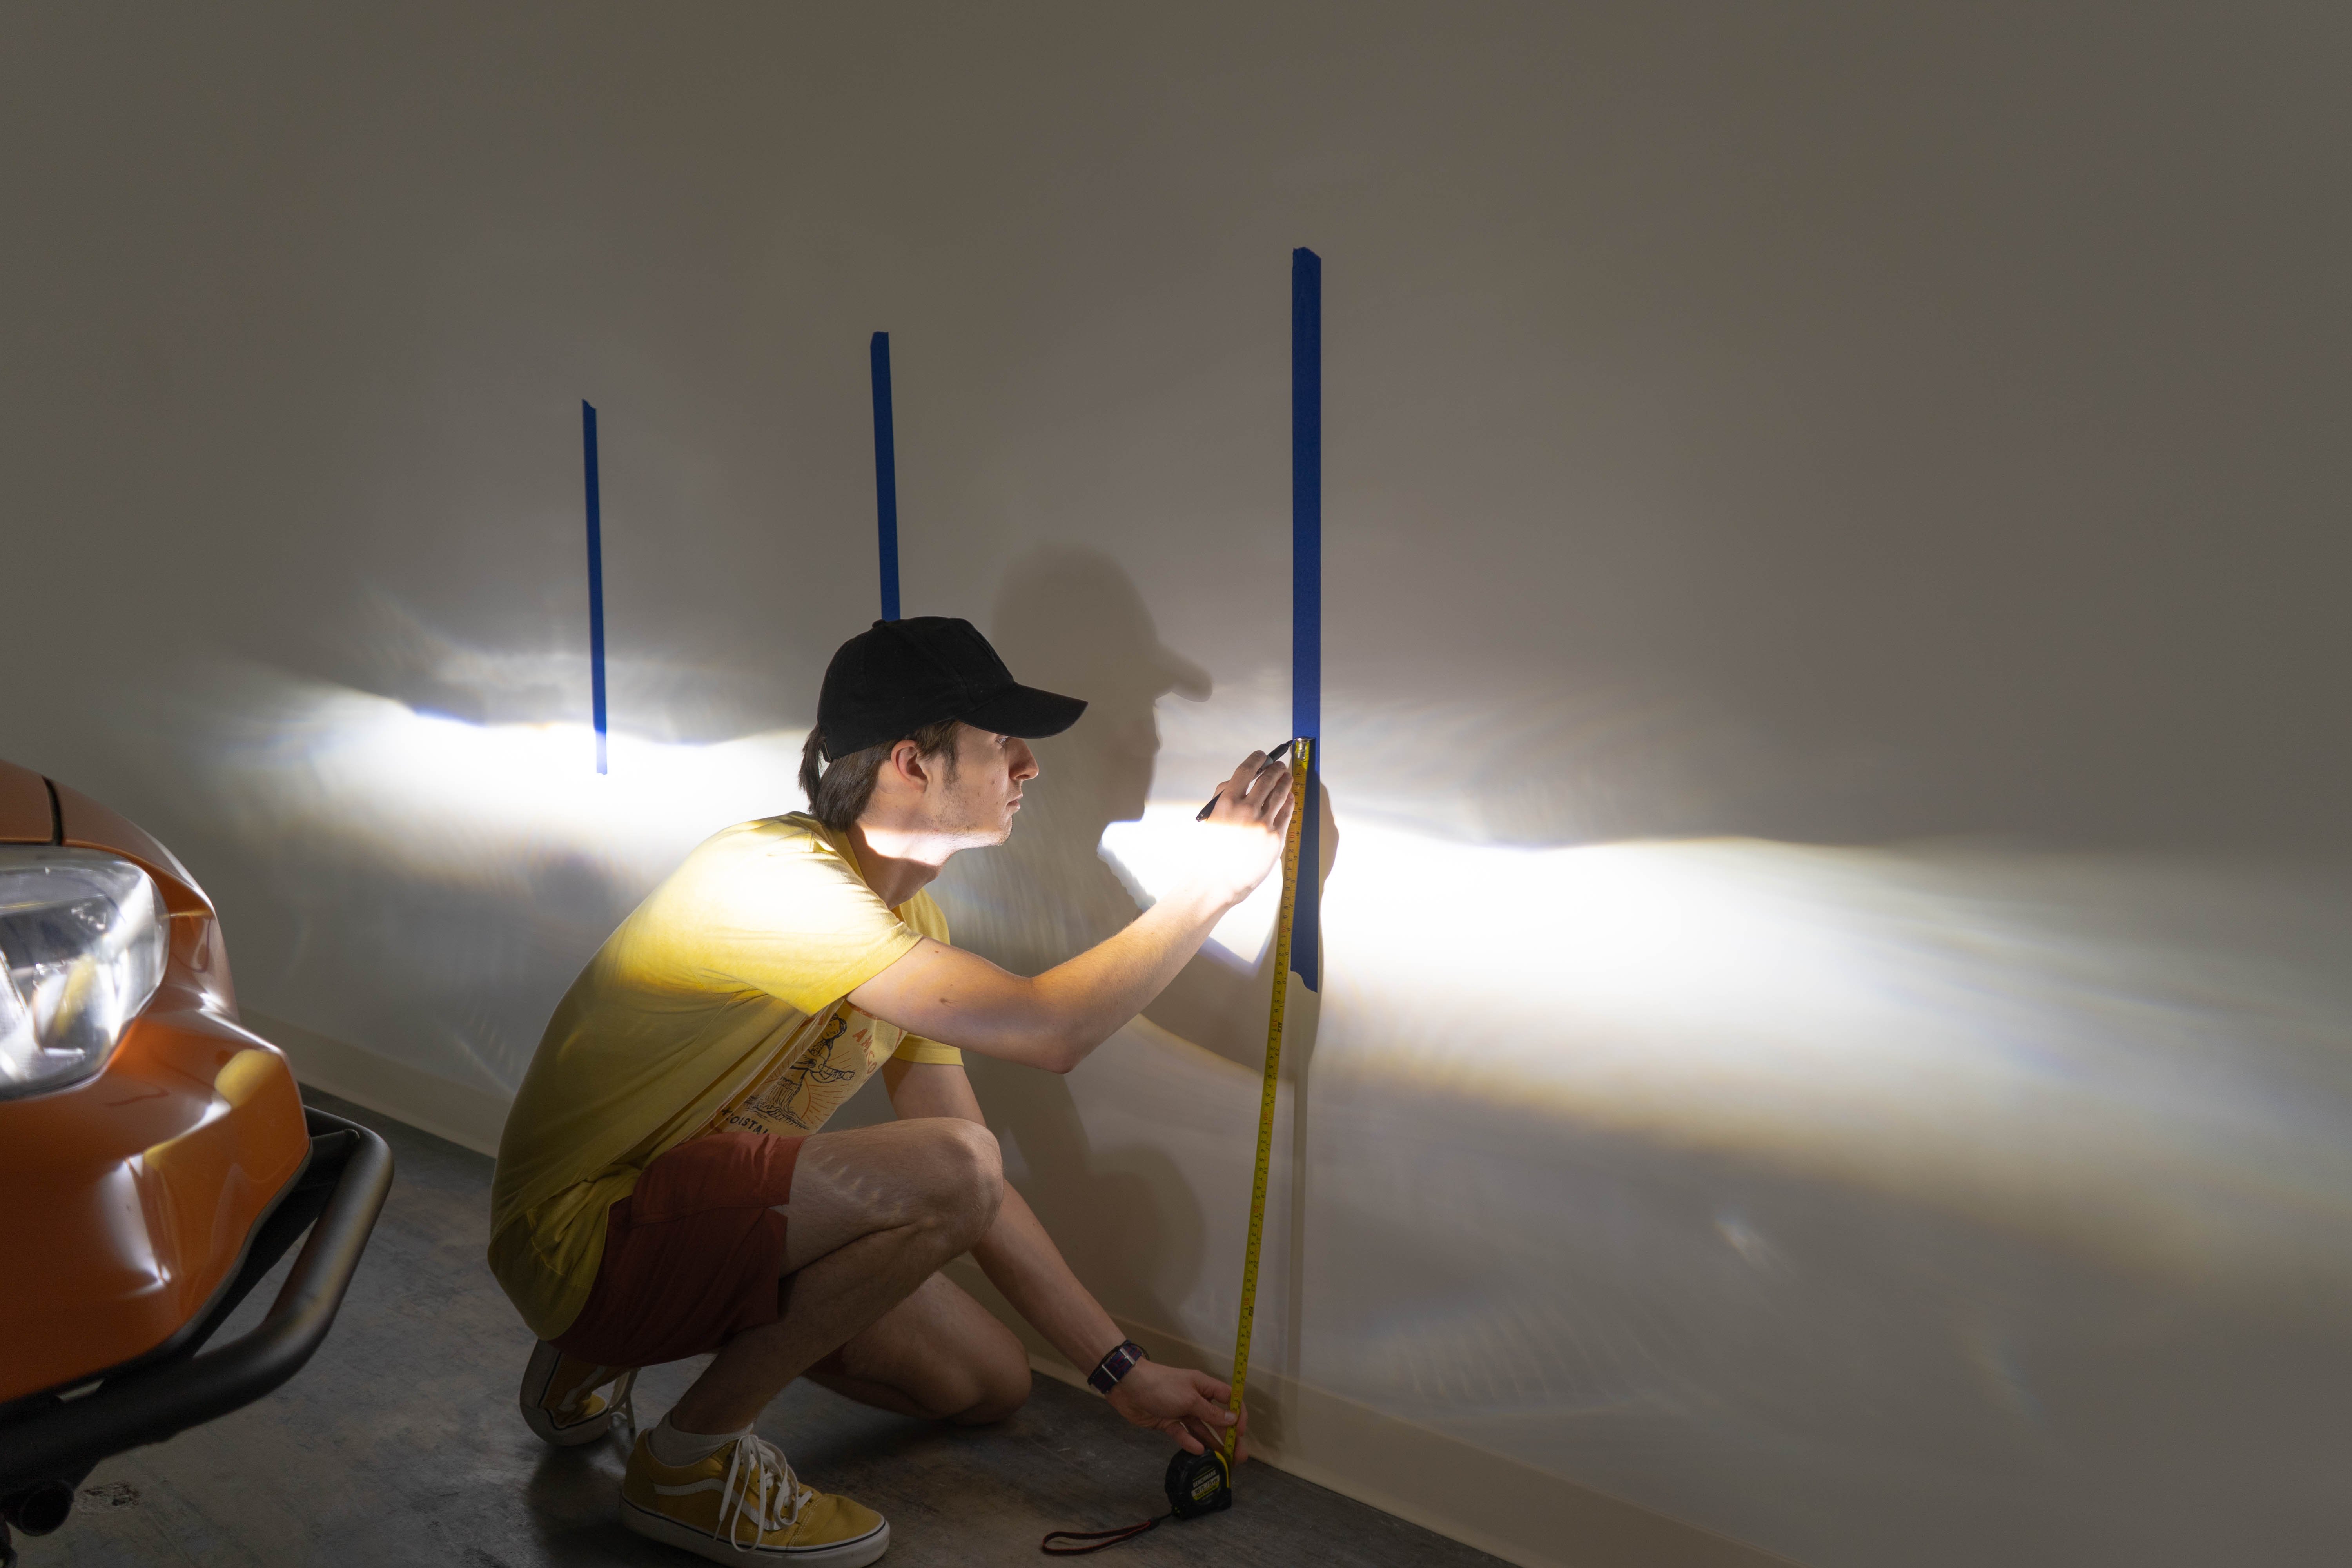
Step 1. First thing, pull your vehicle up to the wall about three feet away, so you've got some space between your front bumper and the wall itself.
If your car is typically weighed down with heavy equipment, you will want to simulate that condition.
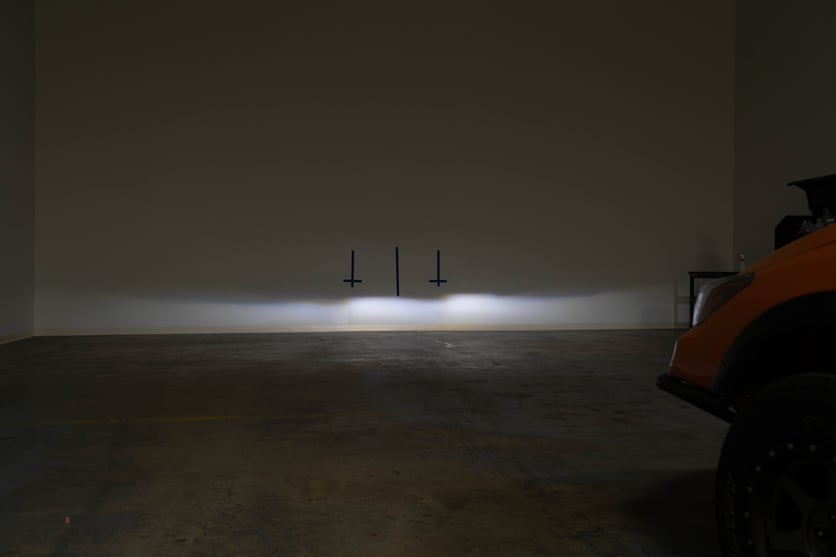
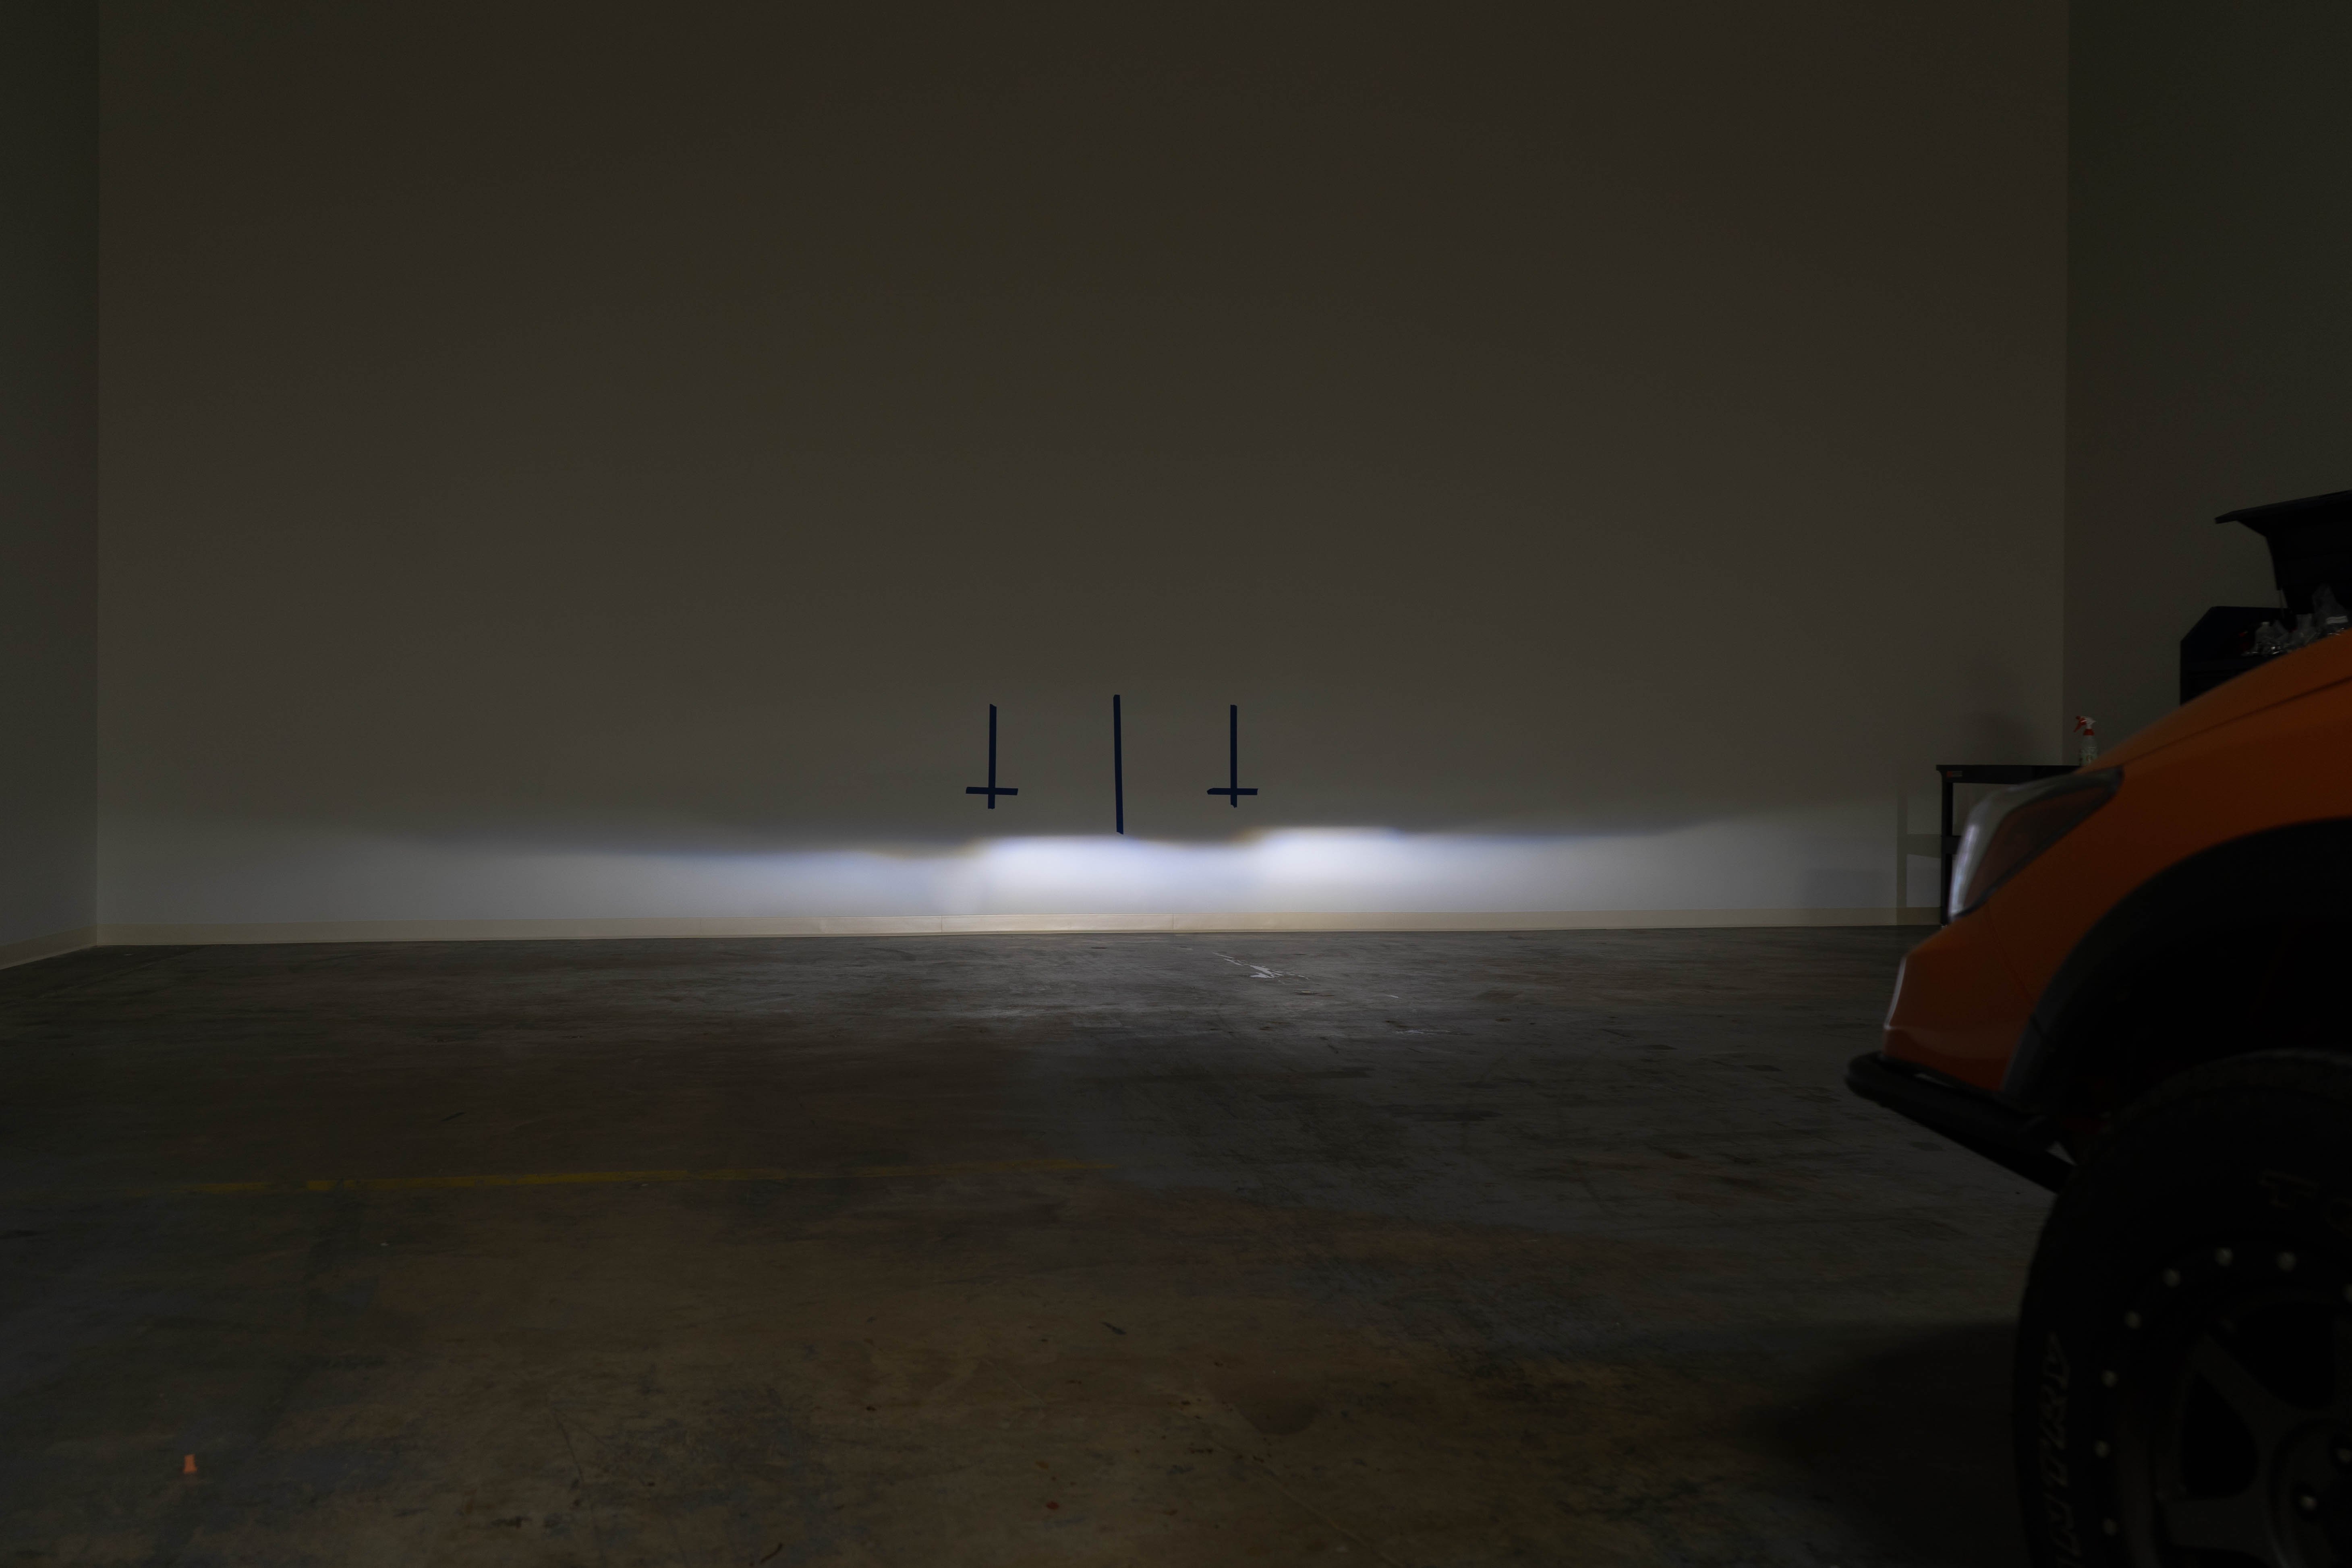
Step 2. Identify the vehicle's center and add a vertical piece of painter's tape or something to indicate the center. Then, identify the center of each headlight and add another vertical piece of tape on the wall in front of each headlight.
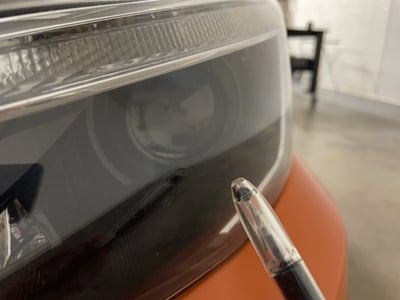
You are going to want to make sure that the distance between the center and your headlight marking is the same on the wall. You can identify the center of your headlight by that little dimple that is in the plastic.
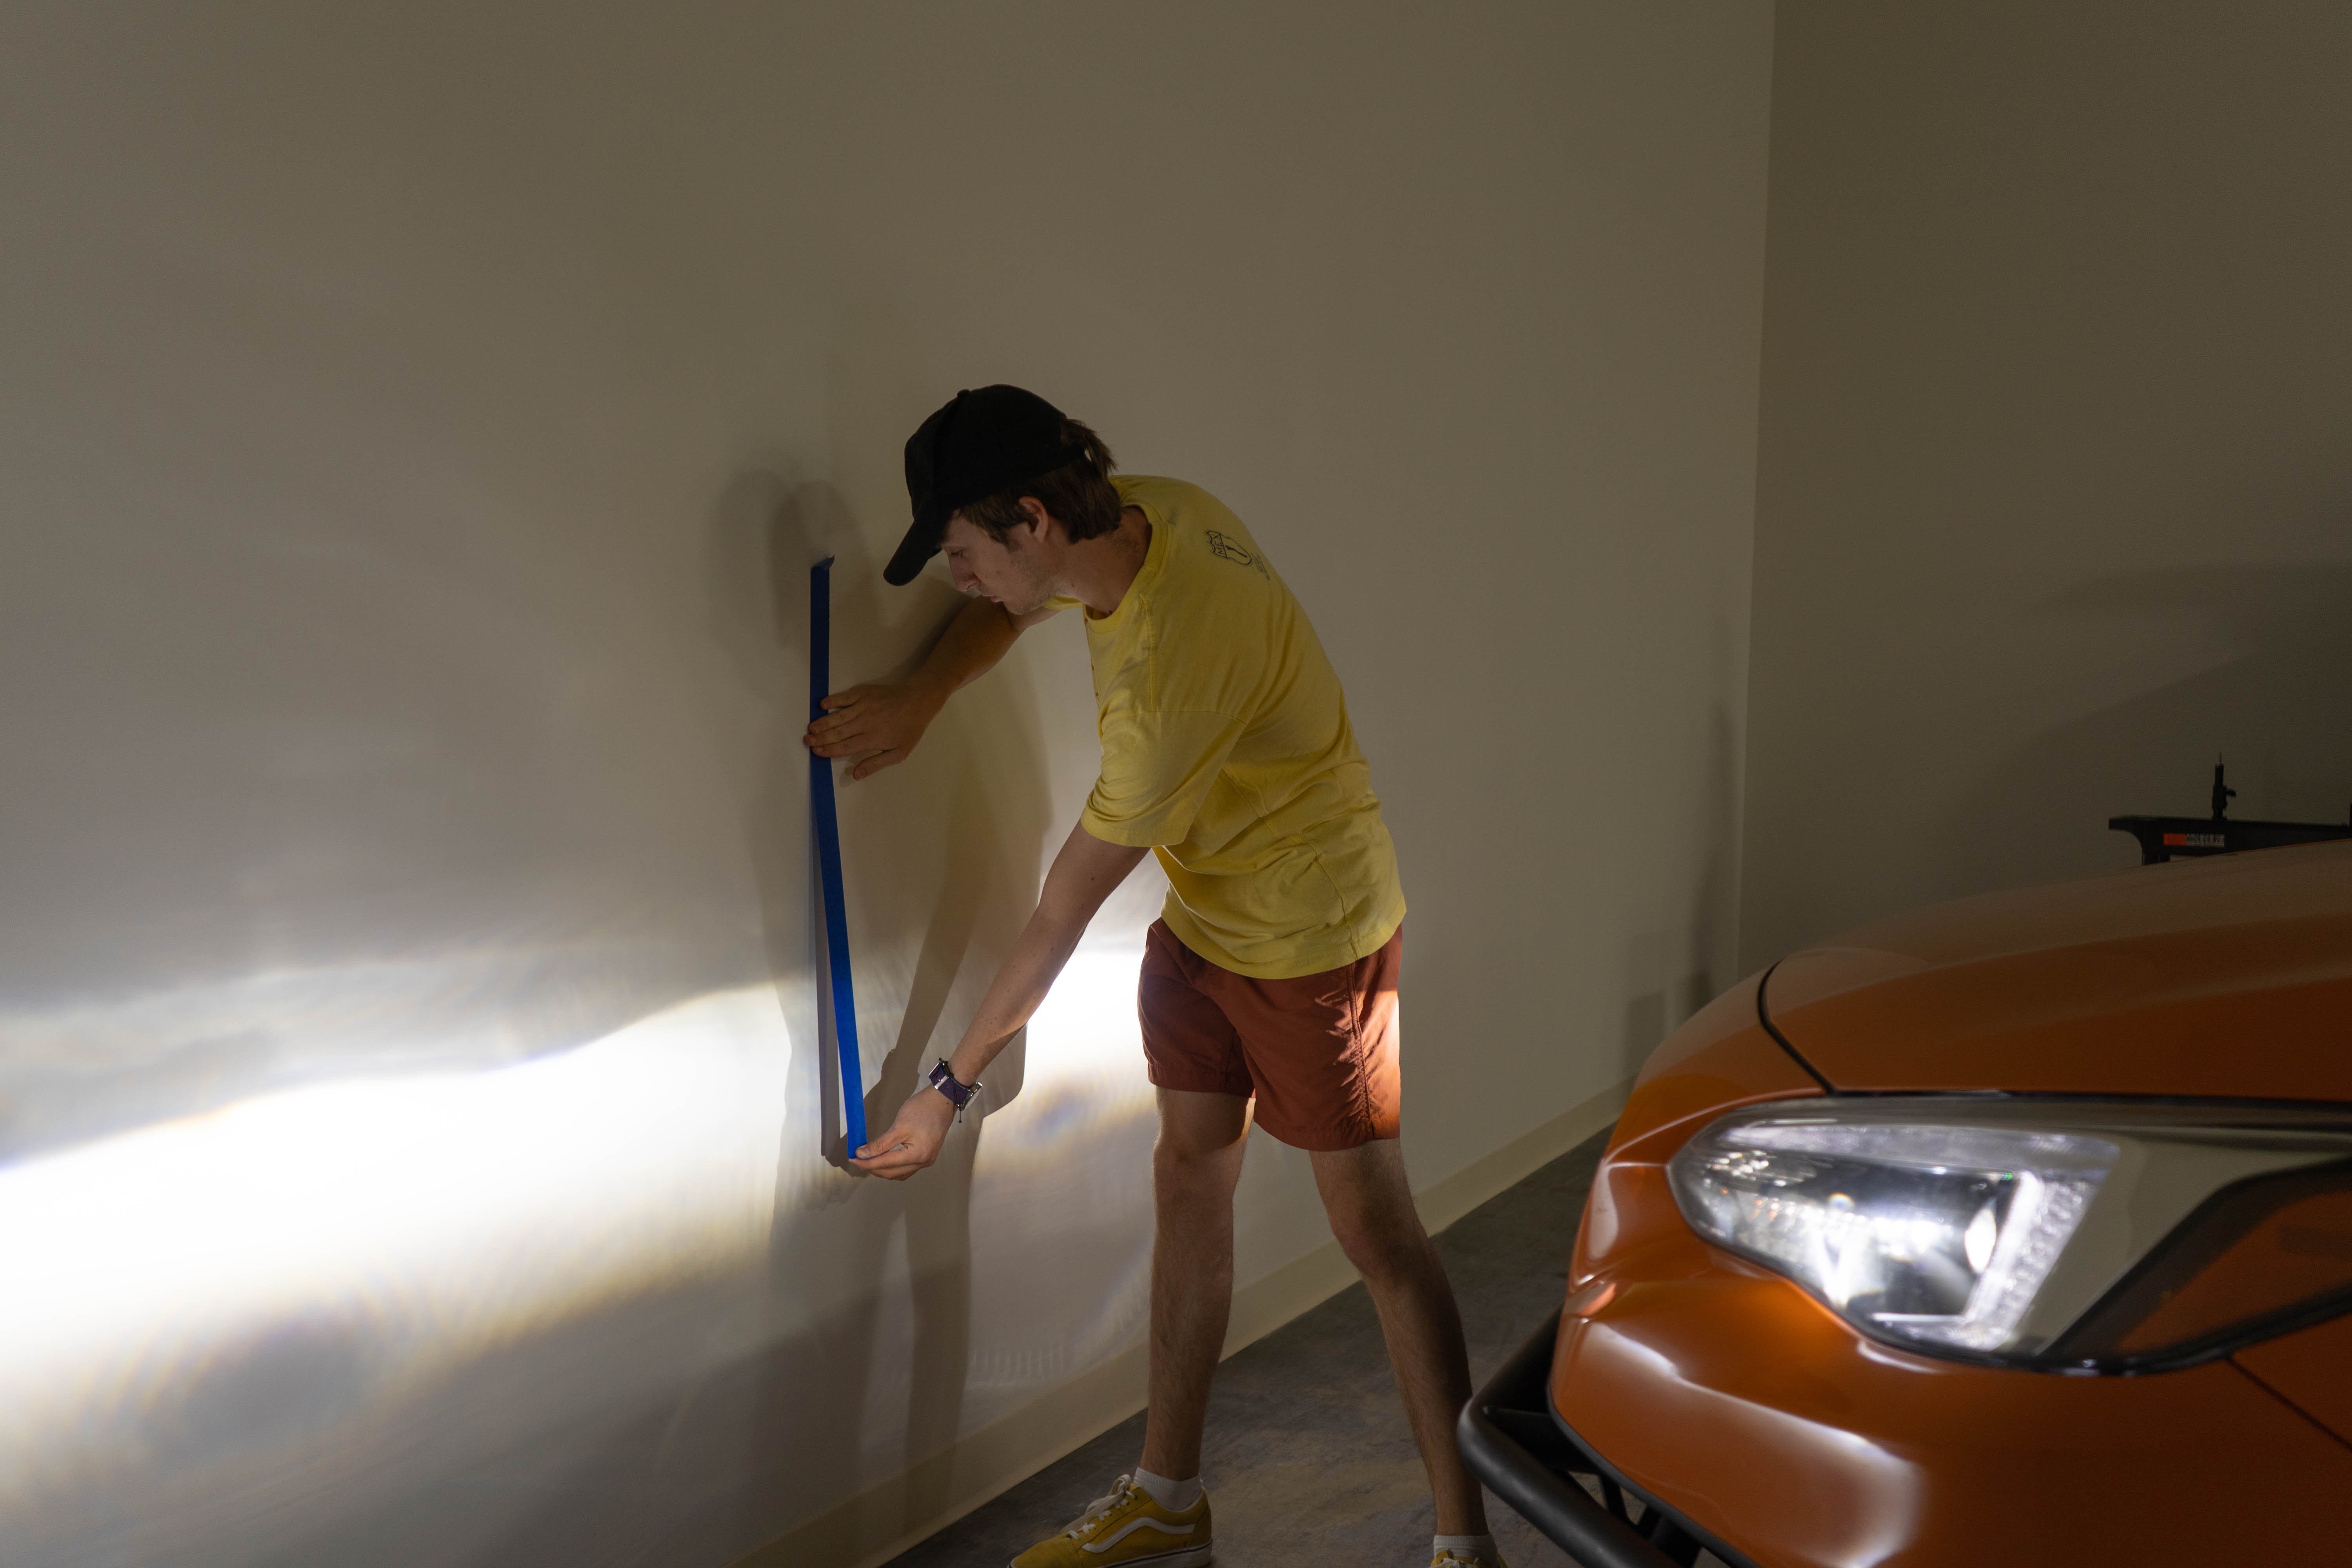
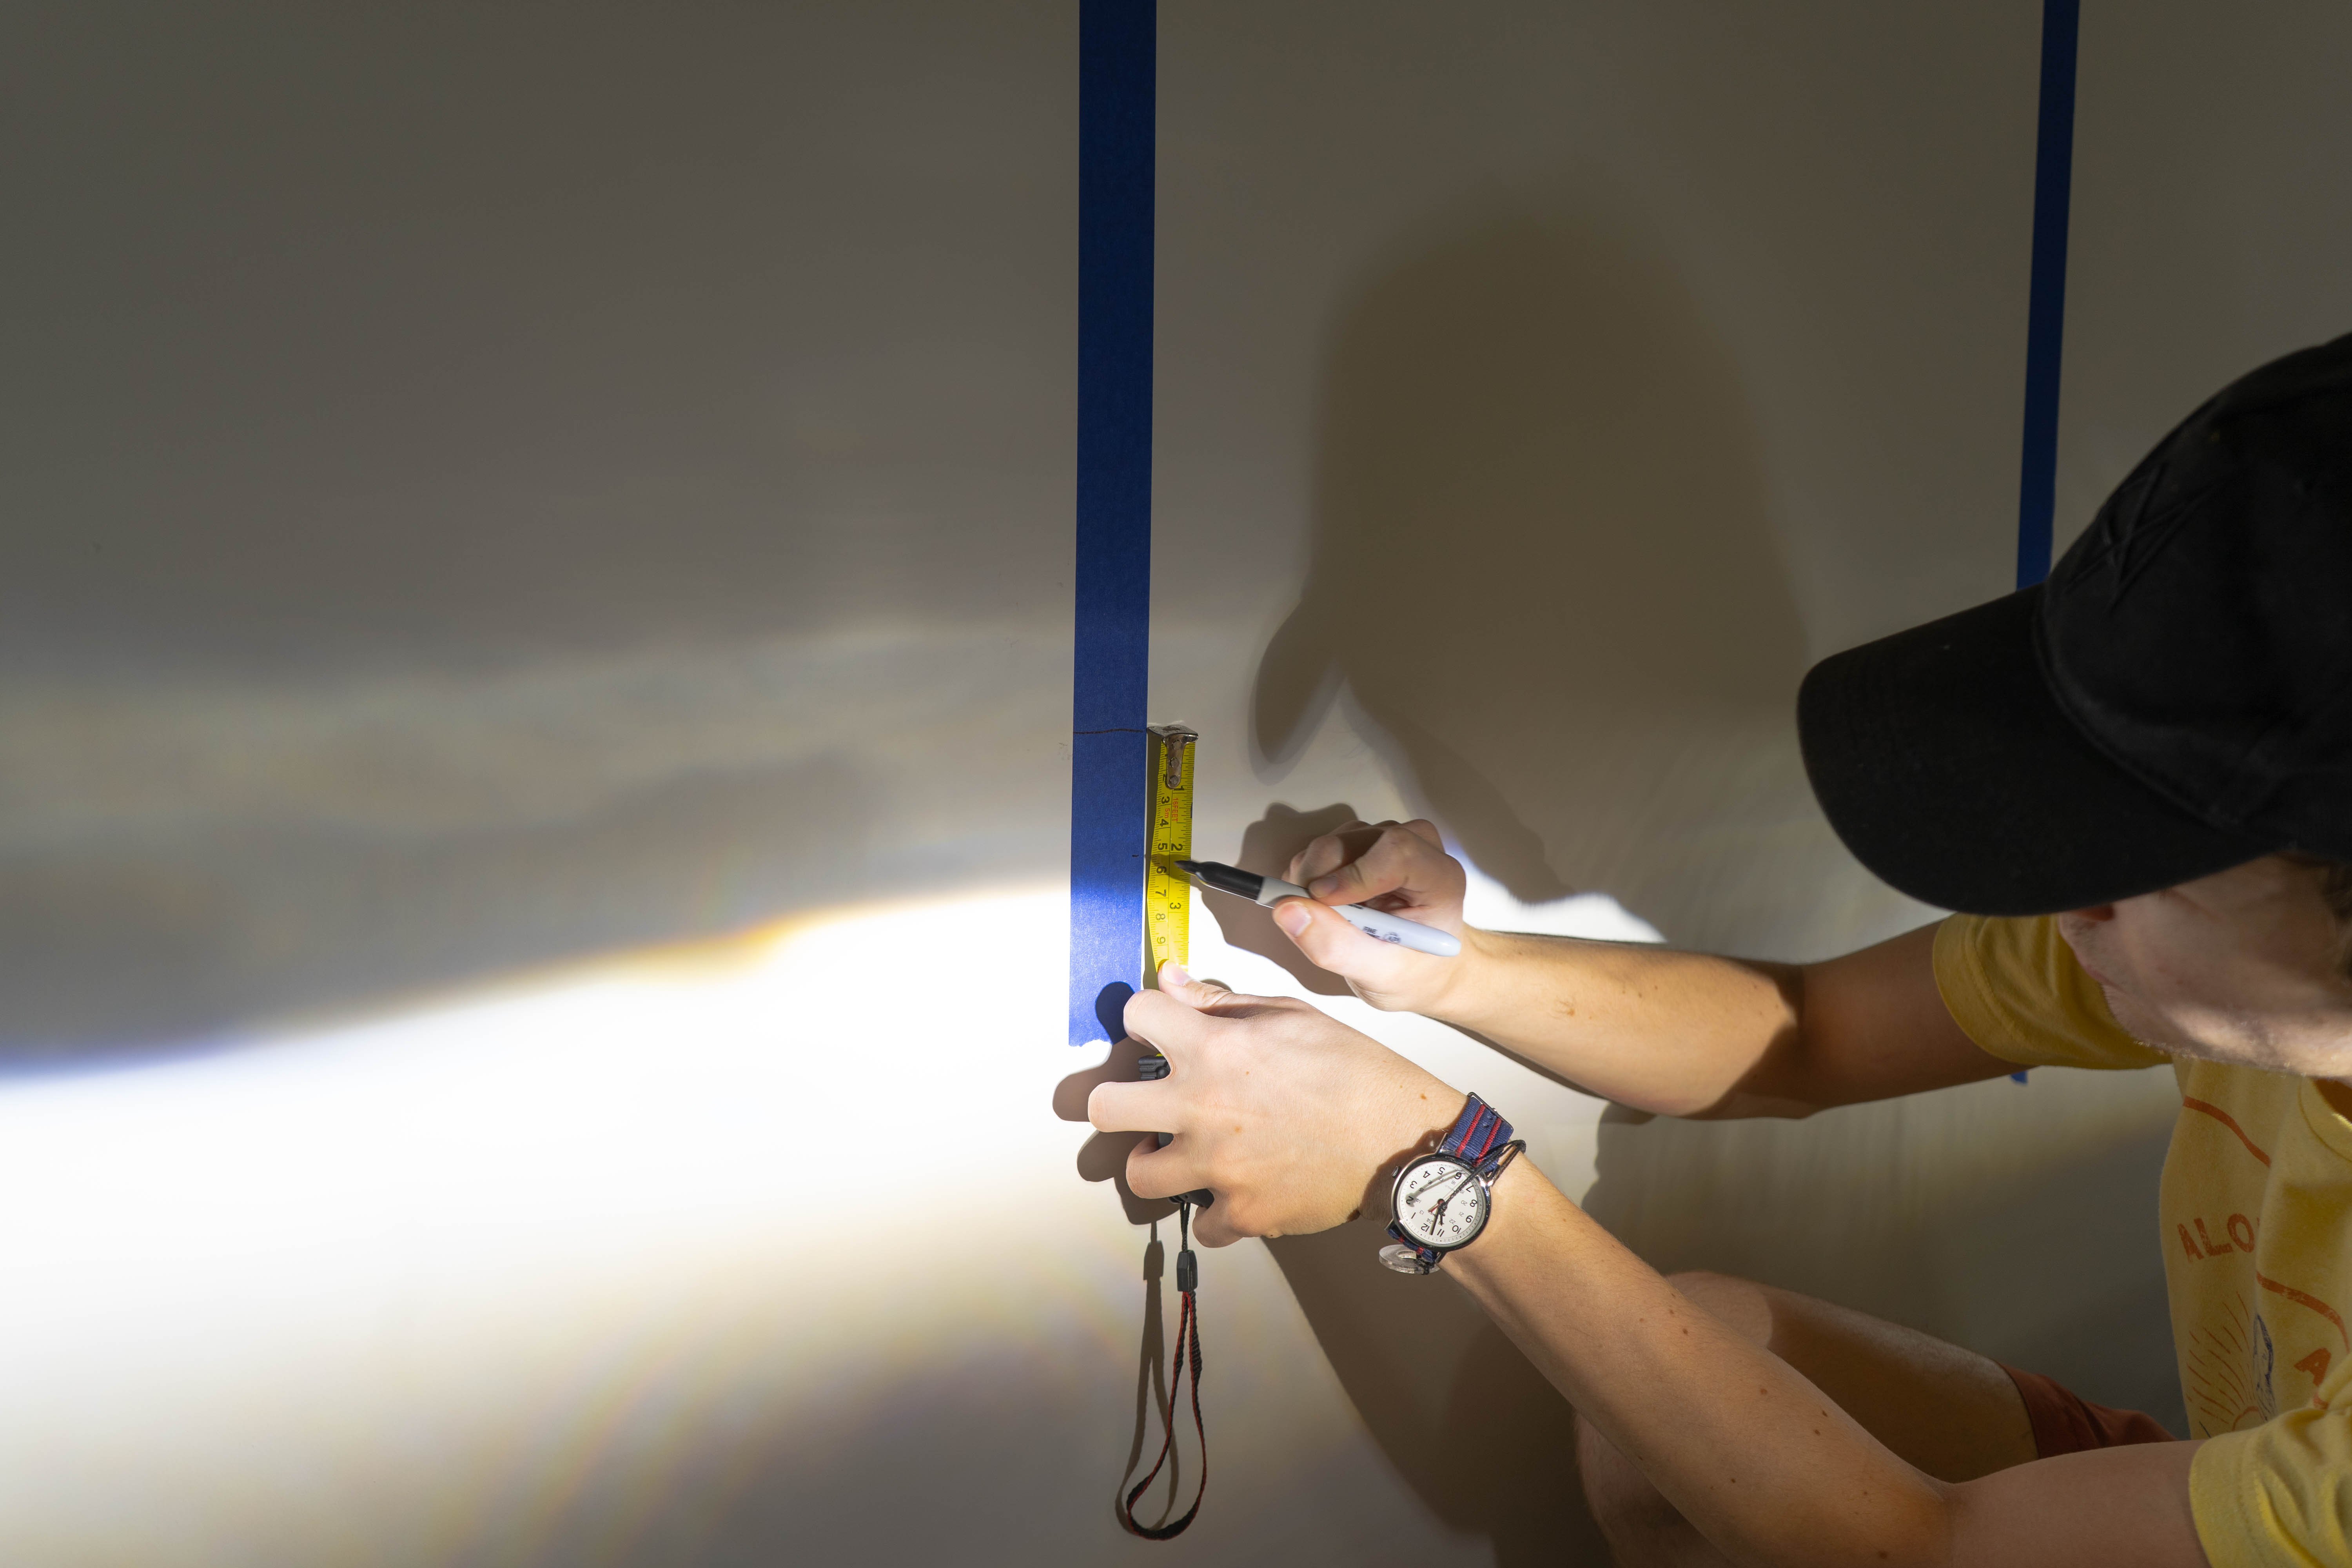
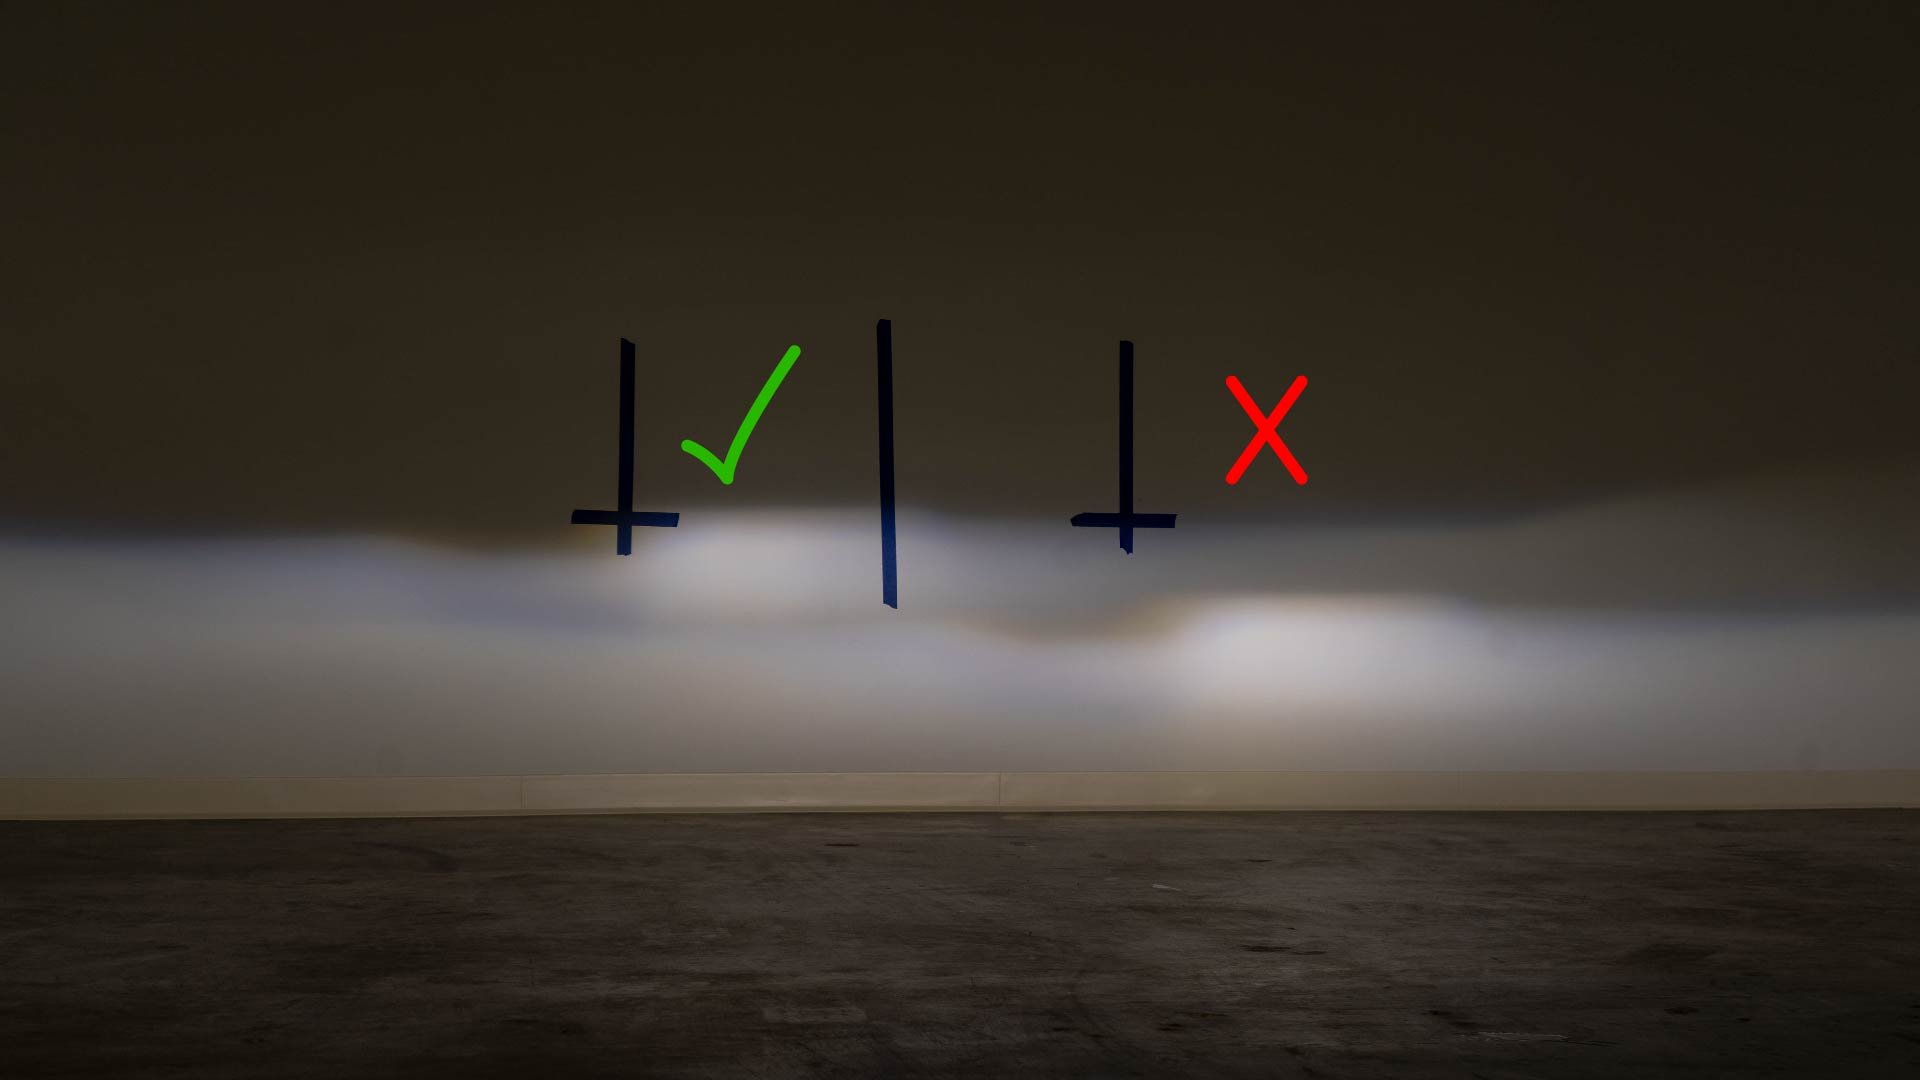
 Step 3. Now, take a tape measure and measure from the ground to the height of the center of your headlight. This measurement is the height of the dimple on your headlight from the floor up. Measure that distance up to the tape on the wall and make a mark on the tape. That should precisely identify the center of your headlight on the wall.
 |
 |
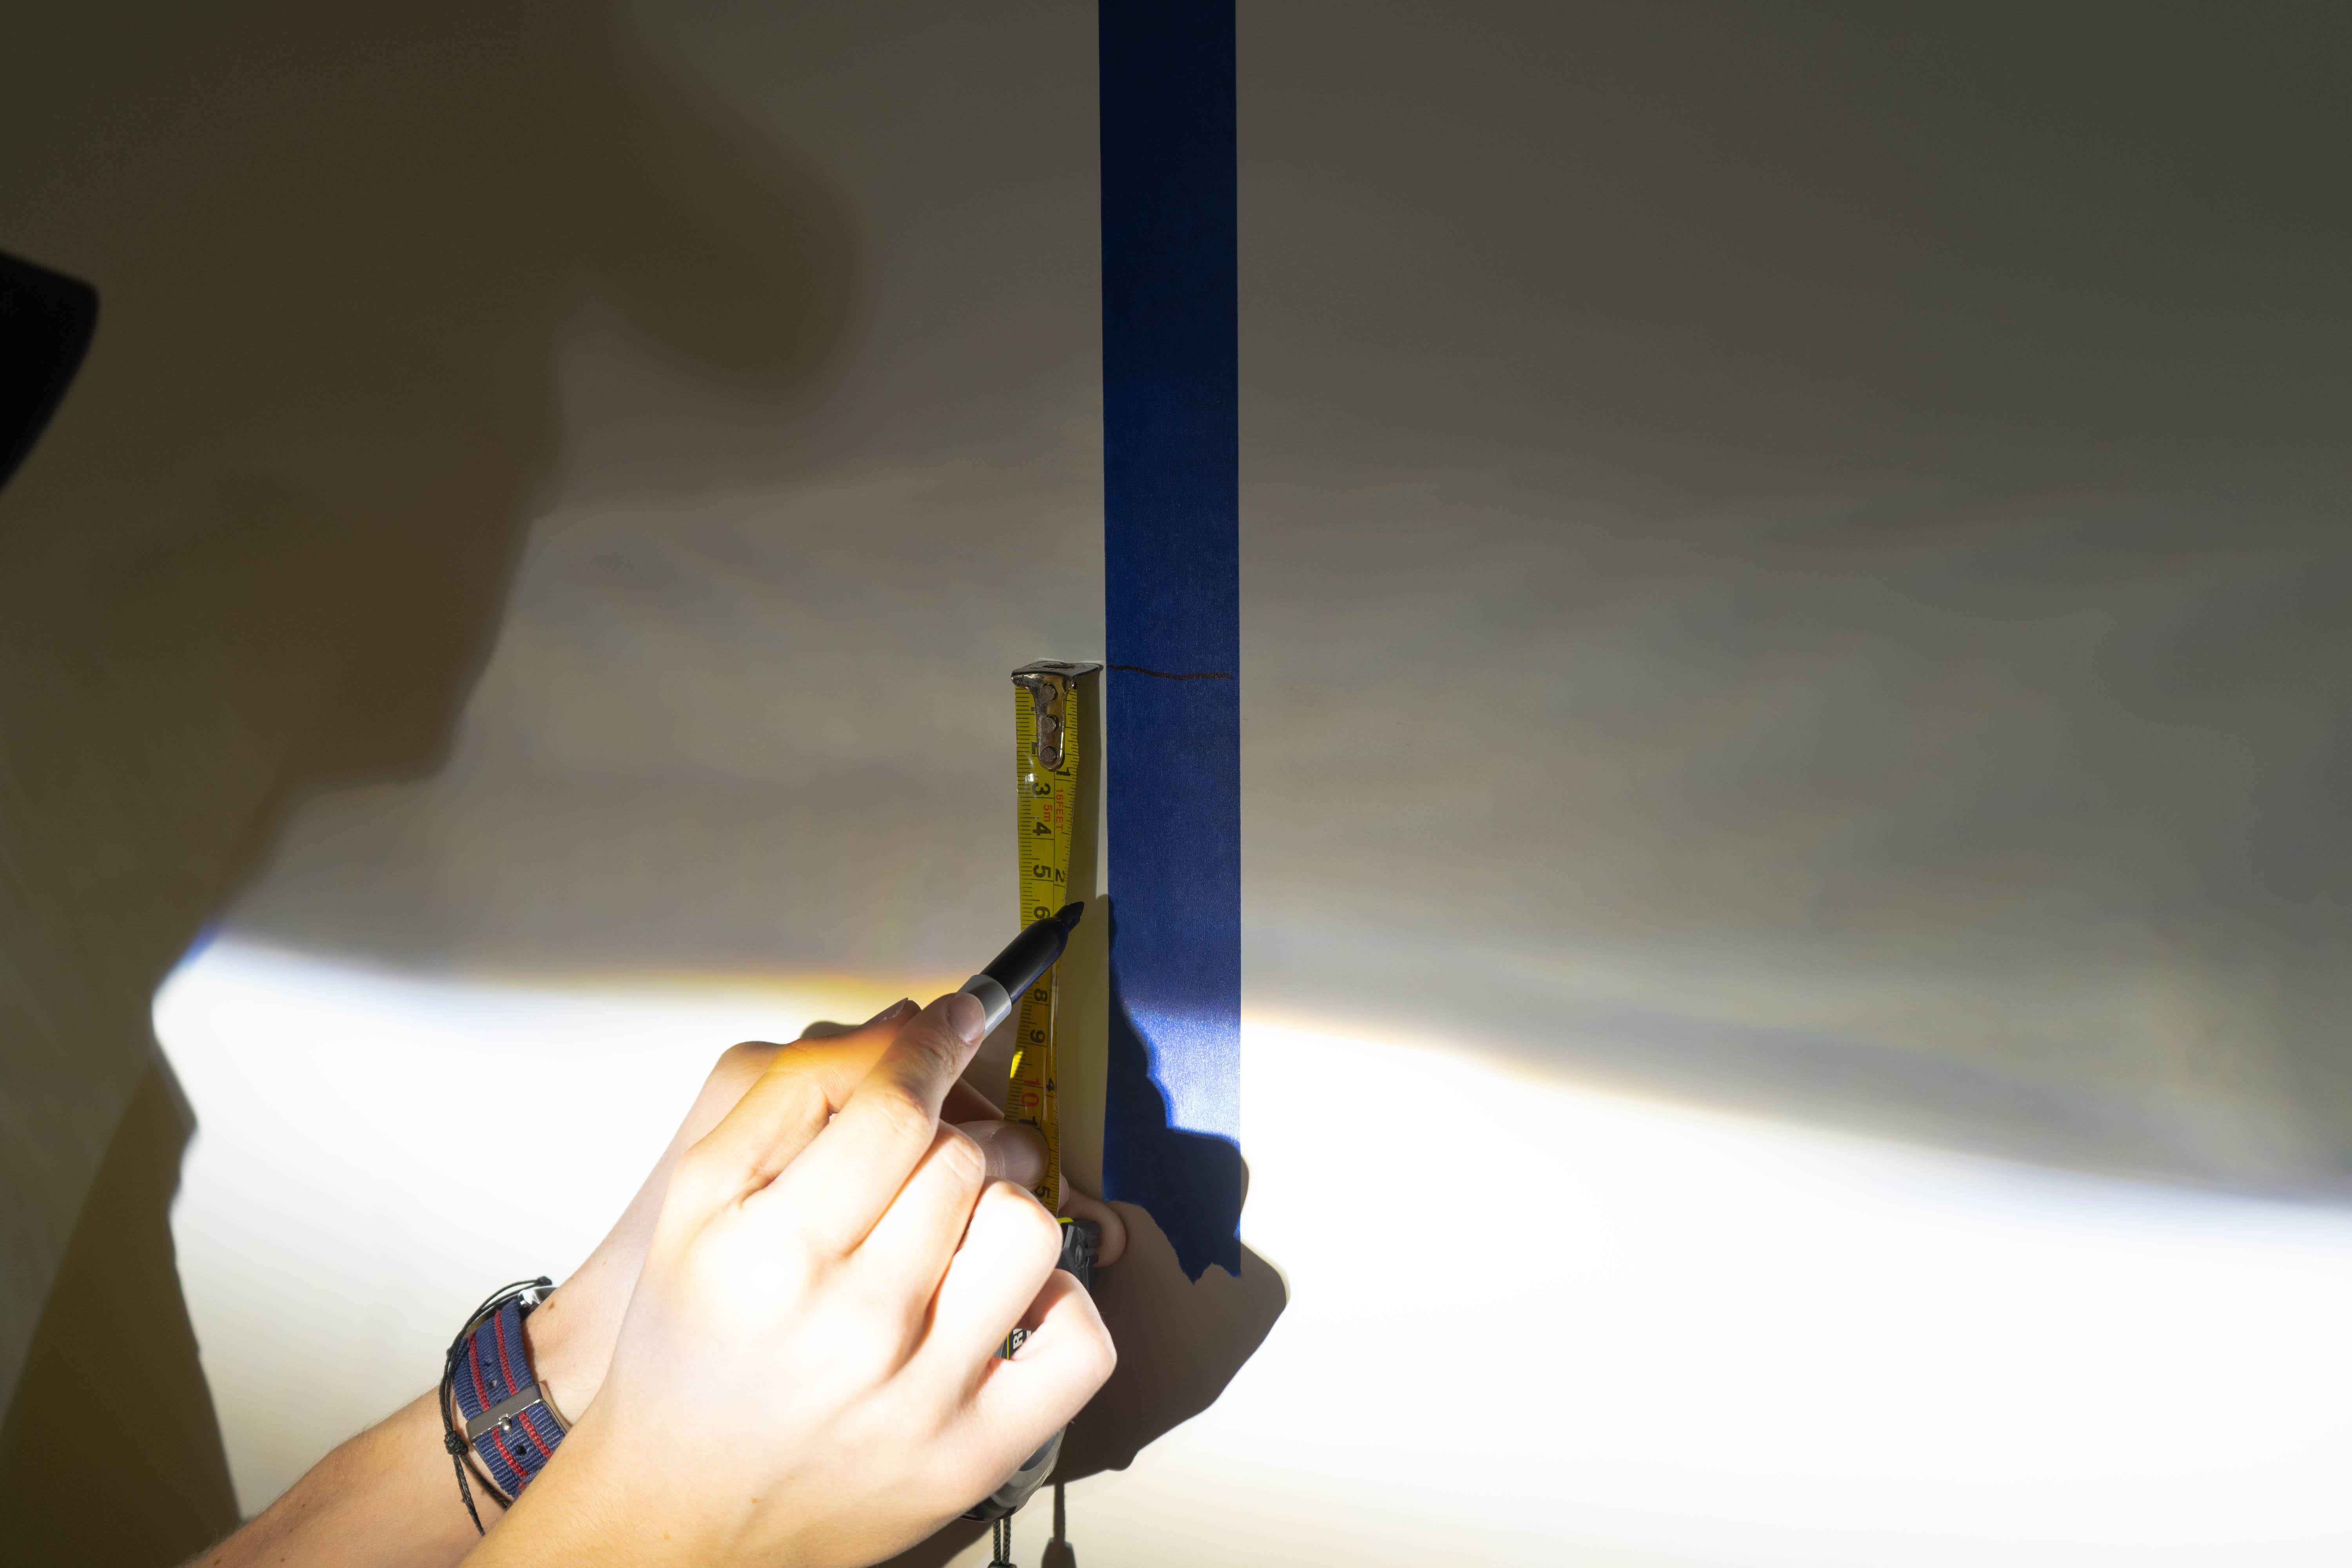
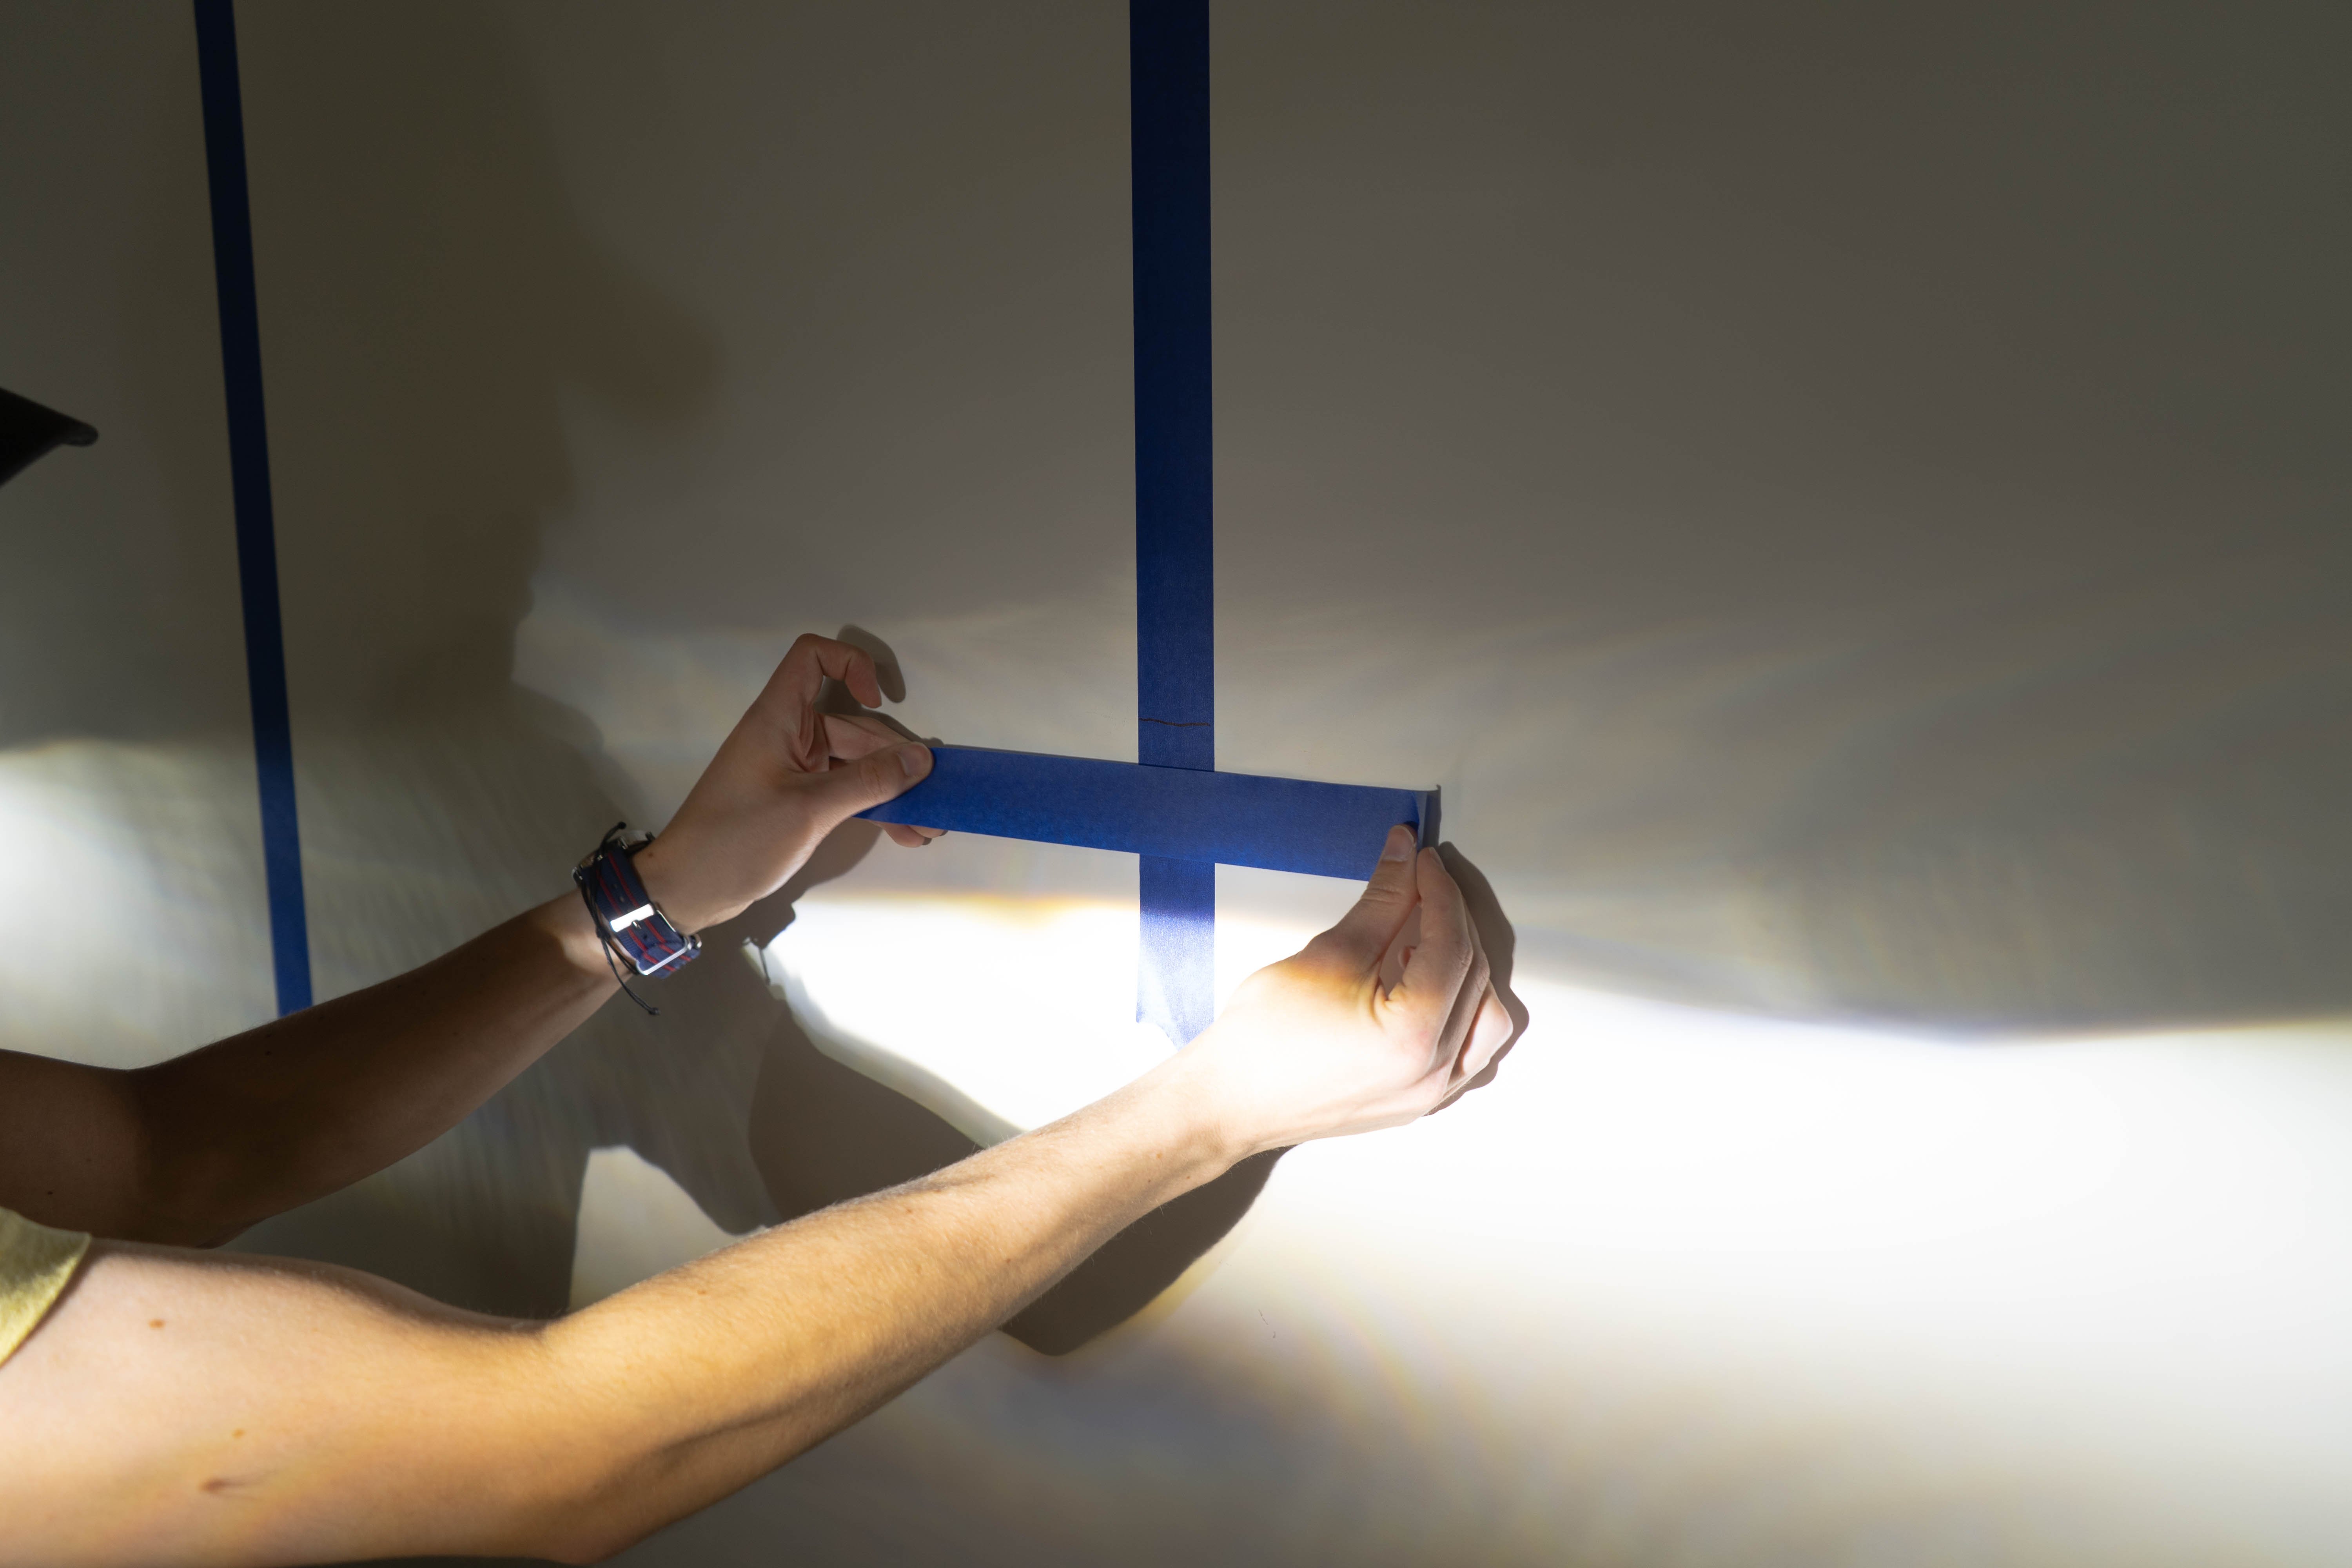
Measure two inches down and make a mark as well. Place a horizontal piece of tape just above the lower mark. Repeat for both headlights.
 |
 |
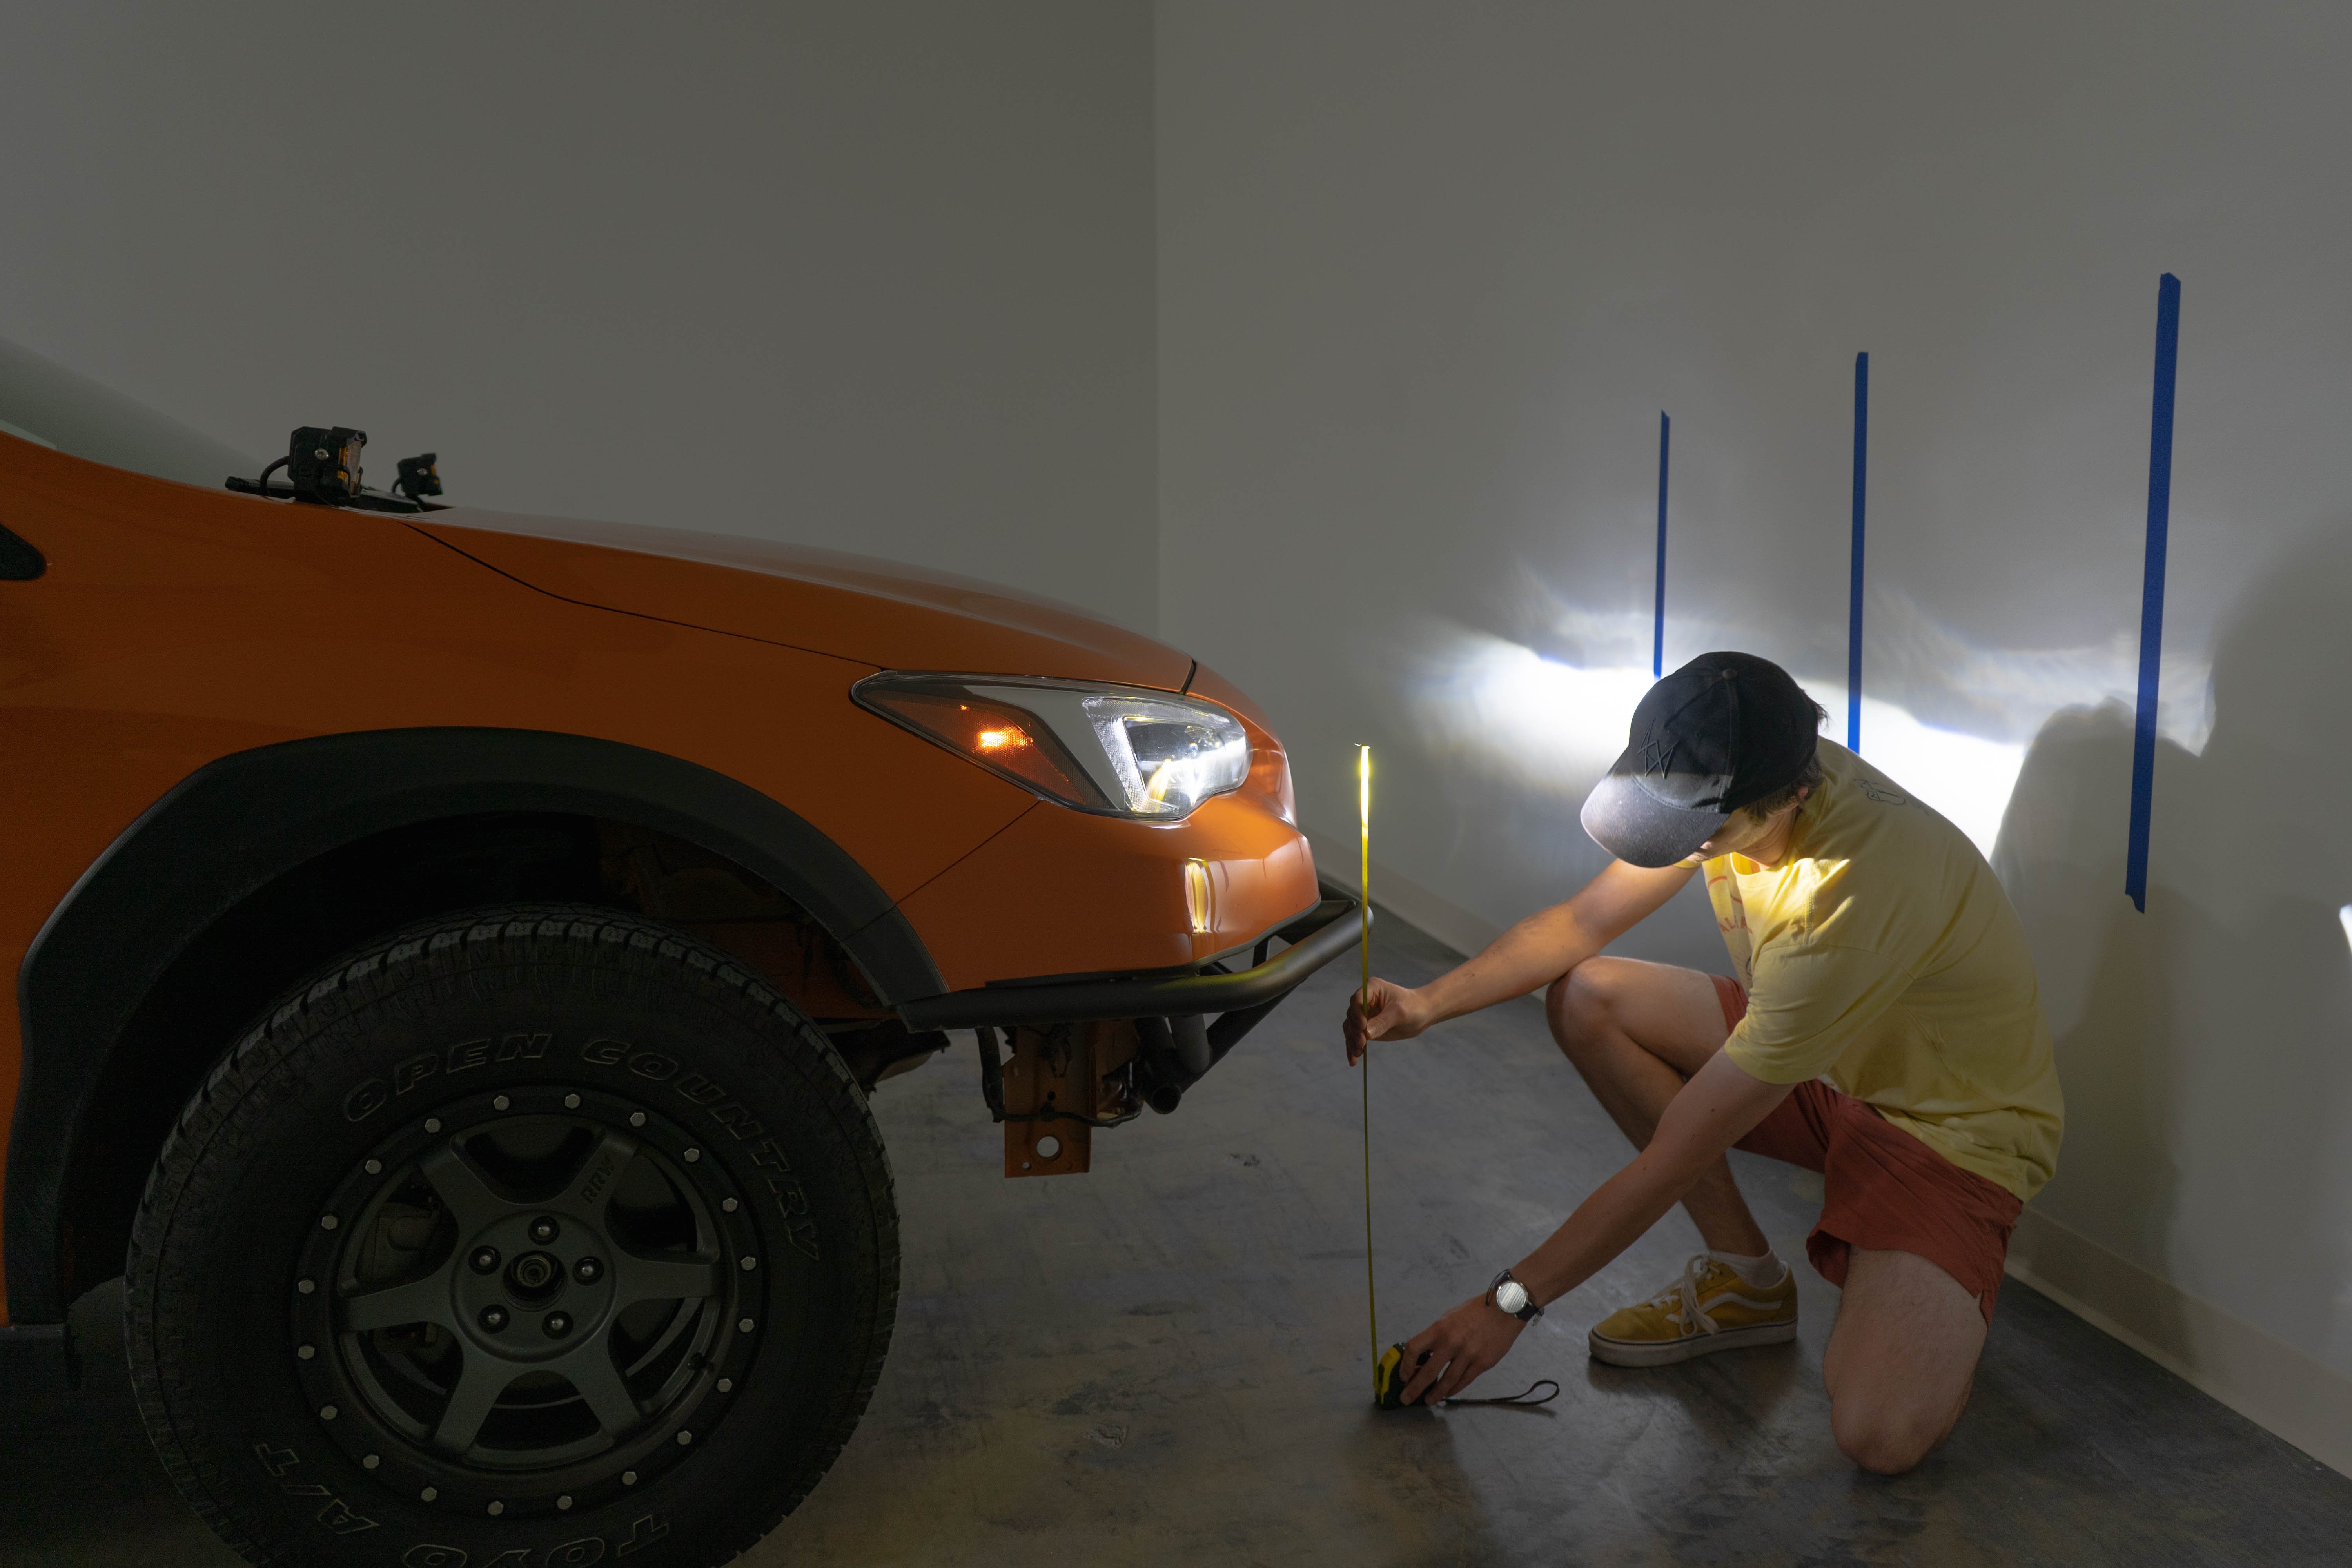
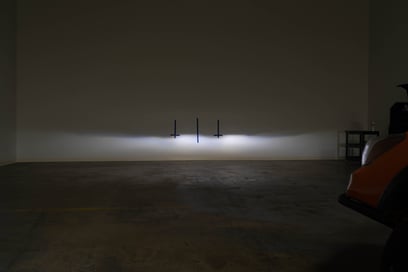
Step 4. Ensure you have enough room and pull your vehicle 25 feet away from the wall. Some manufacturers specify different distances closer or farther away. So before doing this yourself, check your owner's manual to make sure you are doing it right.
Once you have reversed enough your headlight beam should go no higher than the cross mark we made on the wall.
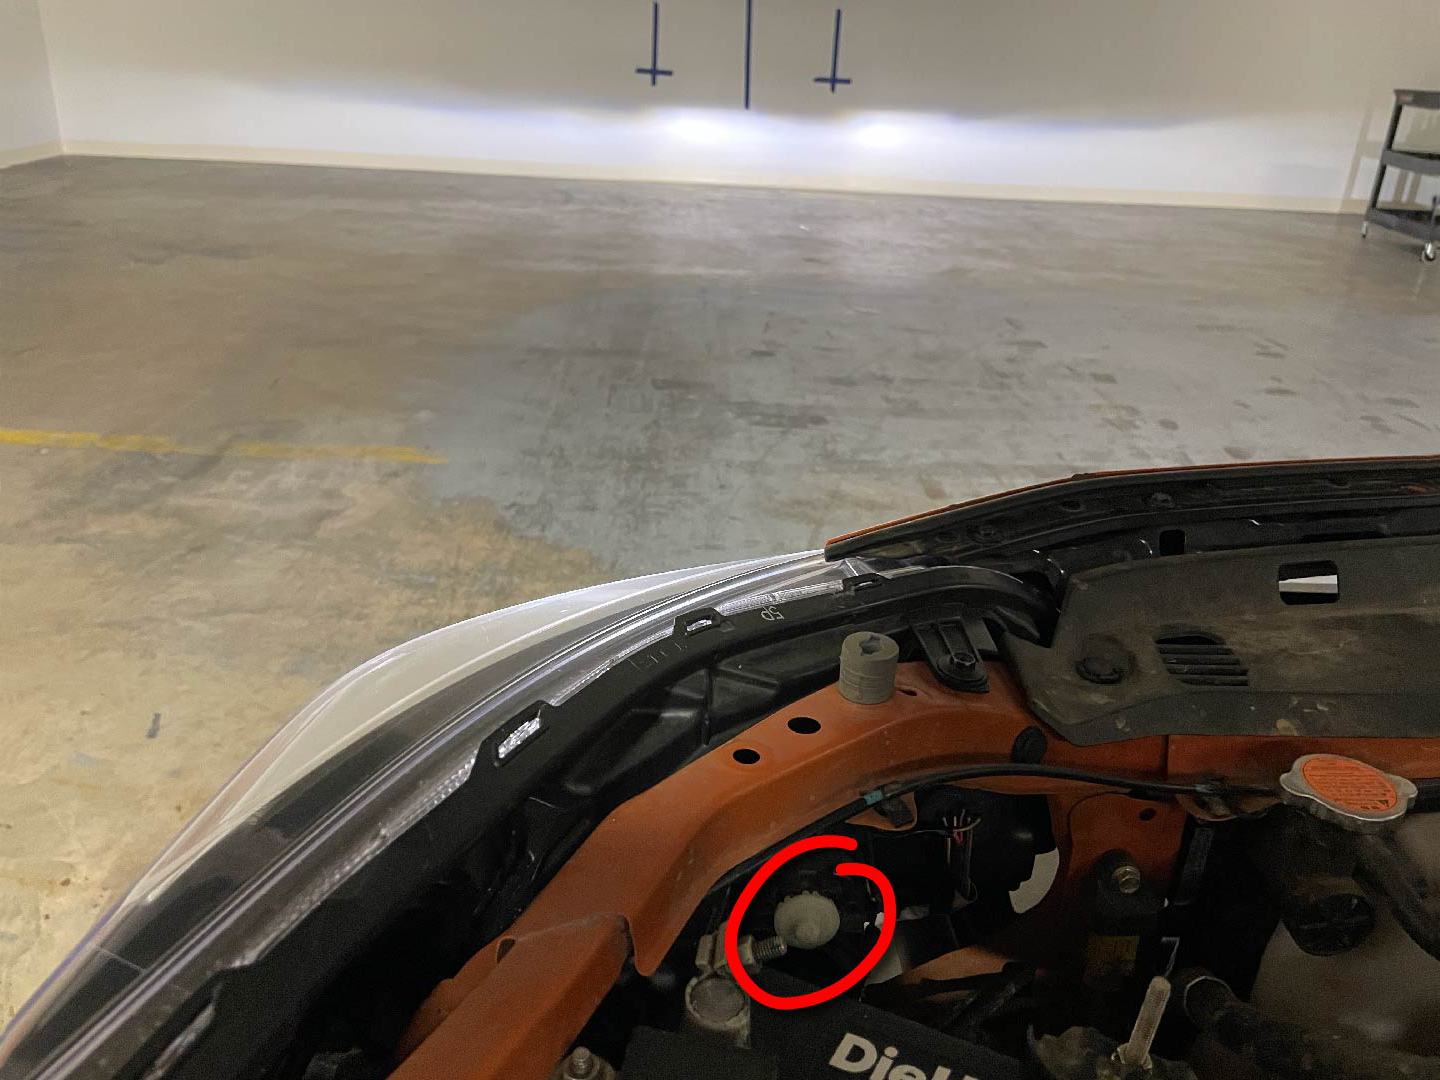
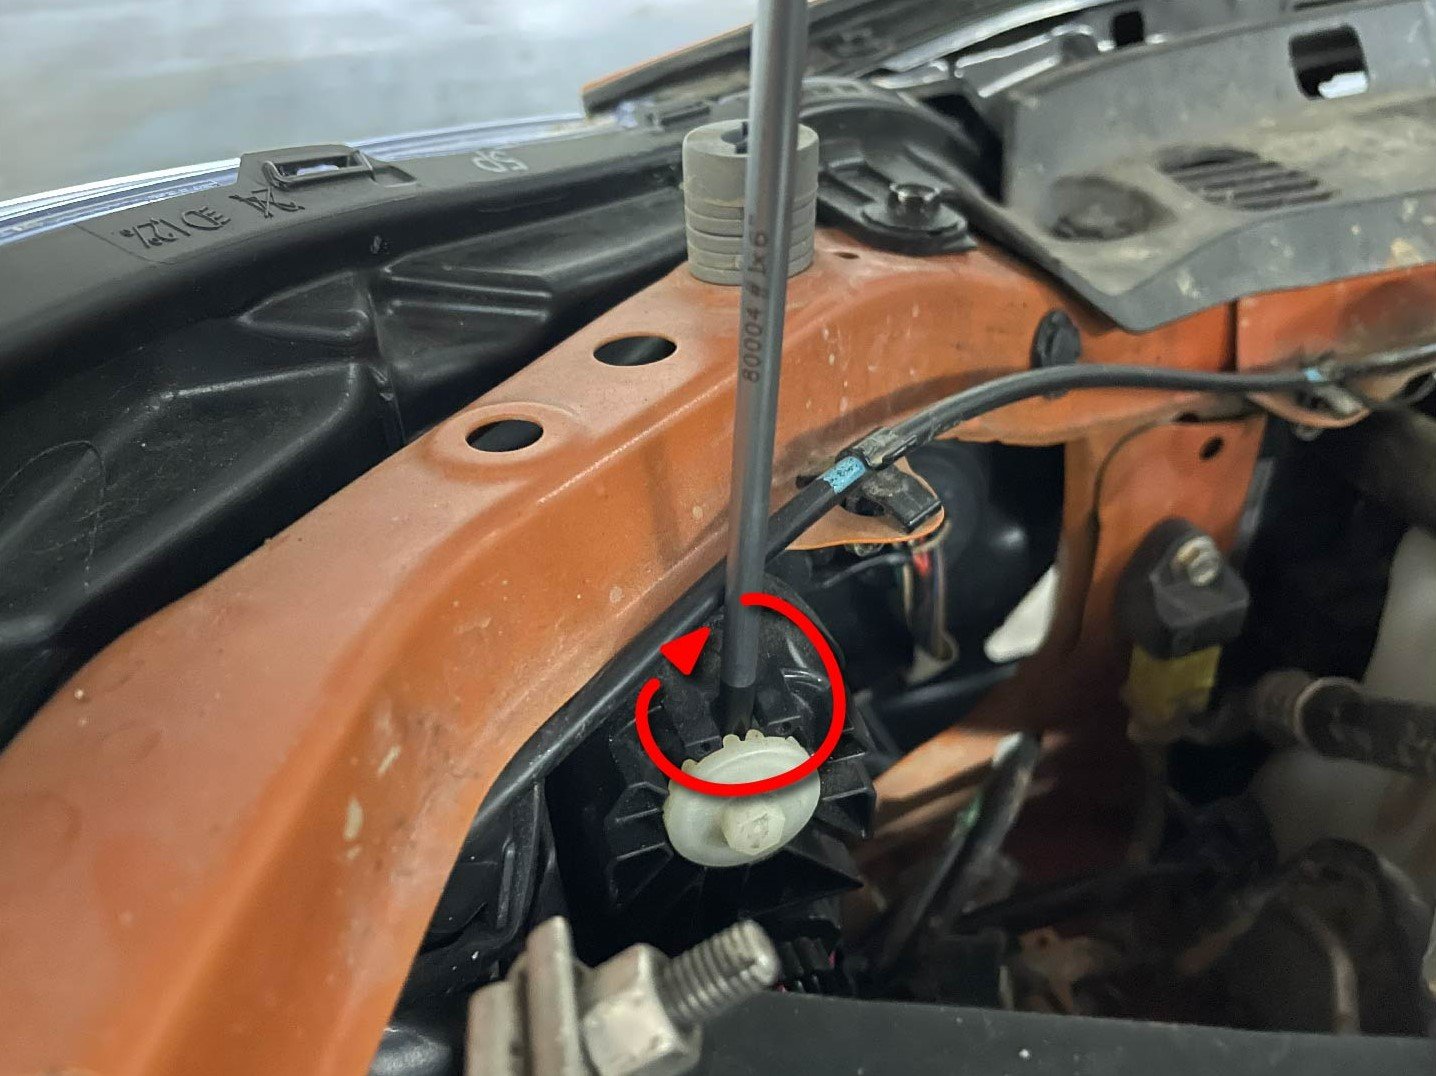
Step 5. Find your adjustment screw to change the height of your headlights, and adjust it with either a screwdriver or socket wrench.
 |
 |
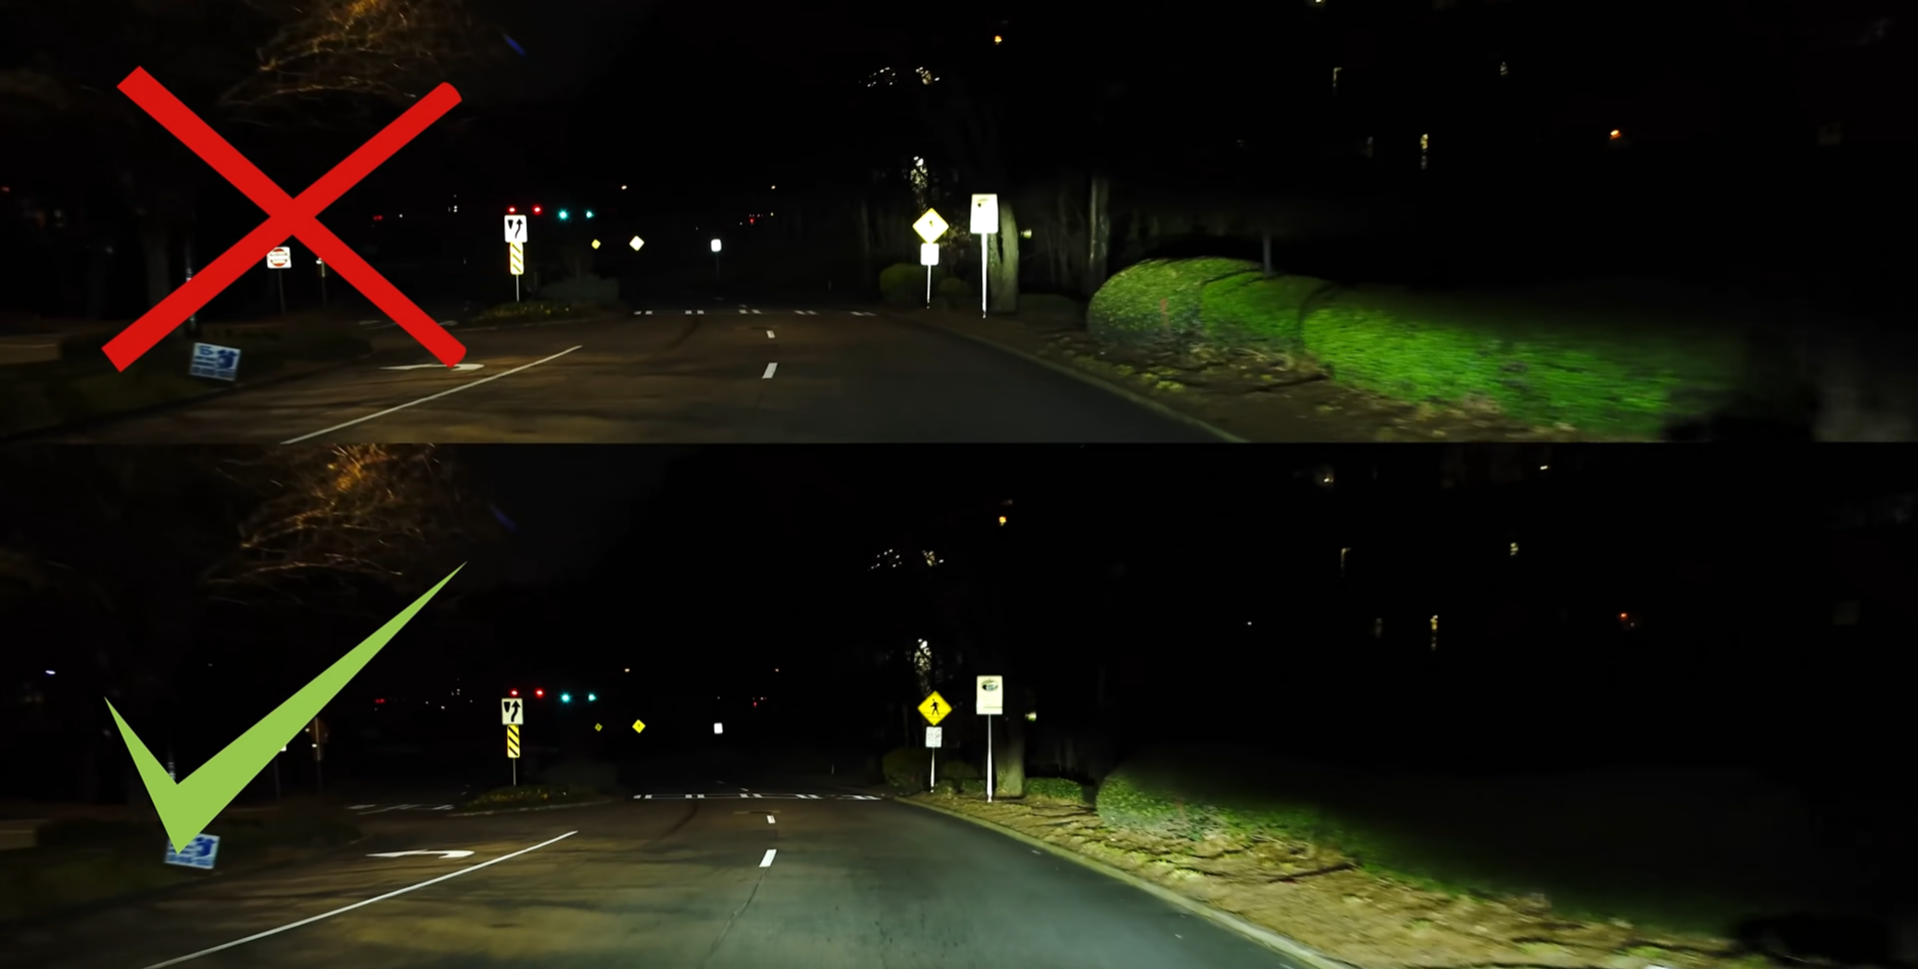
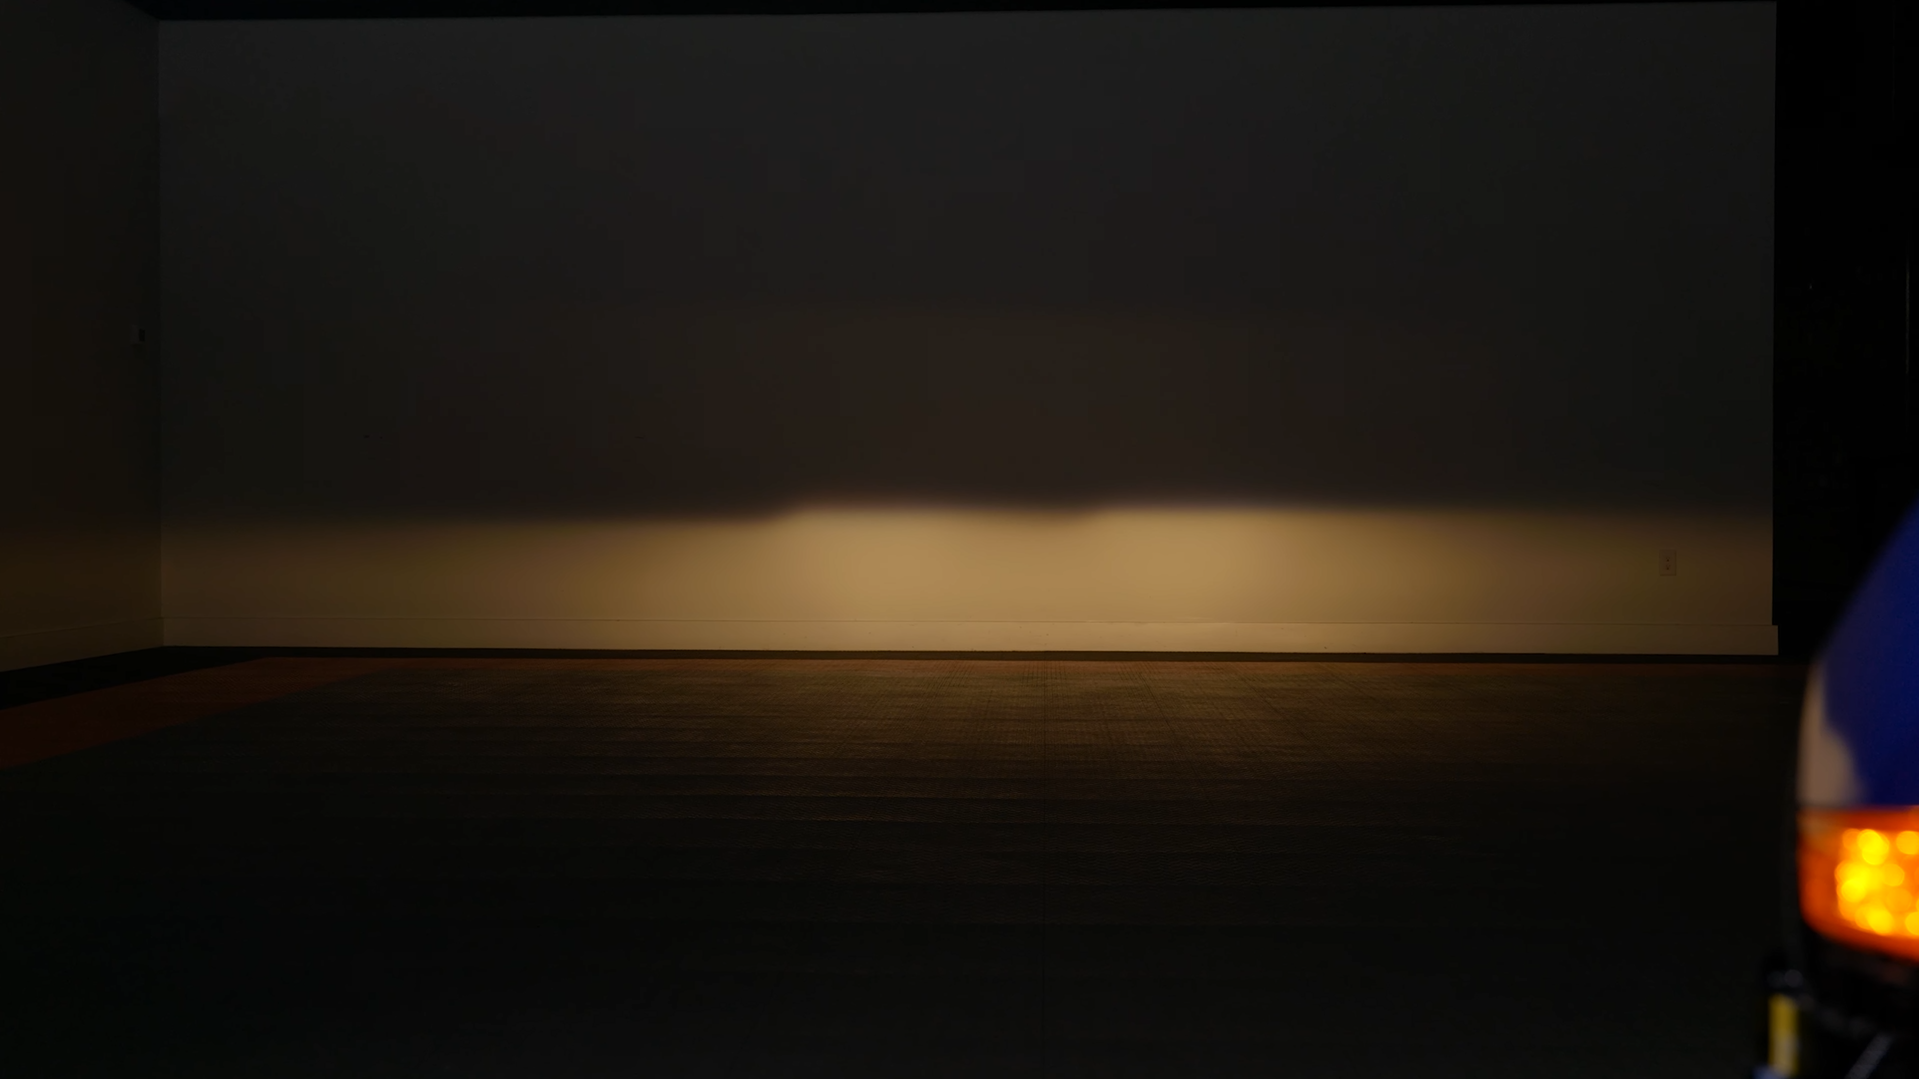
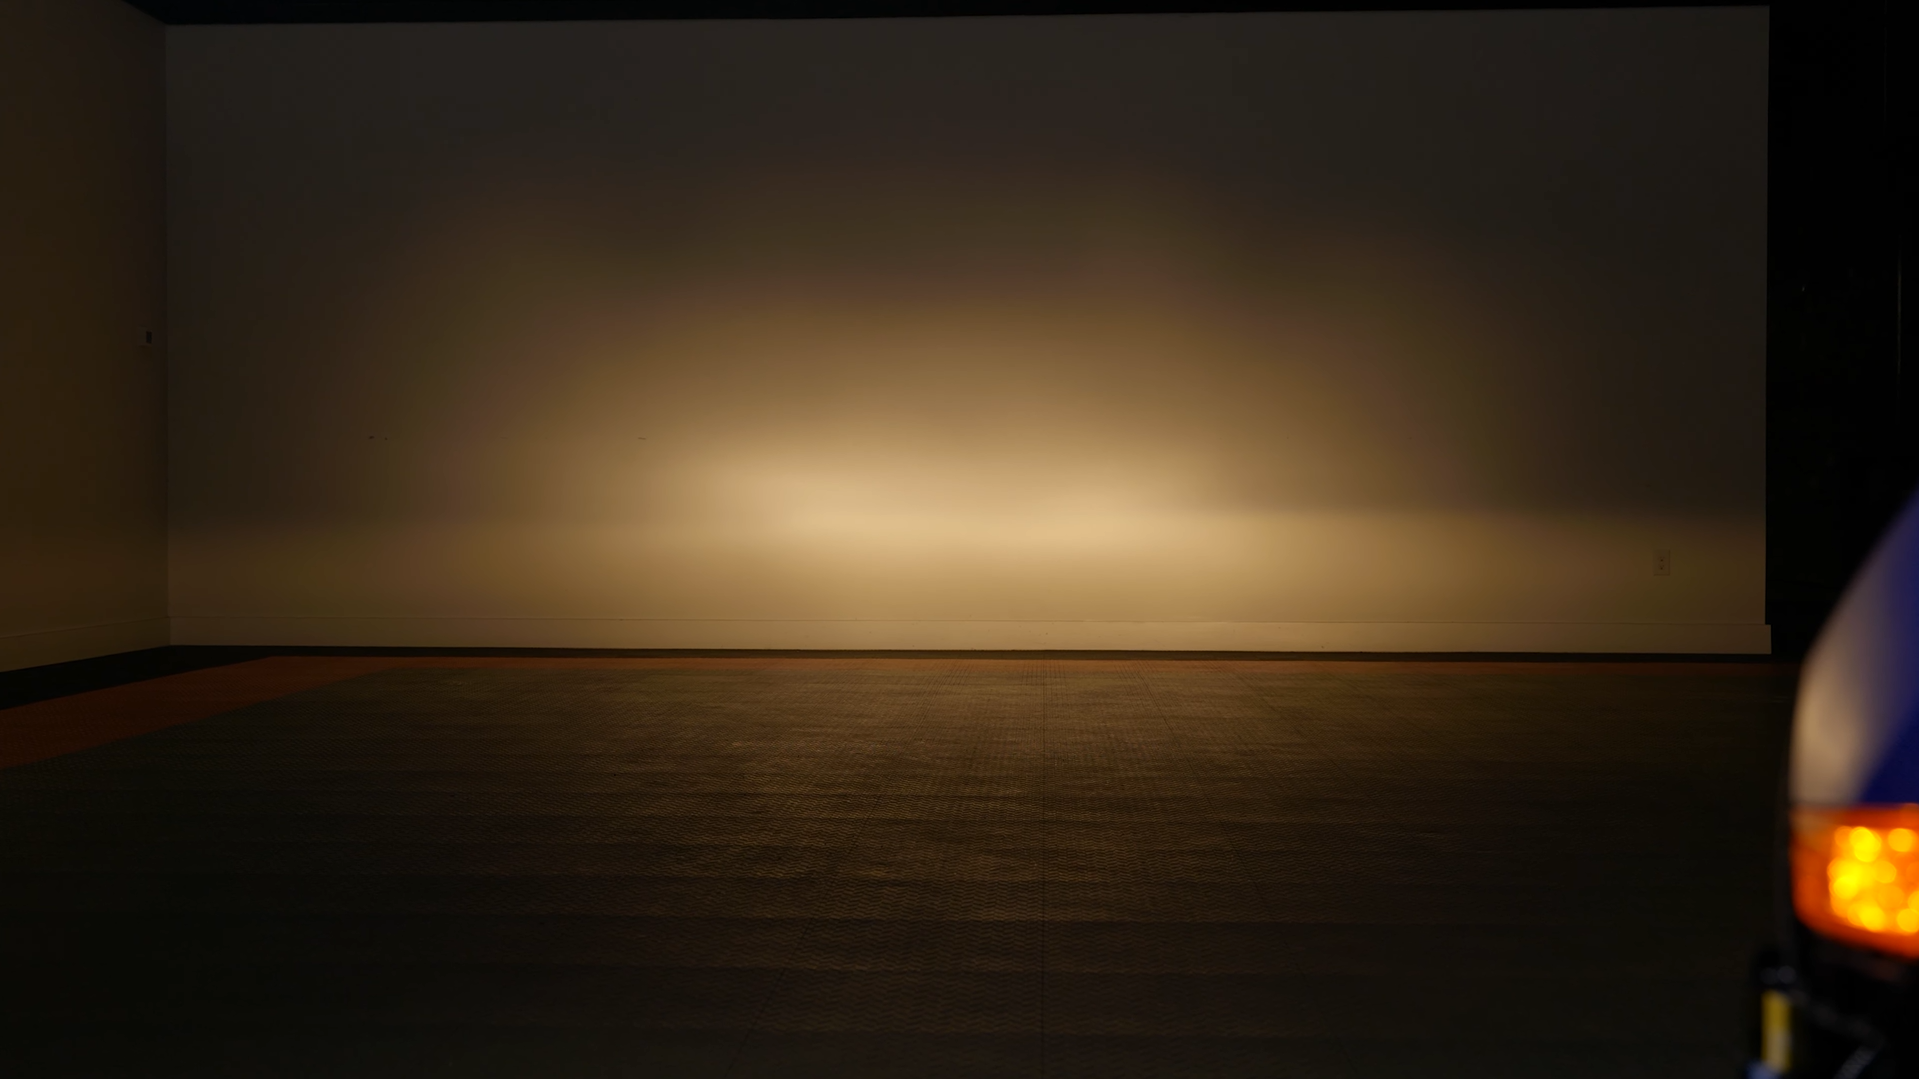
Step 6. Here is the before and after of what the headlight beam pattern should look like after adjusting its positioning.
| Before | After |
 |
 |
CONCLUSION
So, you can have a very bright headlight so long as it subscribes to being of the correct color temperature, create a quality beam pattern, and are aimed properly. With these in mind, you will less likely have oncoming drivers flashing their headlights at you or throwing expletives your way.
If you have any further questions or would like a more in-depth guide on topics we touched on here, be sure to let us know in the comments below.
You can also find us on Facebook now! We will be posting blog updates, talking about new vehicle releases, community builds, and more.


.png?width=300&height=87&name=logo%20(1).png)