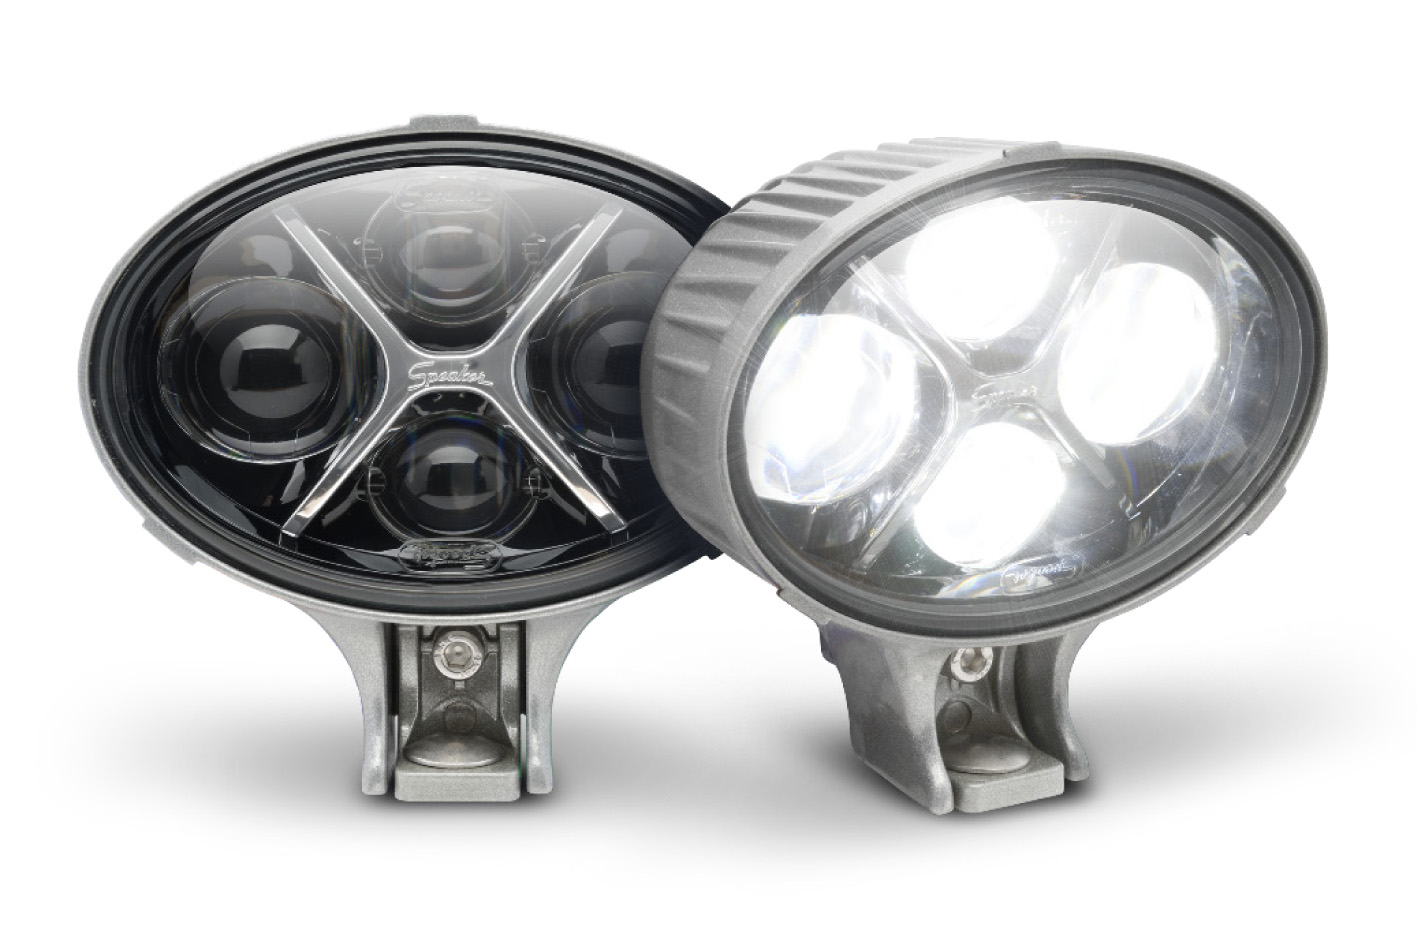
The new JW Speaker 239 J2 Series 3.5″ Round LED Front Turn Signals for the 2007+ Jeep Wrangler JK come in 3 different styles: Regular Amber, Clear or Smoked. These LED replacement fixtures are easy to install drop-in housing replacements for your OEM front turn signal housings that use a standard incandescent bulb inside. If you still have questions, you can ask our support team here.
To properly install this turn signal you should have a good understanding of automotive electrical procedures and systems, and proficiency in the installation of vehicle lights. IF YOU DO NOT, PLEASE SEEK PROFESSIONAL ASSISTANCE.
Estimated Time: 30 minutes
Tools Needed: 3/8” Wrench or Socket Wrench
Wire Functions:
Black = Ground
White = Front Position
Yellow = Turn Signal
In the Box:
(x2) Model 239 Front Turn Signals
(x2) Retaining Bracket
(x2) 1/4”-20 Flanged Hex Head Bolt
(x2) Zip Ties
Input Voltage: 12V DC
Operating Voltage: 9-16V DC
1. Read all safety notes and mounting guidelines before installing the product. Verify that all parts listed under “In the Box” are present and complete.
2. Inspect the product for damage. DO NOT install the product if there is any damage. Contact the authorized retailer where you purchased it to initiate a warranty claim if there is damage.
3. Verify that all power supply and/or charging systems comply to the specified voltage limits for the light.
INSTALLATION INSTRUCTIONS:
1. Remove the turn signal bulb from the stock housing by rotating it 90°.
2. To remove the bulb from the wire harness, slide the red retaining lock away from the bulb (2 clicks). Depress the black retaining tab while pulling apart.
3. Remove the stock turn signal by depressing the two plastic retaining tabs, then push the signal through the front of the grille opening.
4. Insert either one of Model 239 J2 Front Turn Signals from the front of the grille. (shown in picture)
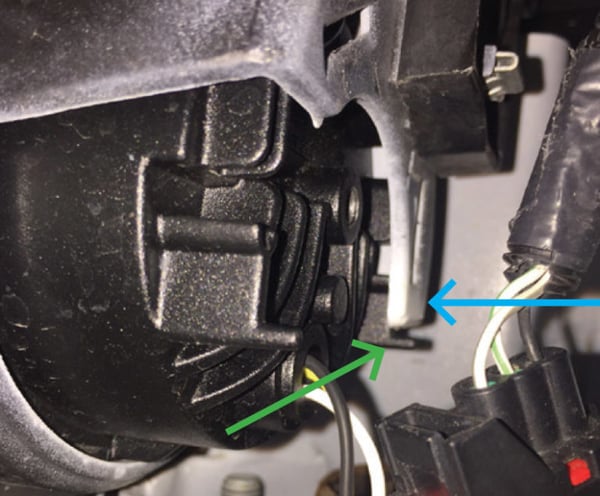
NOTE: The J.W. Speaker logo must be oriented to the bottom. Use the post on the bottom of the lamp (green arrow) to align the signal to the bottom of the grille opening. (blue arrow)
5. Insert the retaining bracket into the holes where the stock turn signal snapped in. The Model 239 J2 housing will line up with the same holes as the stock turn signal.
Note: The bracket is labeled LH (Left Hand) on one side and RH (Right Hand) on the other. These marks reference left and right for the vehicle’s orientation. For U.S. installation (left-hand drive) LH corresponds to the driver’s side.
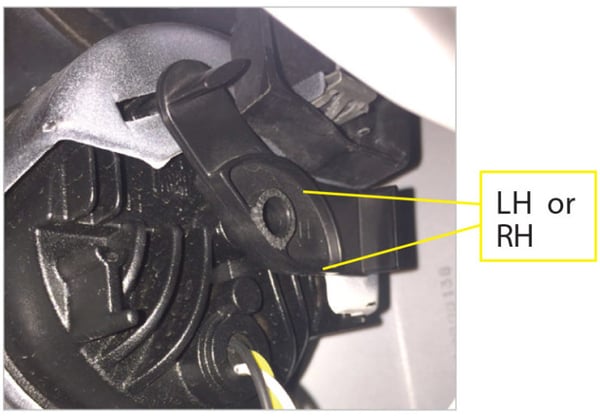
6. Insert the provided bolt into the back of the retaining bracket. Torque to 32 in-lbs to ensure proper tightening.
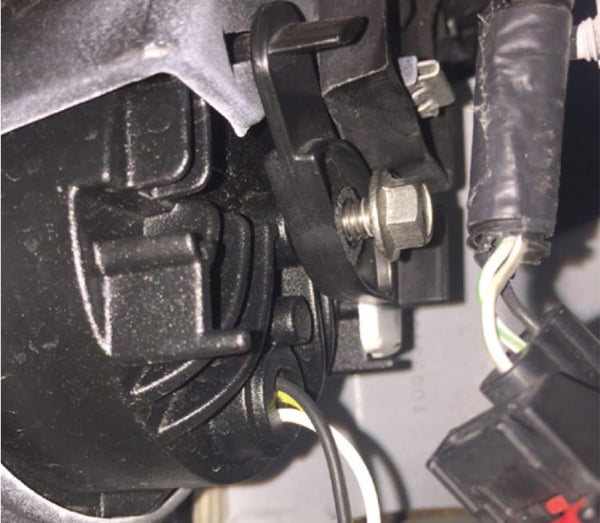
7. Insert the Model 239 J2 connector into the vehicle’s connector. You must lock the connectors together by pushing the red retaining lock toward the turn signal connector, as shown.
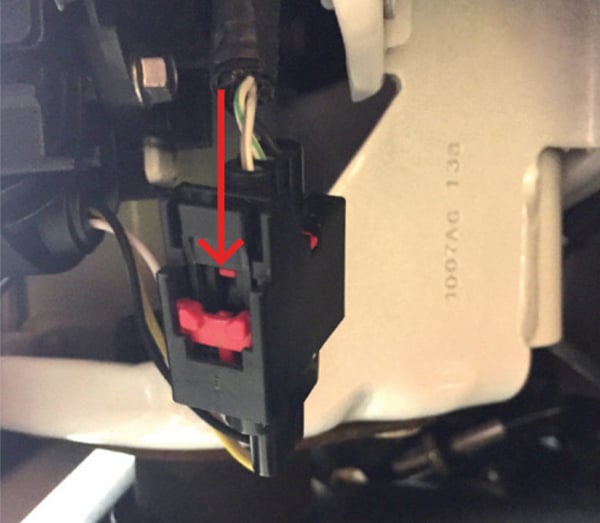
8. Check for proper function by turning on hazards and parking lights.
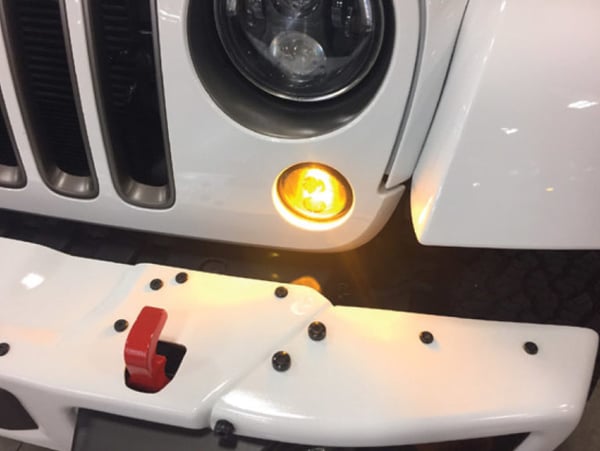
If you are experiencing flickering, you may have an intermittent connection with your Model 239 J2. Zip ties have been included in the package to create a more stable connection by forcing the connectors to stay together.
9. Insert the zip tie between the black and white wires of the Model 239 J2 connector.
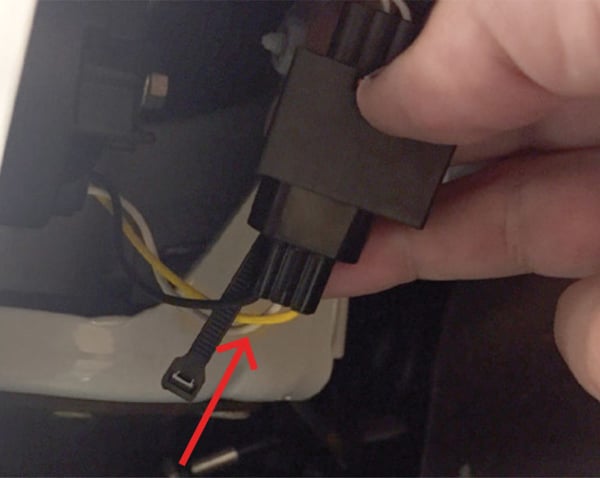
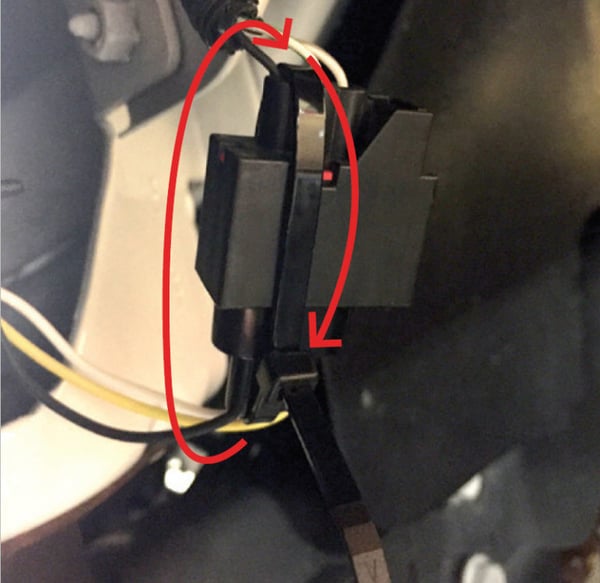
10. Loop the zip tie around the vehicle connector, passing through the wires. Close the zip tie to secure the two connectors.
All 3 styles of the JW Speaker Model 239 J2, pictures, and pricing can all be found here.





.png?width=300&height=87&name=logo%20(1).png)