BRAND-NEW Morimoto 4Banger LED Pods & the 07-13 Toyota Tundra
We are already halfway through winter, but with Spring around the corner, it is never too early to be shopping for lighting accessories for your vehicle. What is on our minds are these brand-new LED light pods from Morimoto. They have outdone themselves with their first foyer into the off-road lighting market with their 4Banger LED pod lights.
Today we will be giving an overview of the Morimoto 4Banger lineup and taking a look at how the vehicle-specific mounts make the 4Banager LED pod light line-up one of the most versatile on the market today. Not to mention, we will also be going over how to install these pod lights on a 2007-2013 Toyota Tundra.
What is a 4Banger?
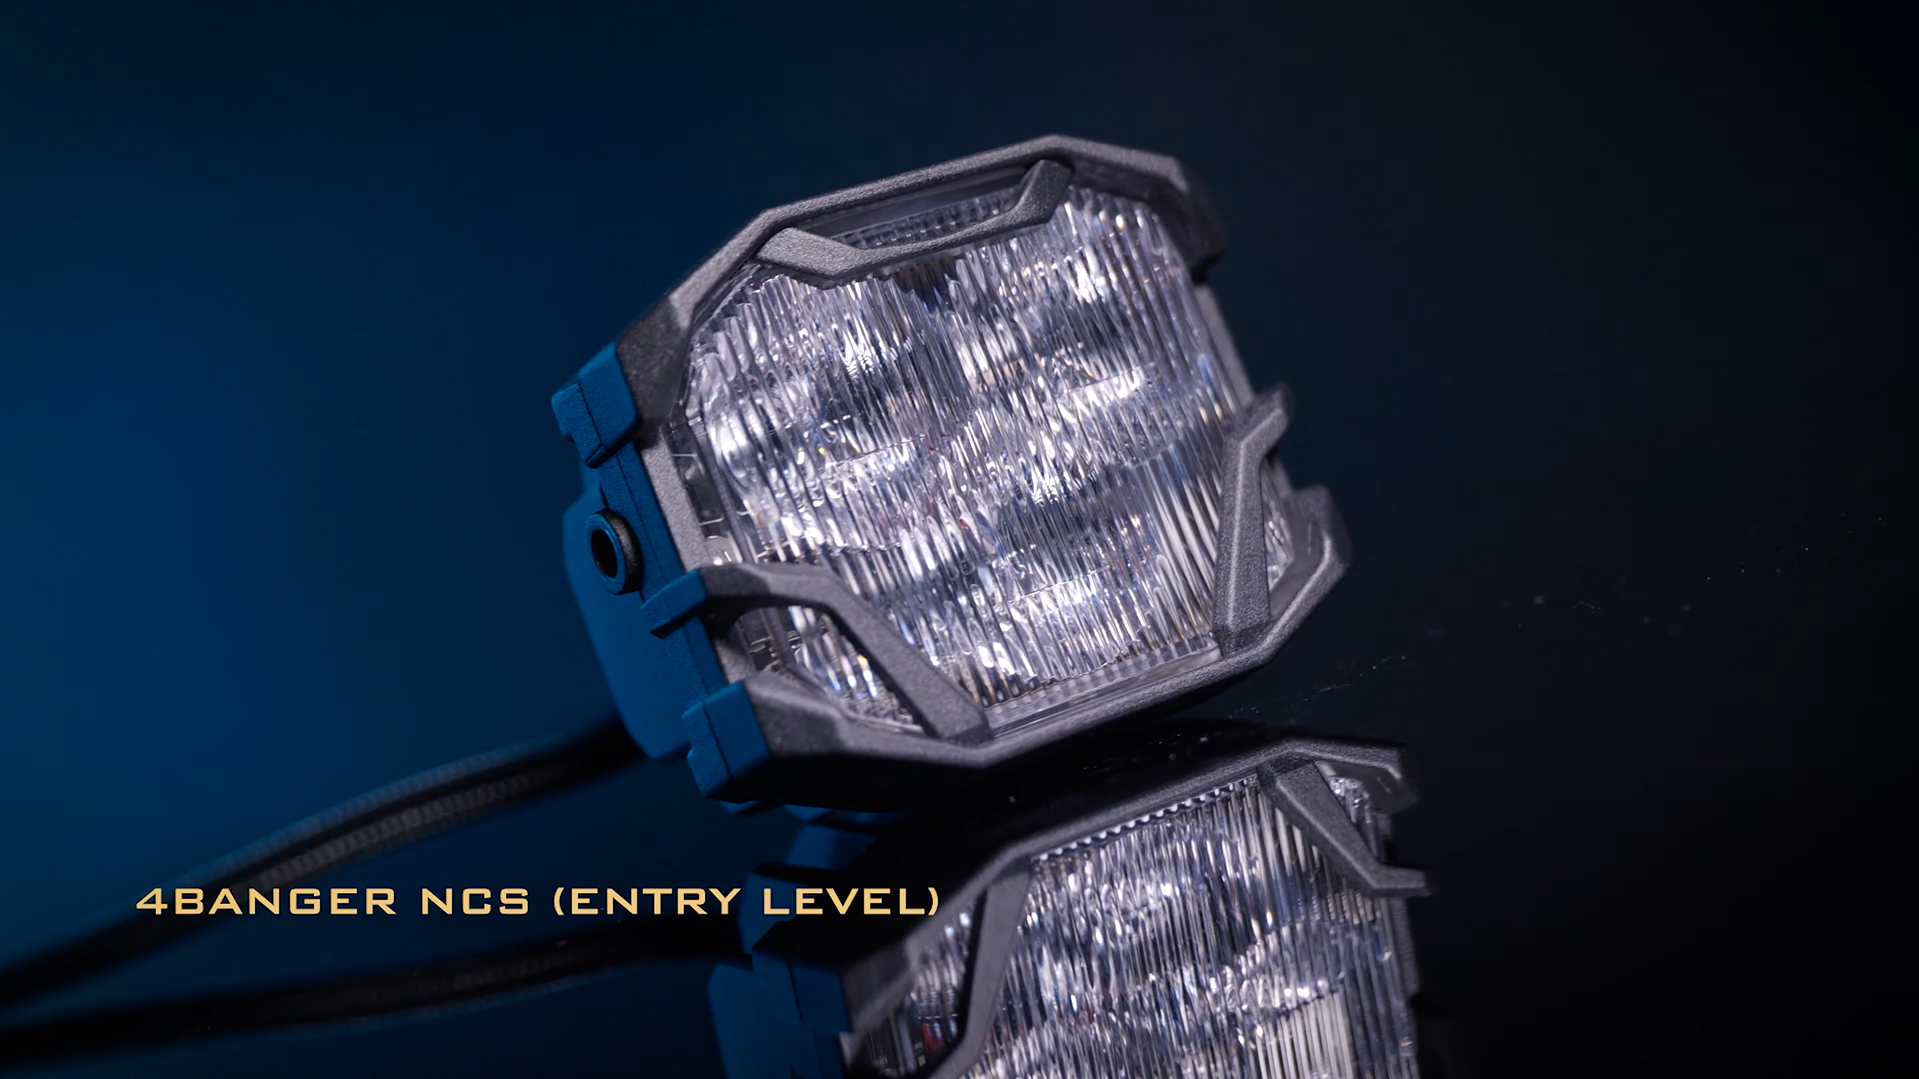
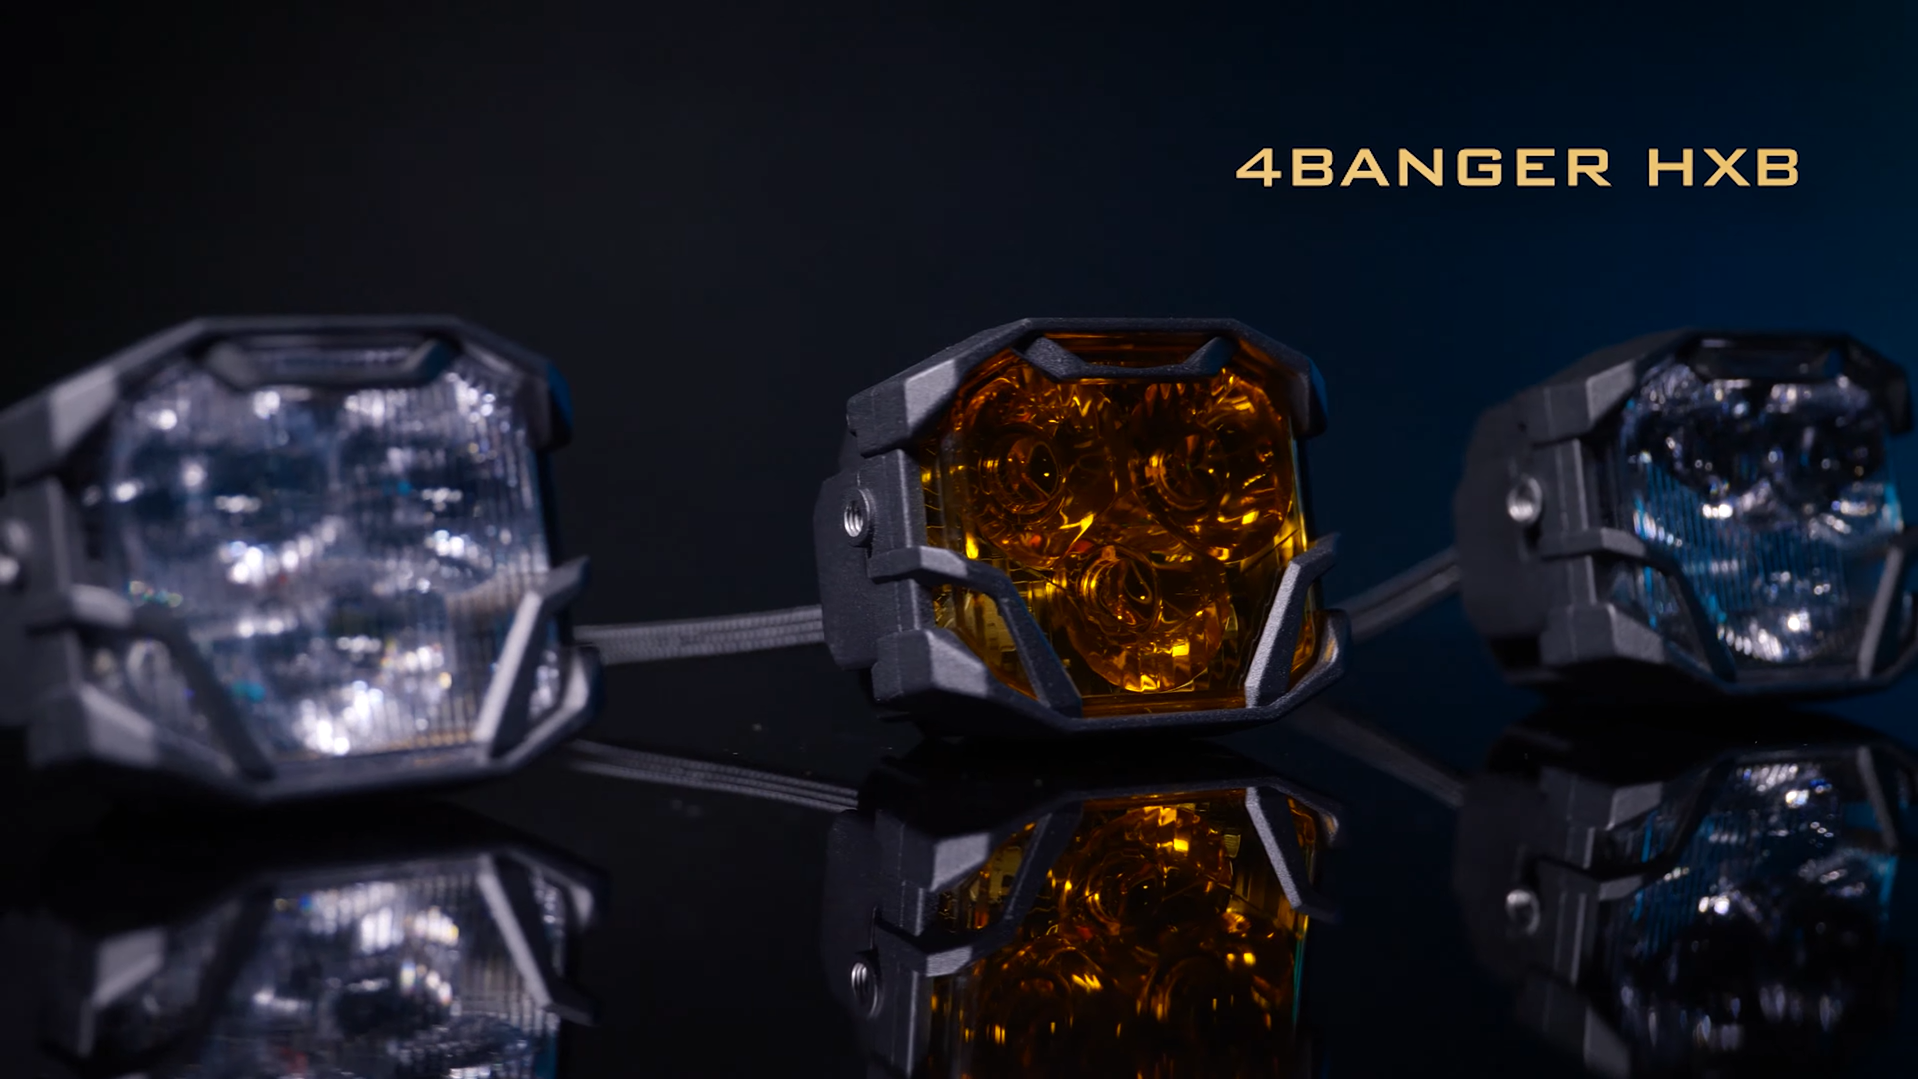
Available in two different trim levels, the Morimoto 4Banger LED Pod lights bring a mixture of design, output, and versatility to the LED pod light market. With the entry-level 4Banger NCS model, you get a Nichia LED chip spec for its output source. For the premium HXB model, an Osram HX Boost LED chip packs its punch behind the TIR optics, which can be found on both models.
 |
 |
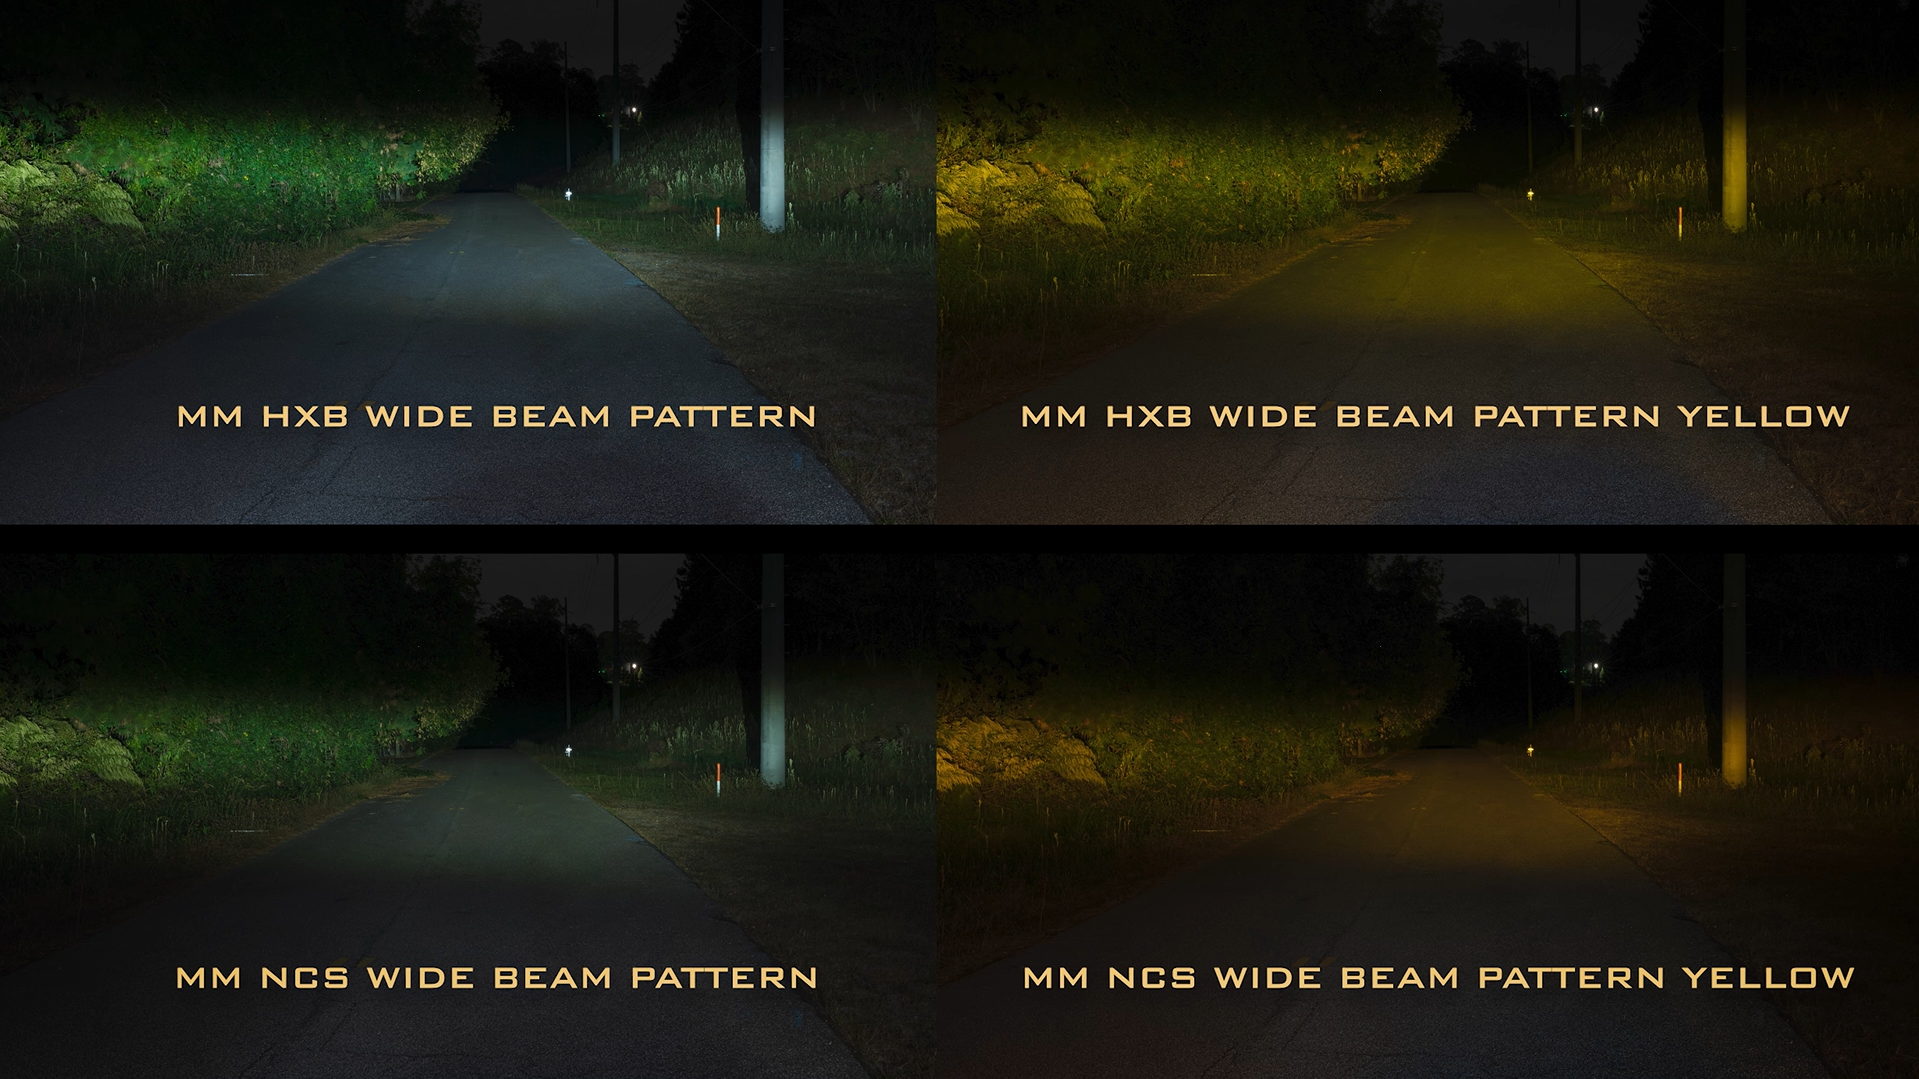
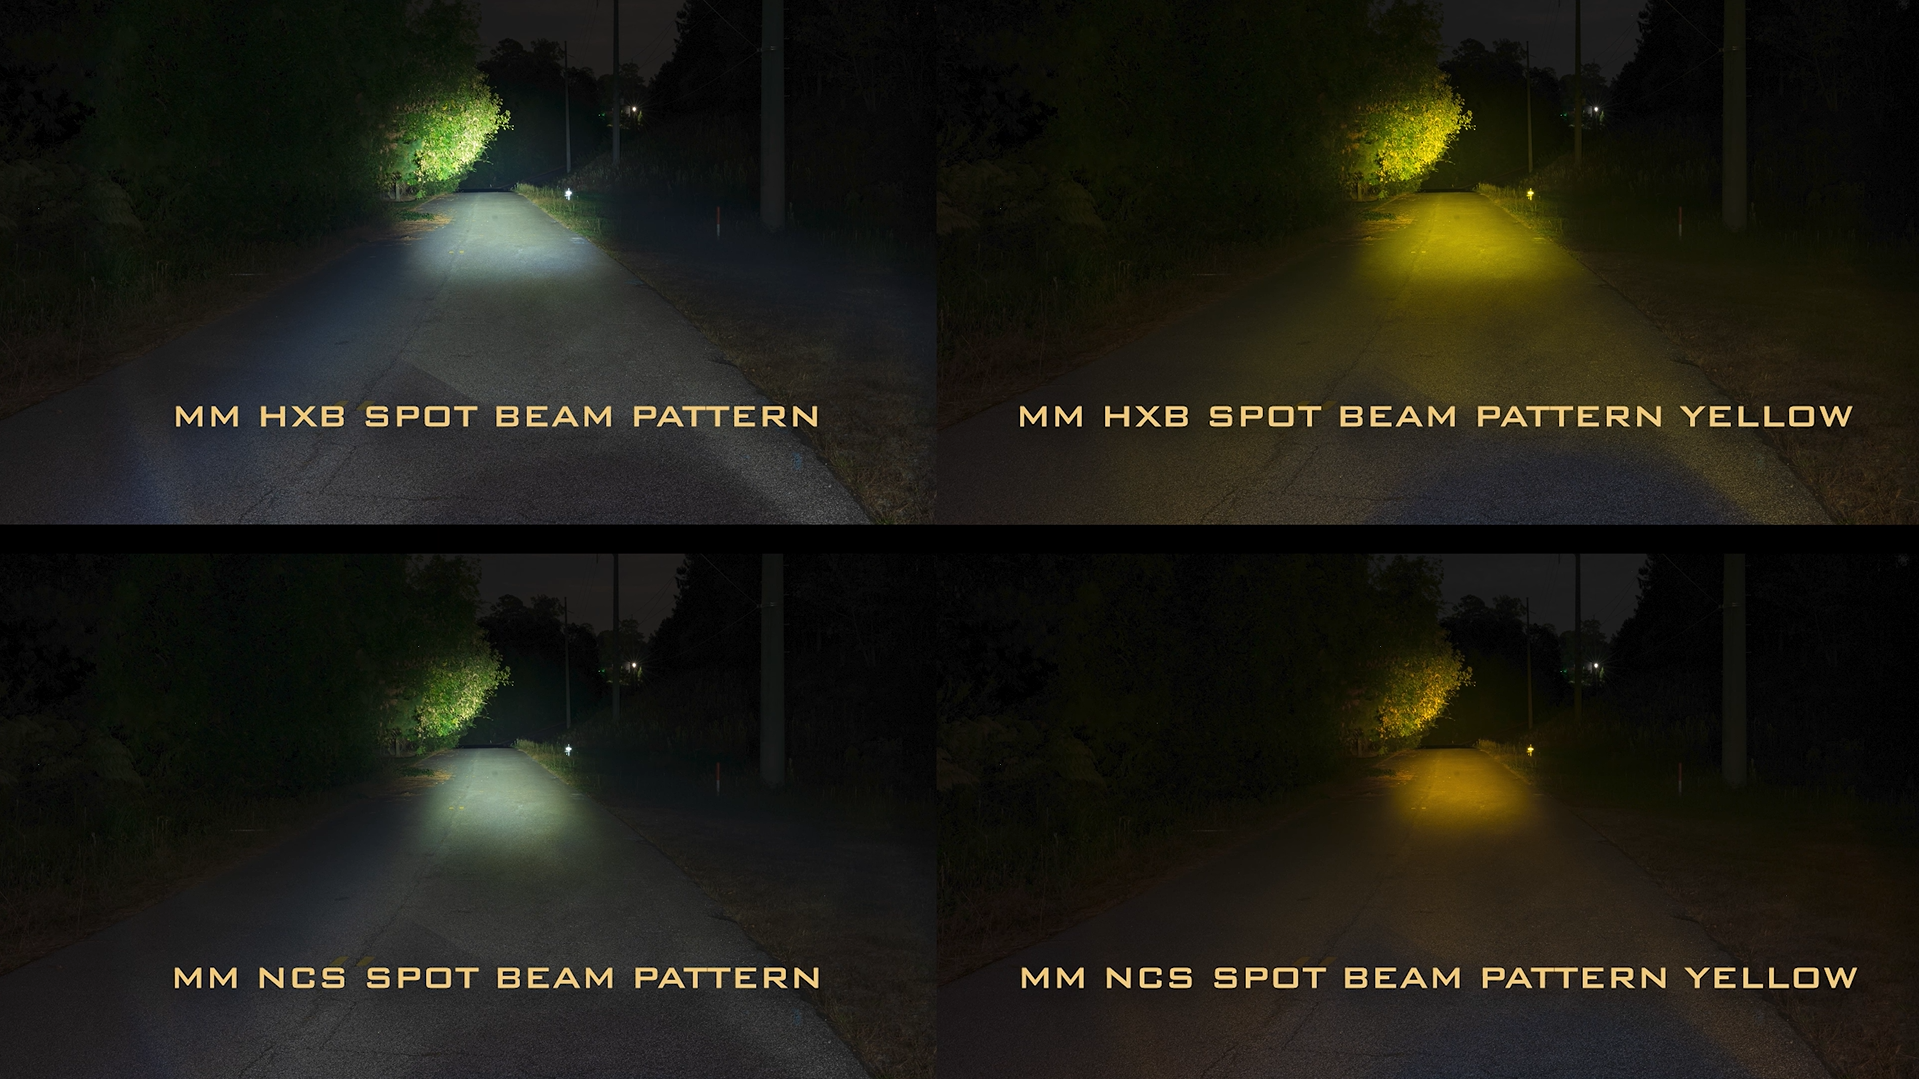
Beam Patterns
The NCS and HXB models both come in three different beam patterns: combo (driving), wide, and spot. The most popular among the three will likely be the wide beam pattern. This can ideally be used in a fog light application and is legal for road use when aimed at -3°.
The combo, also known as driving pattern, is useful when it comes to off-roading and will likely be a favorite of off-road-minded buyers.
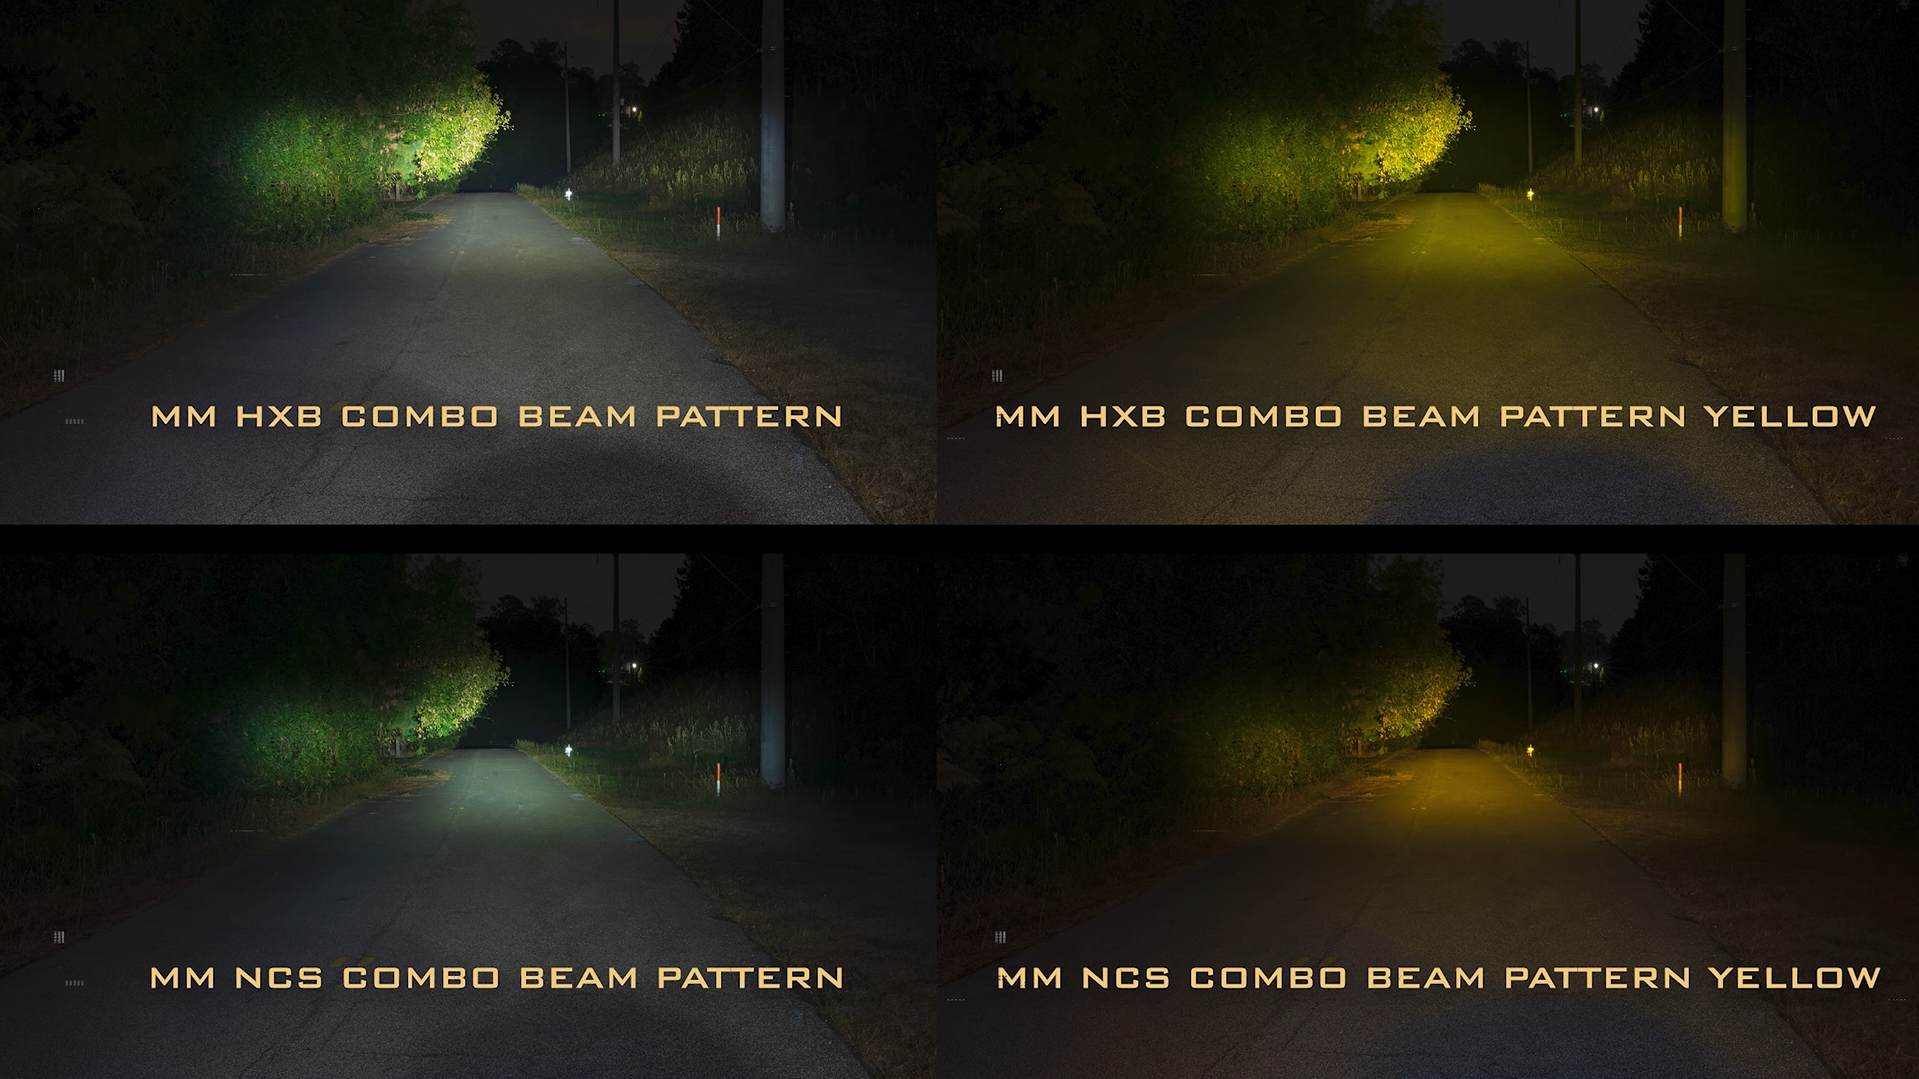
The same can be said about the spotlight beam pattern which is almost exclusively meant for an off-road application.
Color Options and Optics
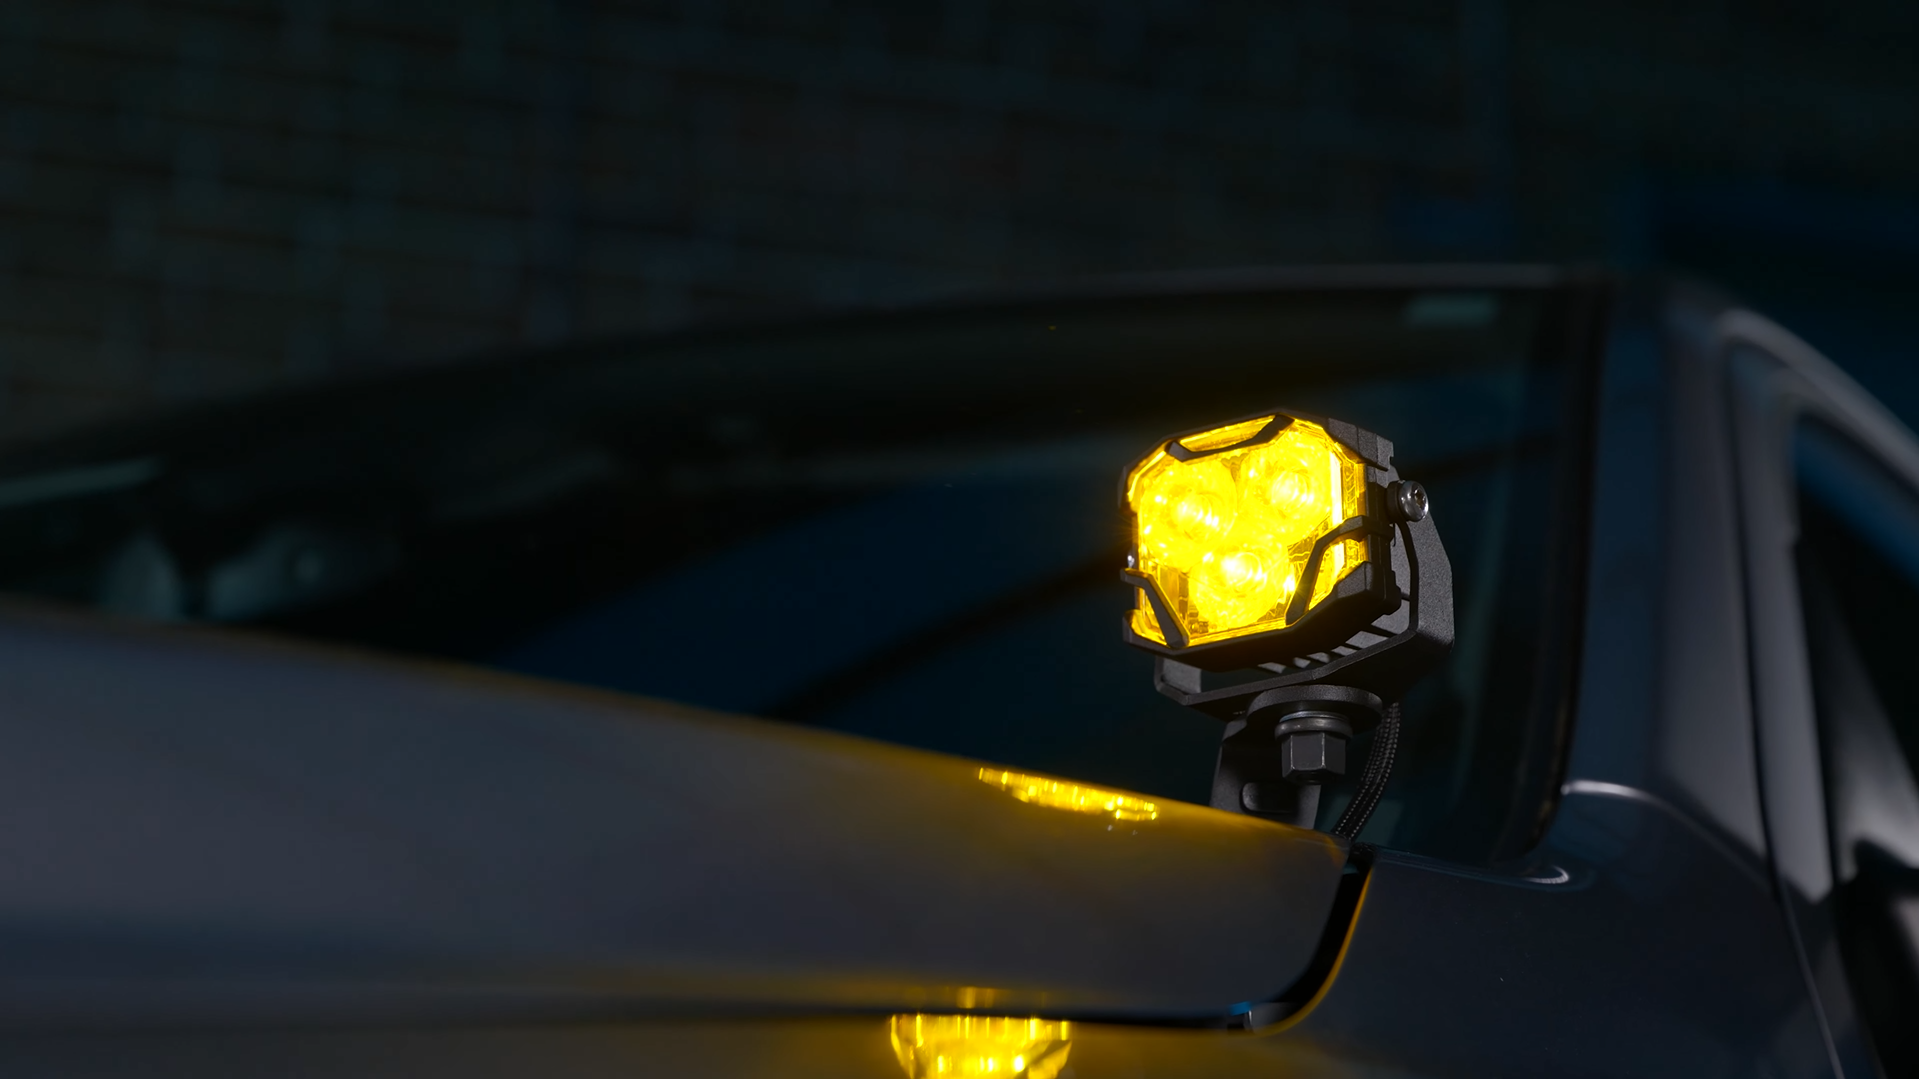
Additionally, each of those beam patterns for both the NCS and HXB models can be purchased with a white or yellow beam pattern.
If you choose to go with the yellow NCS model, you will be using a Nichia true-yellow LED chip with a yellow-filtered lens. This is in contrast to the HXB model that uses a white Osram chip with a yellow-filtered lens. To compare the output between the HXB white and yellow options, you will lose roughly 30% of your brightness when you switch from the premium white HXB 4Banger to the premium yellow HXB.
This also produces a slightly different shade of yellow between the two lights that you can see below.

Speaking of the lenses, the TIR optics we mentioned before, stands for Total Internal Reflector. Essentially, rather than having the LED chip within the 4Banger Pod light, the lens optic creates the individual beam patterns.
Which 4Banger is for Me?
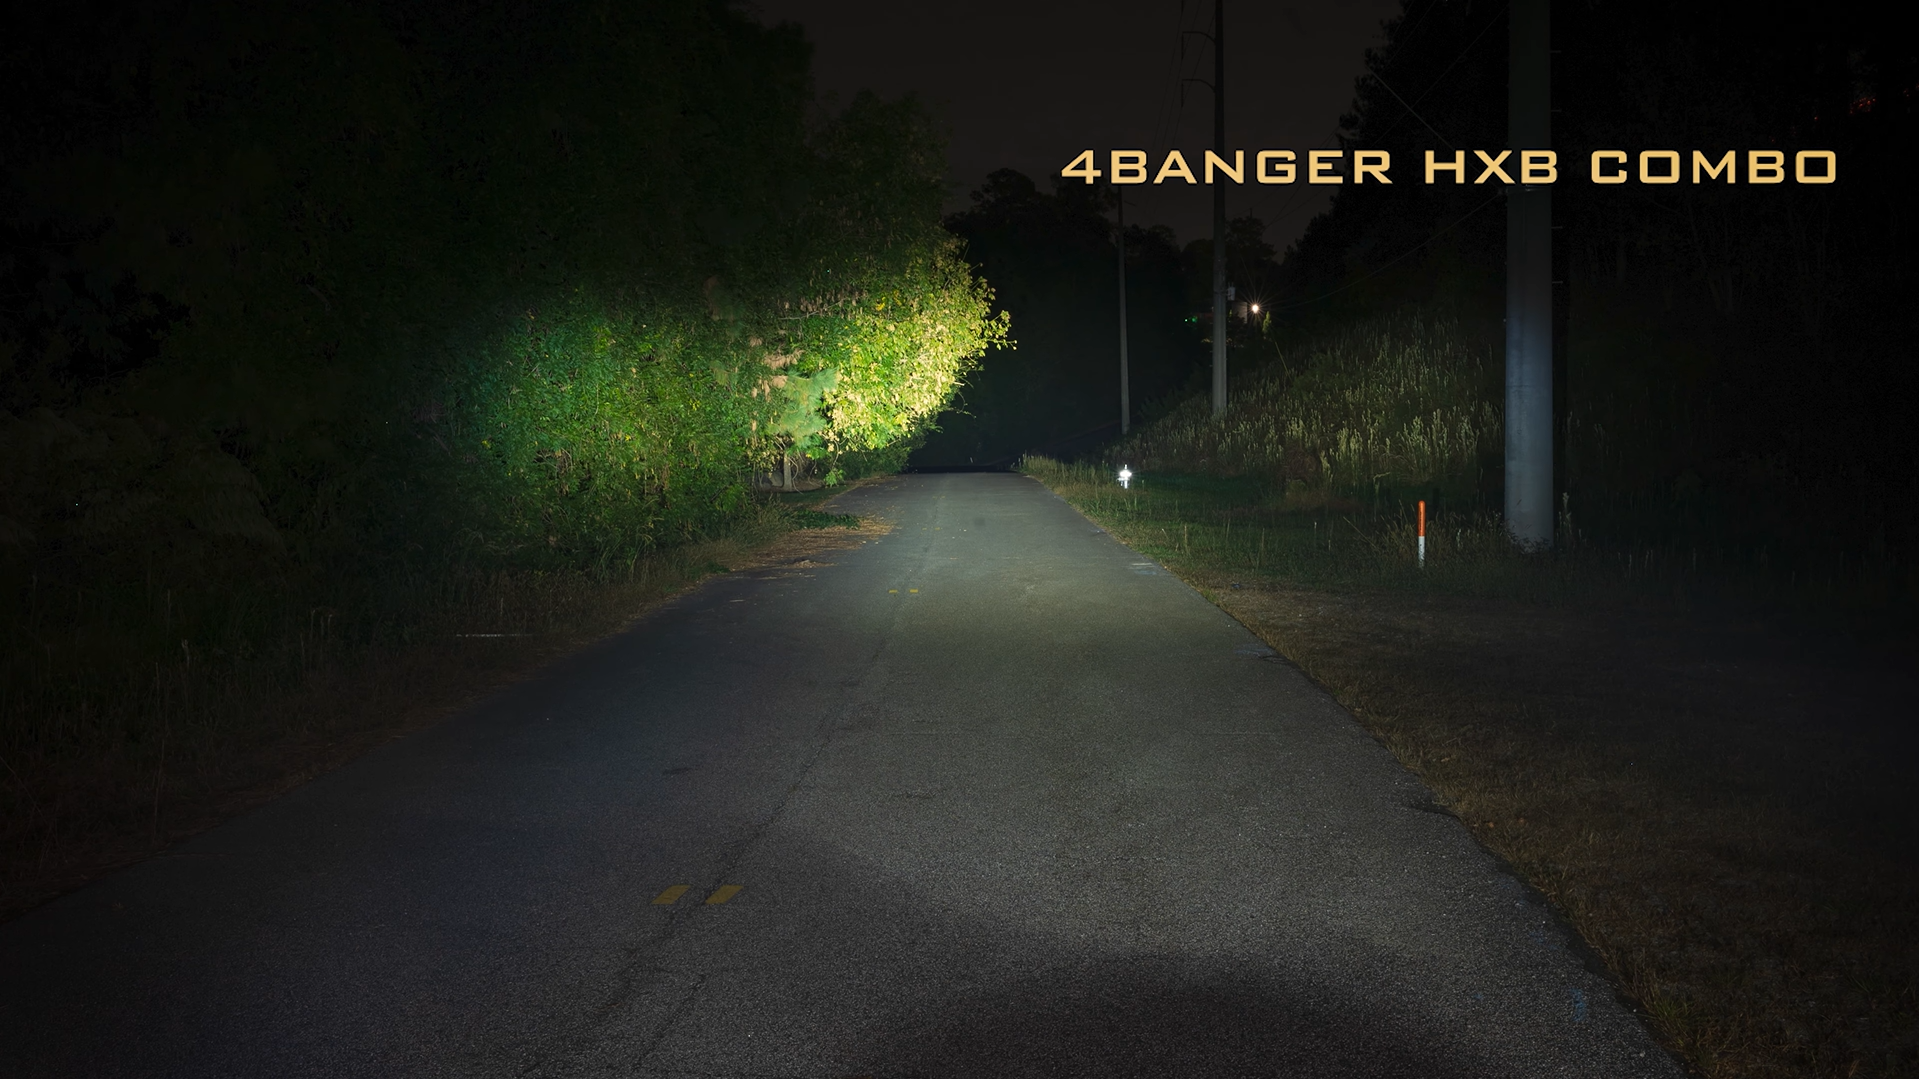
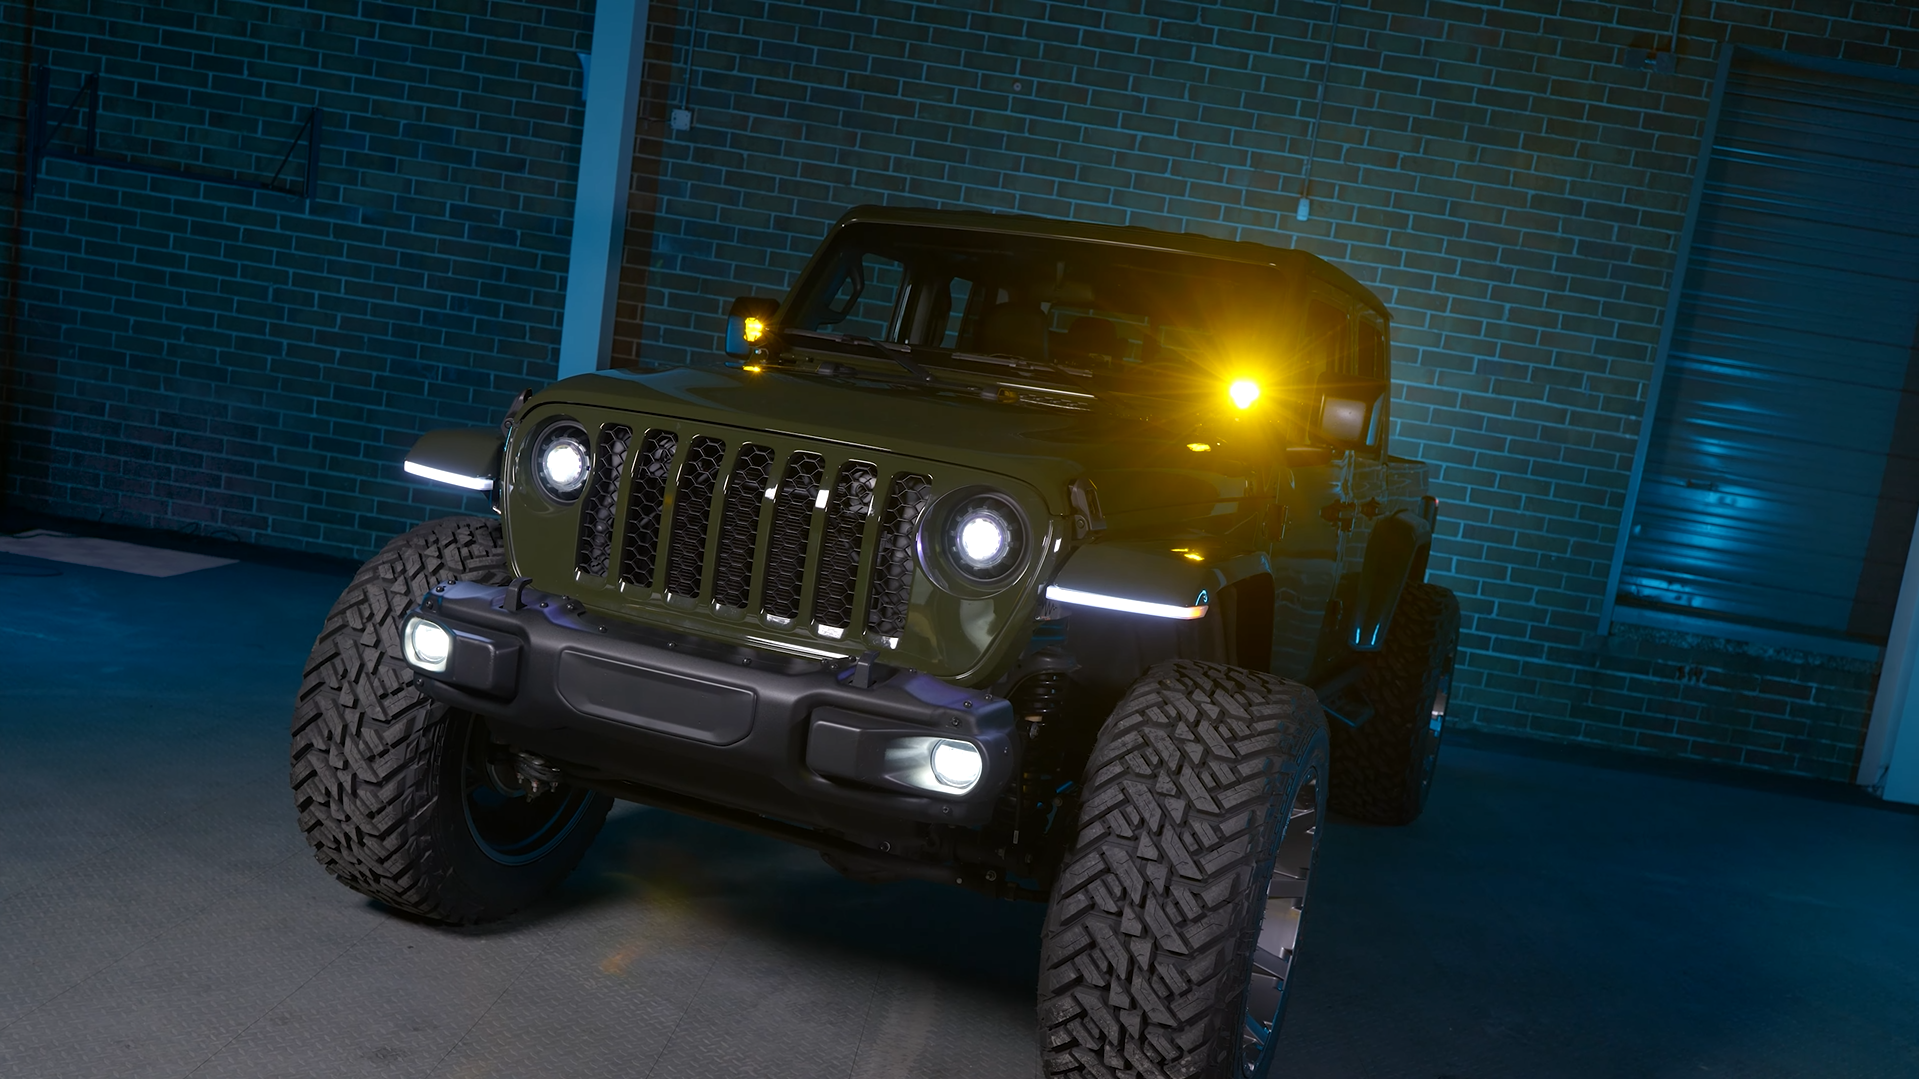
If you are looking to outfit your off-road rig with the best possible pod-lights money can buy, the HXB premium Morimoto 4Bangers are the way to go. Particularly the combo light option provides a good mix of that wide beam with greater distance than the wide beam.
Many people will choose to go with both a fog and a combo light beam pattern for their vehicle. The good news is, no matter what you choose, Morimoto has provided the 4Bangers with huge levels of versatility with their vehicle-specific mounts for the A-pillars, internal mounts, and universal mounts to be put anywhere on your vehicle.
Lastly, if you are looking to rip through the wilderness and give rally drivers a run for their money, we recommend the 4Banger spot beam pattern. This will give you a huge level of visibility at far distances.
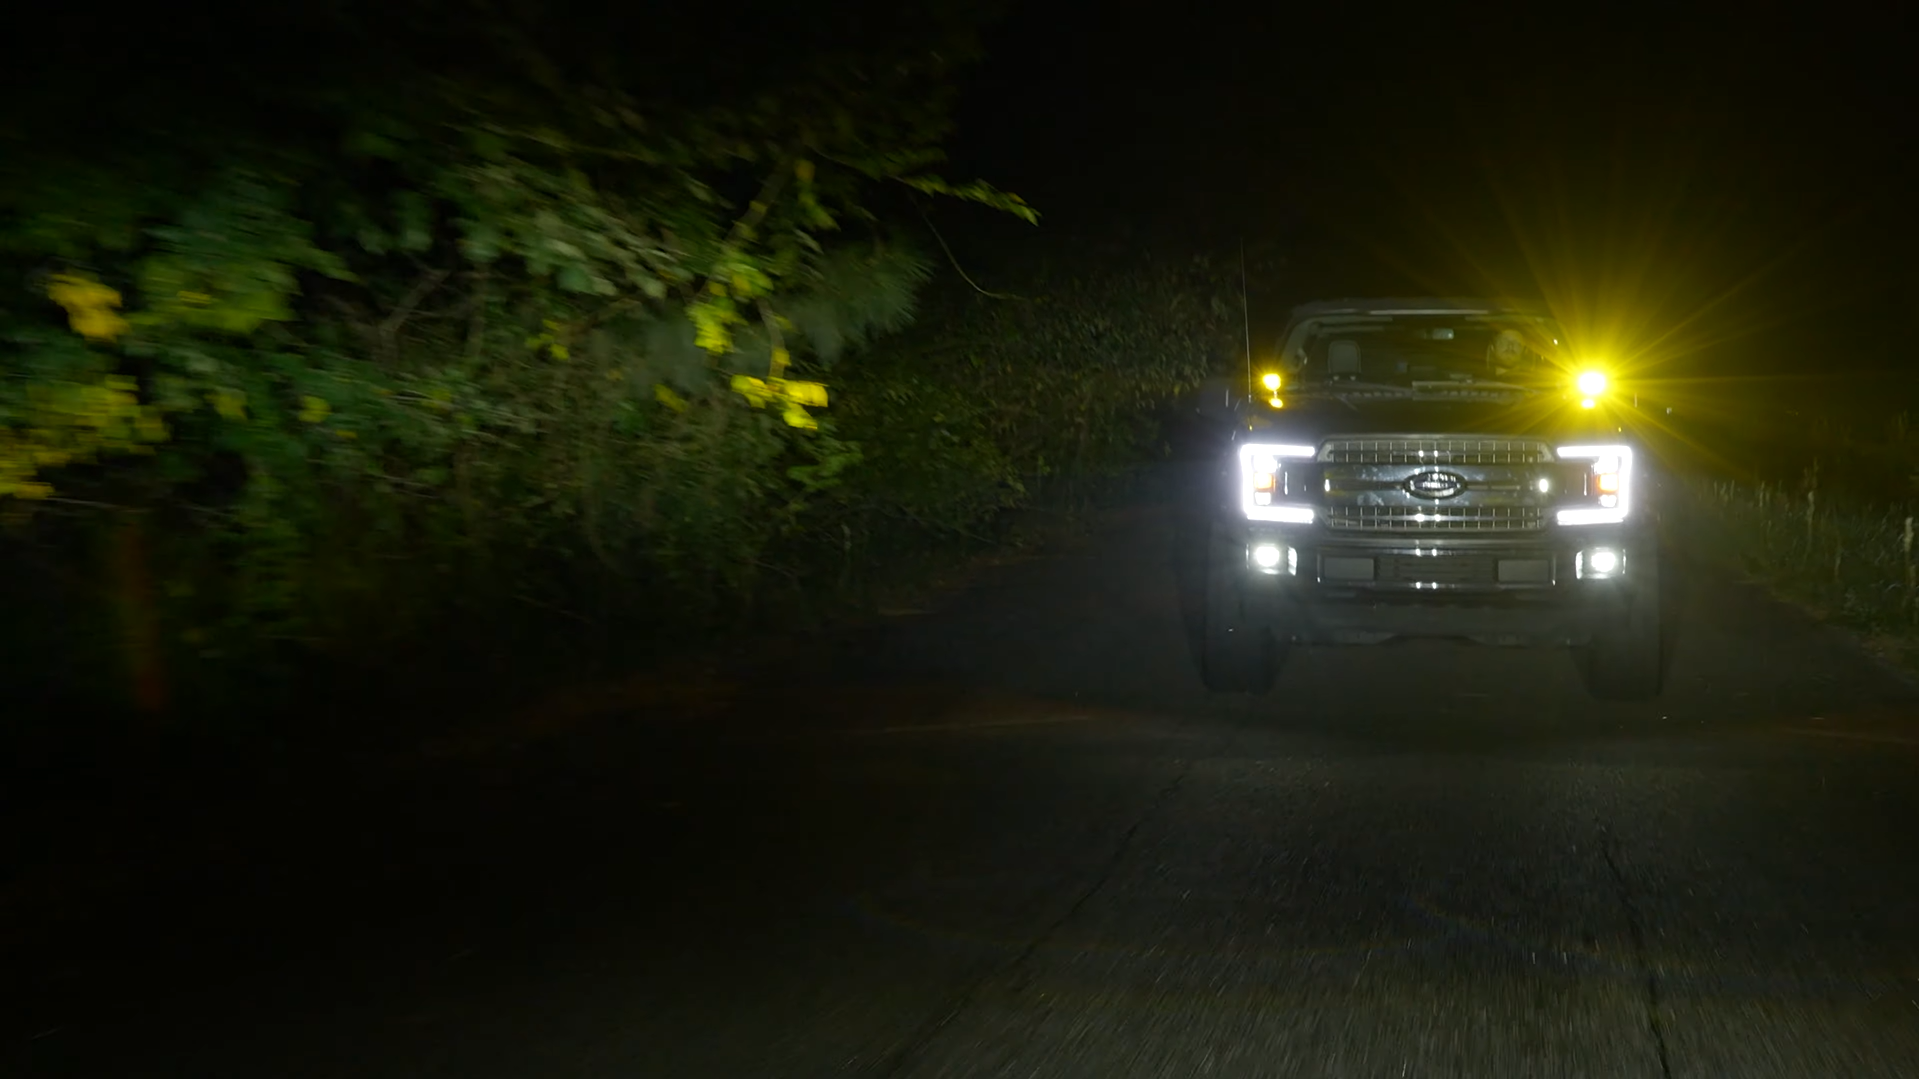
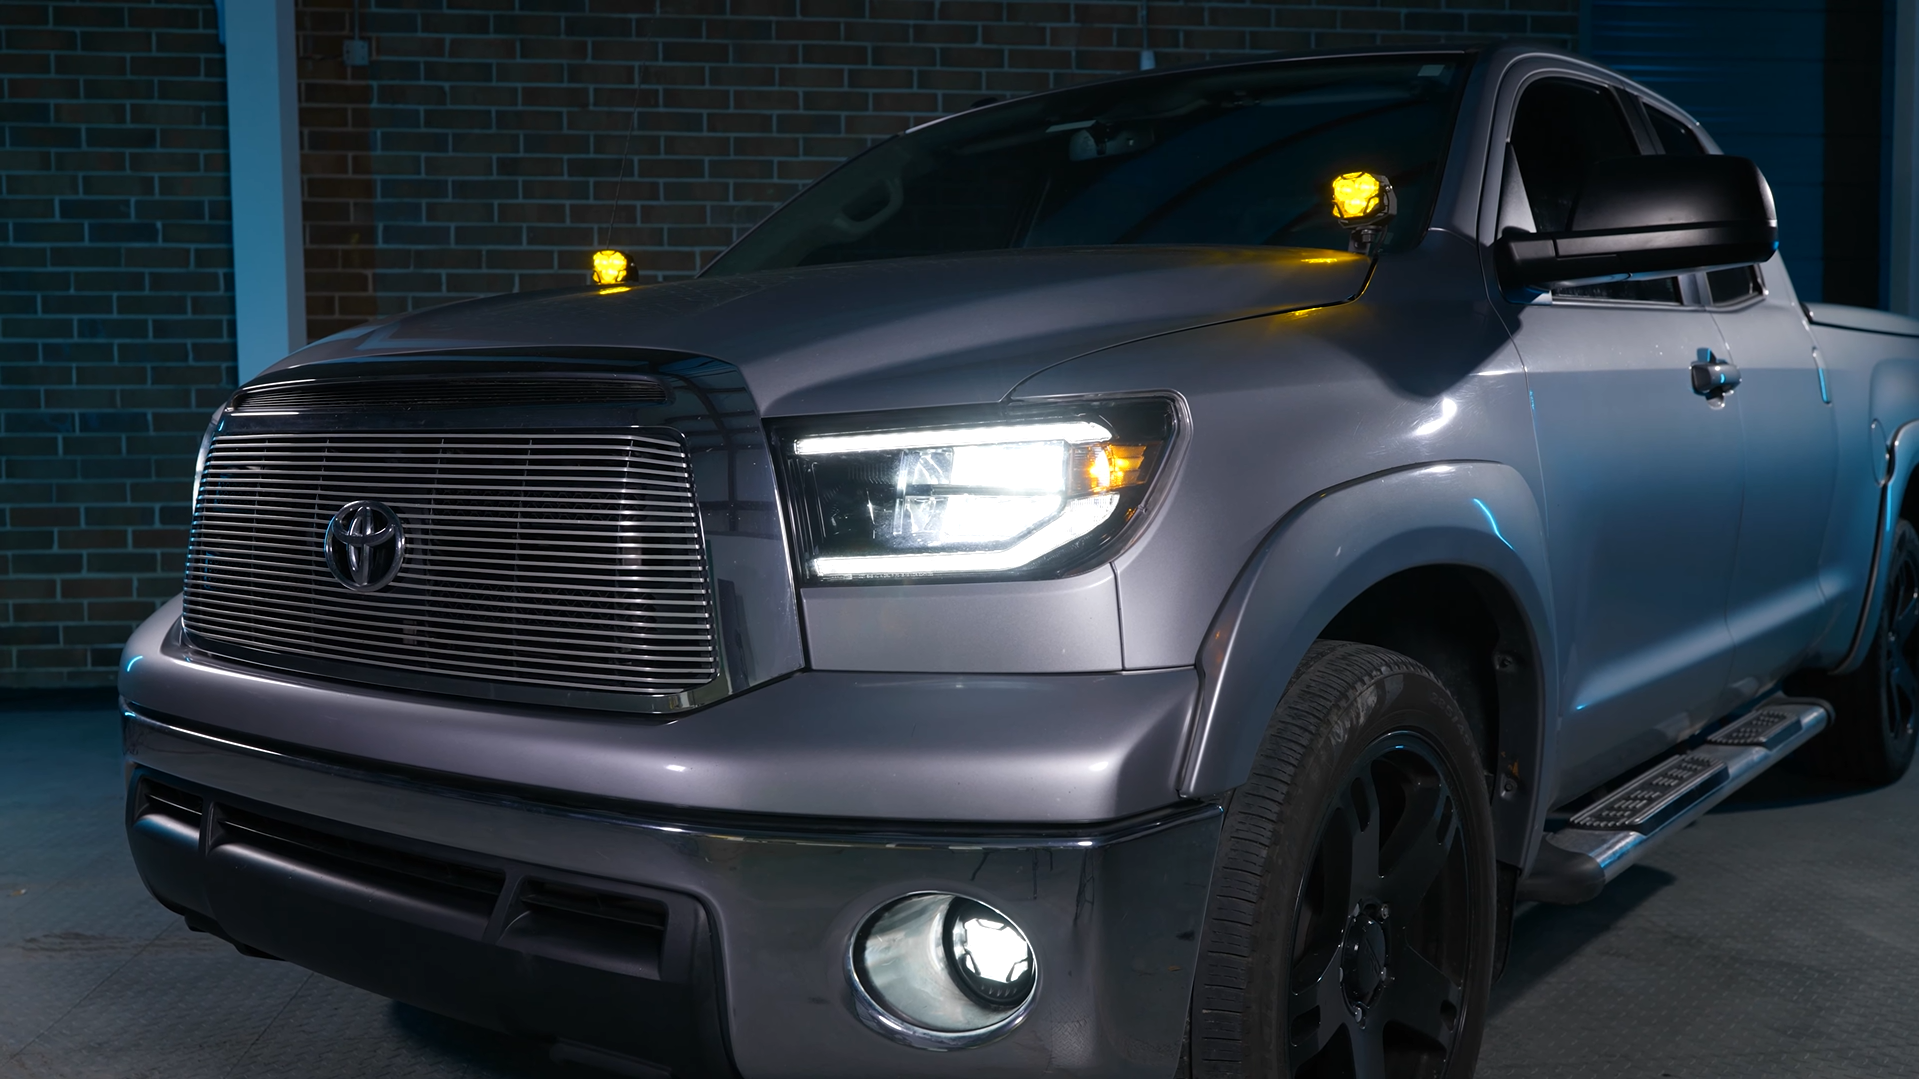
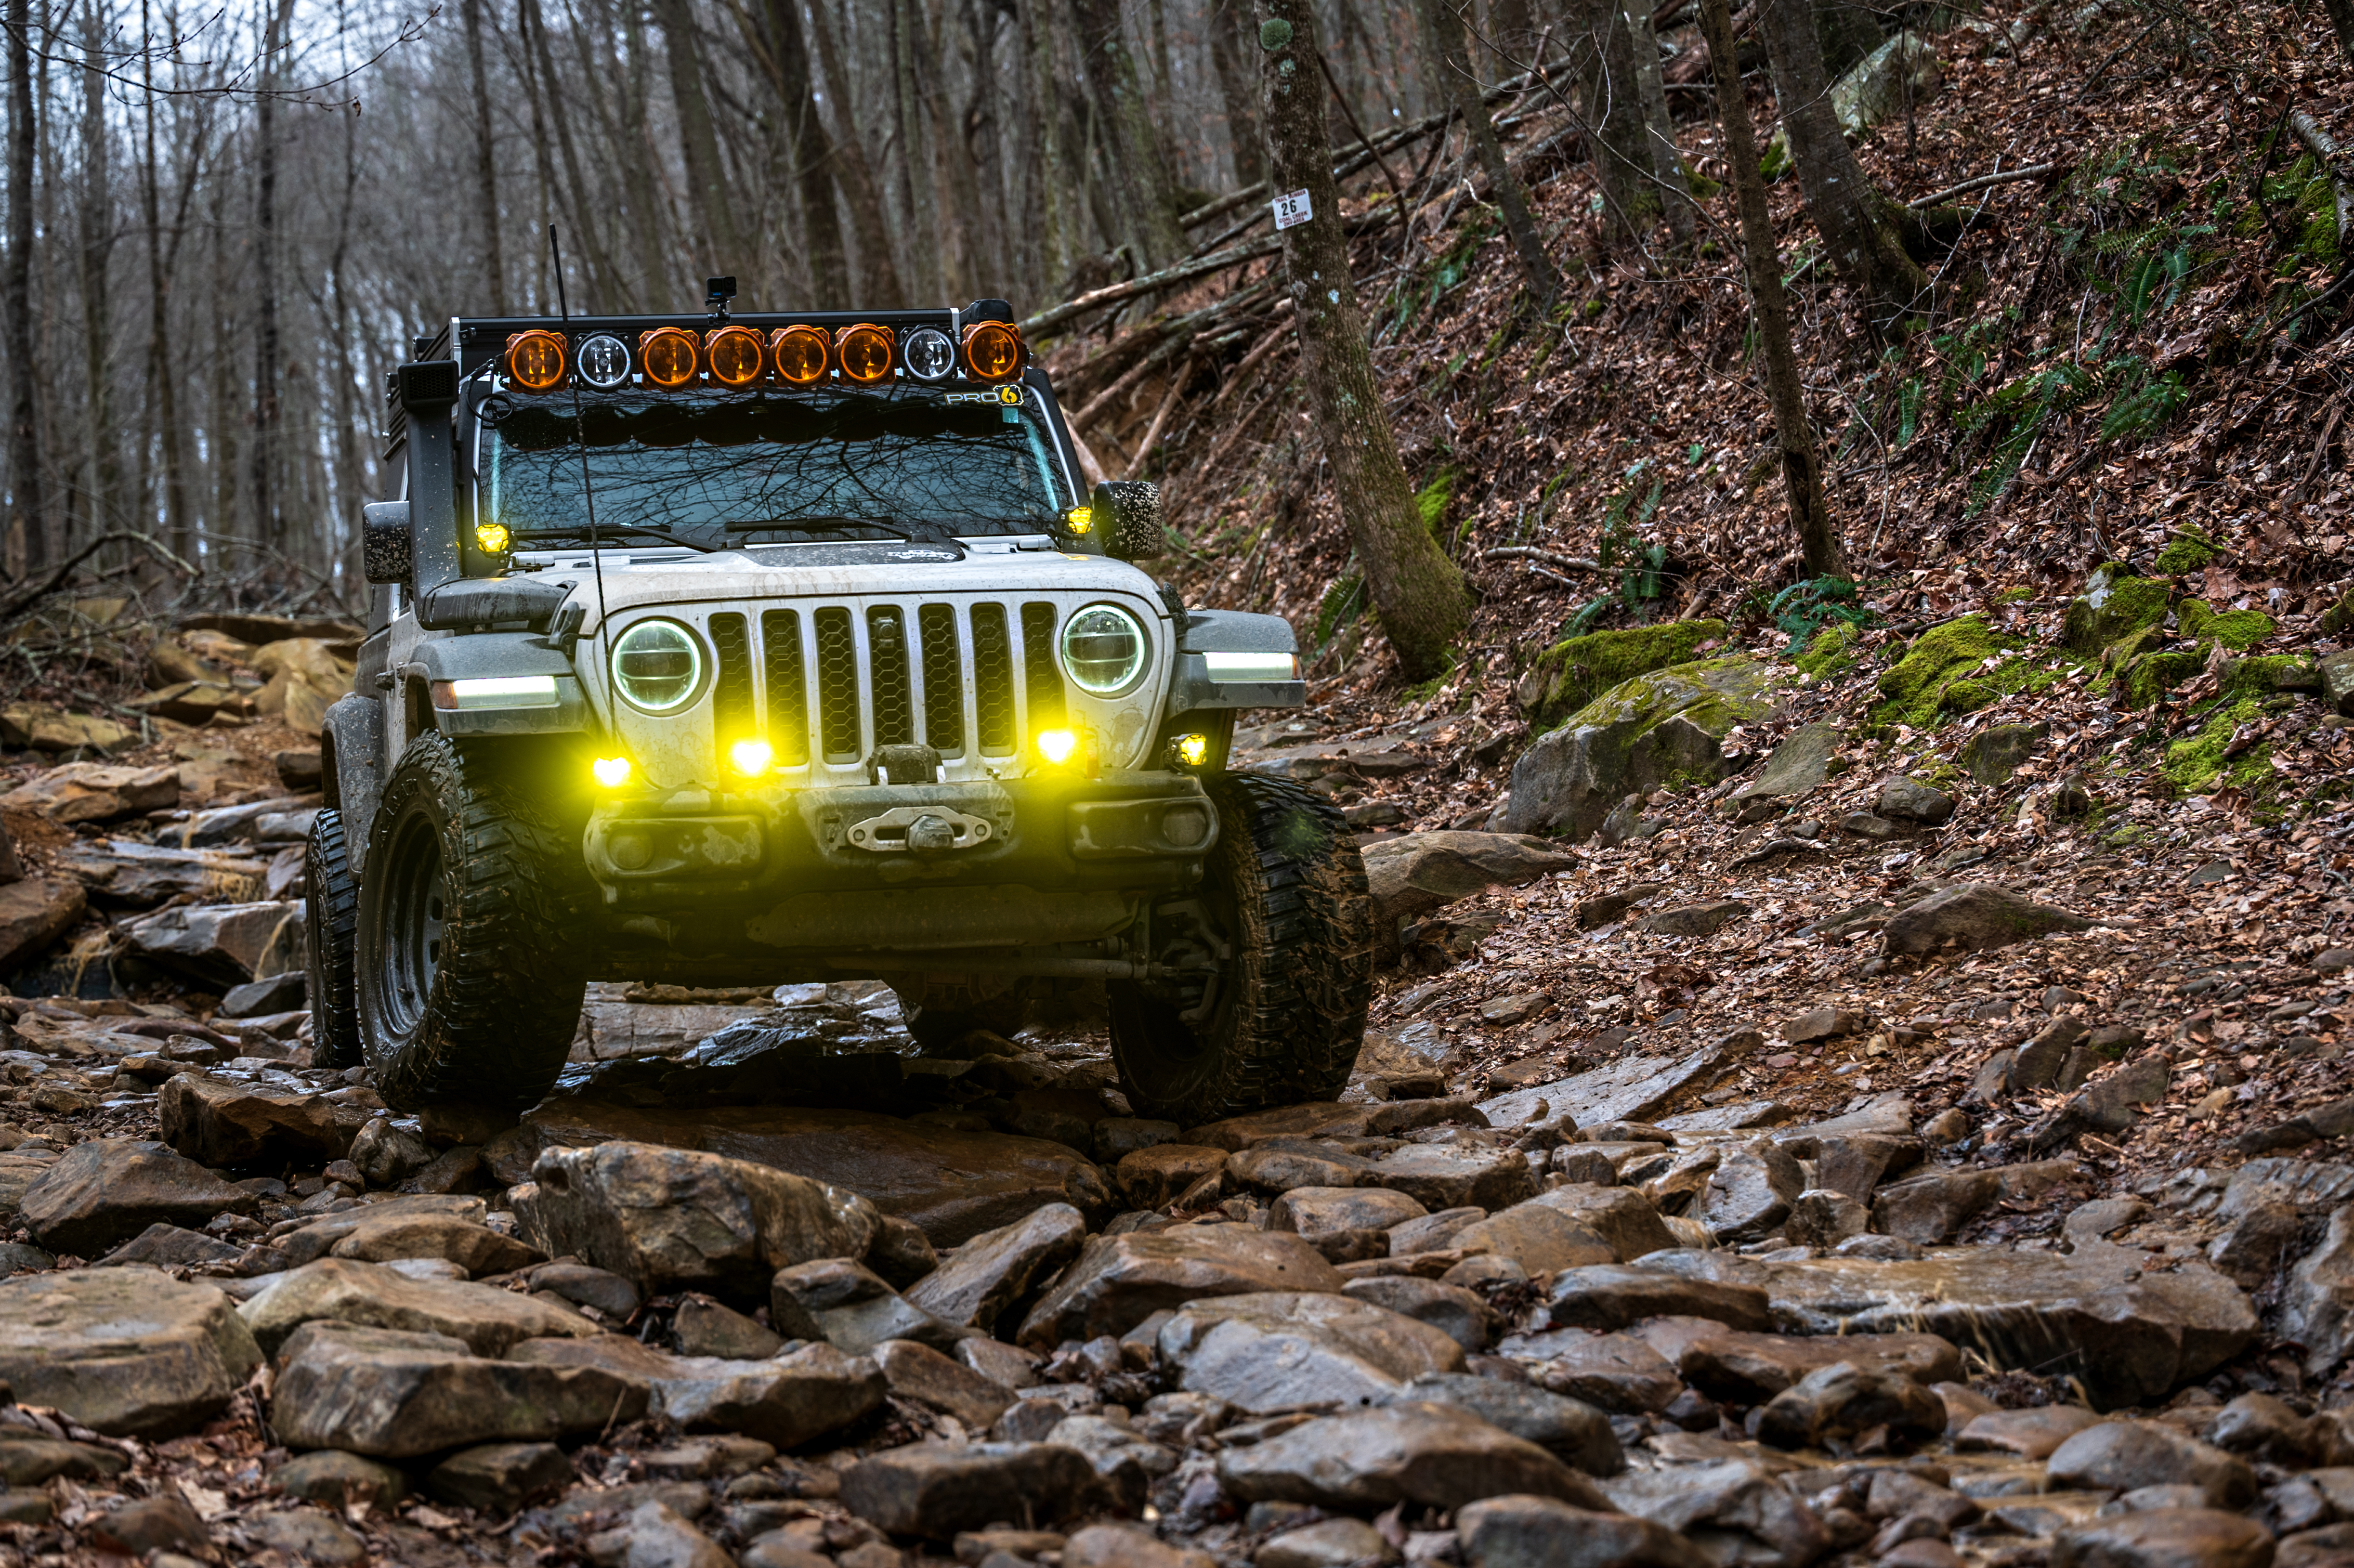
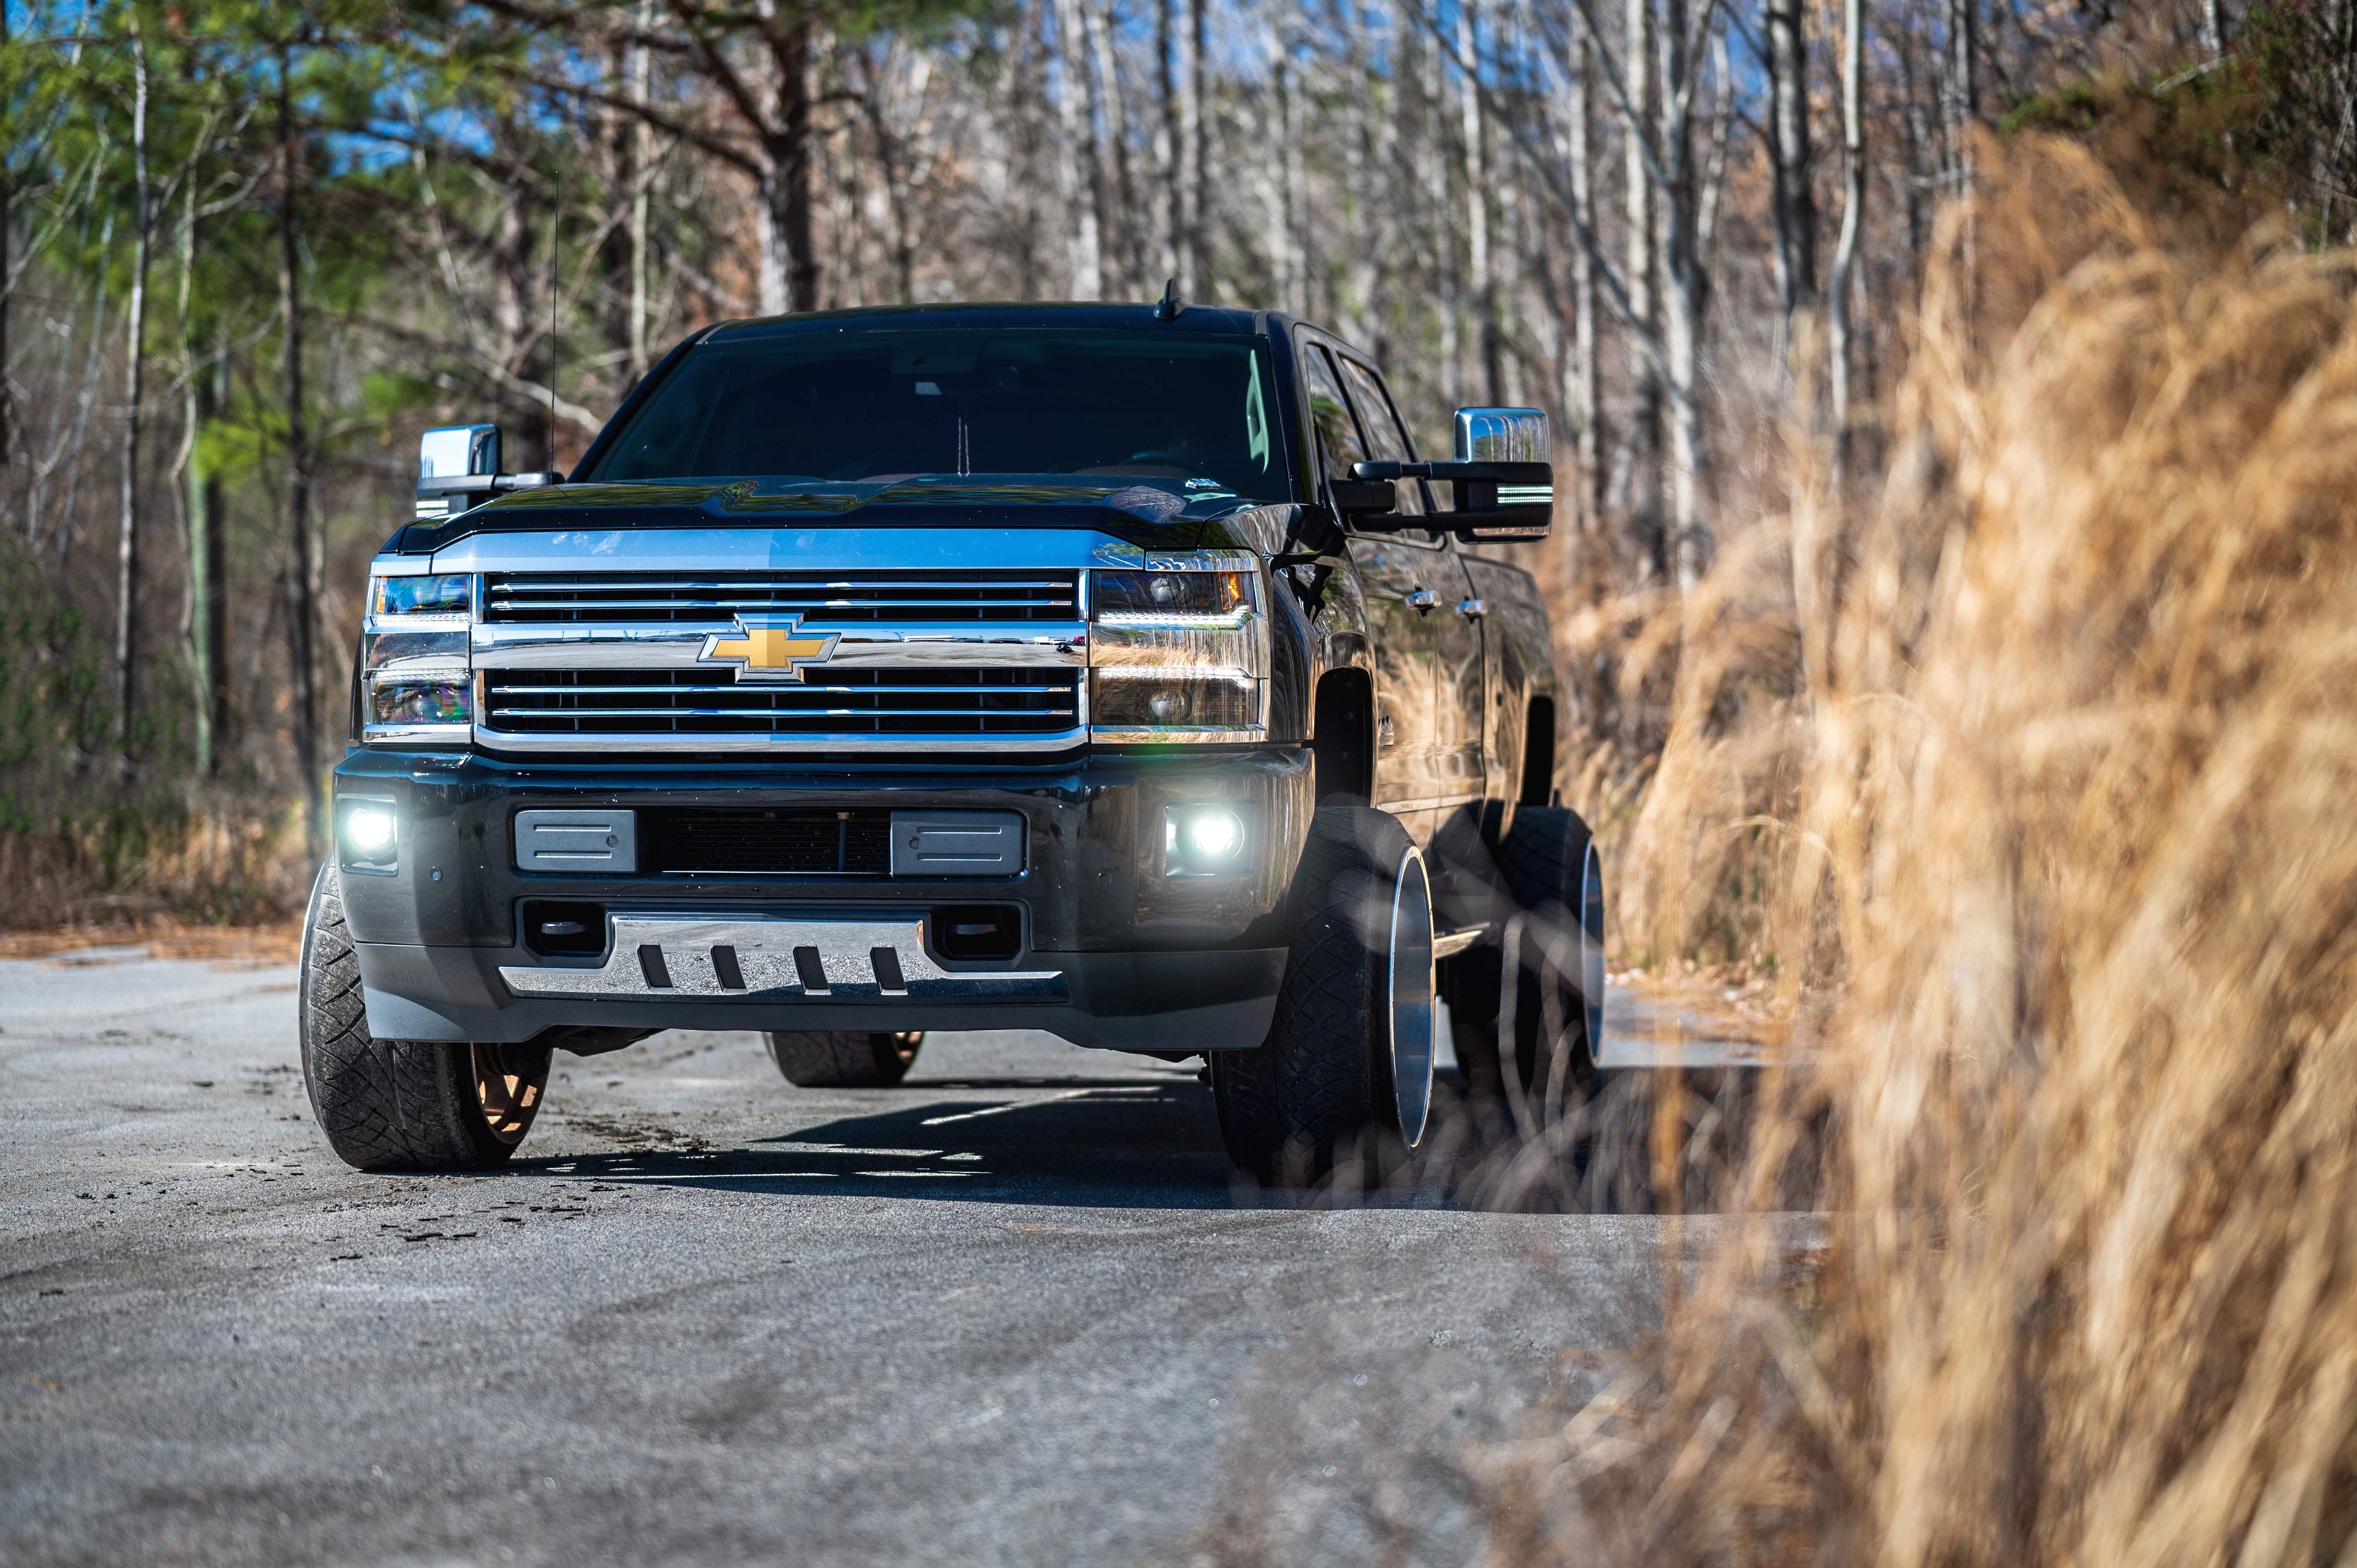
THE TUNDRA
To show how easy-to-install the 4Bangers are, Morimoto has created an install guide using their A-Pillar and internal fog light mounts for the 2007-2013 2nd generation XK50 Toyota Tundra. If you are looking to order your own set of 4Bangers for this model Tundra, click here! If you are looking for a 4Banger for another vehicle, check out Morimoto’s complete line of 4Bangers here.
Tools Needed for the Job
10mm Bolt
High Impact Drill
Pry Tool
Blade
Screwdriver
Needlenose Pliers
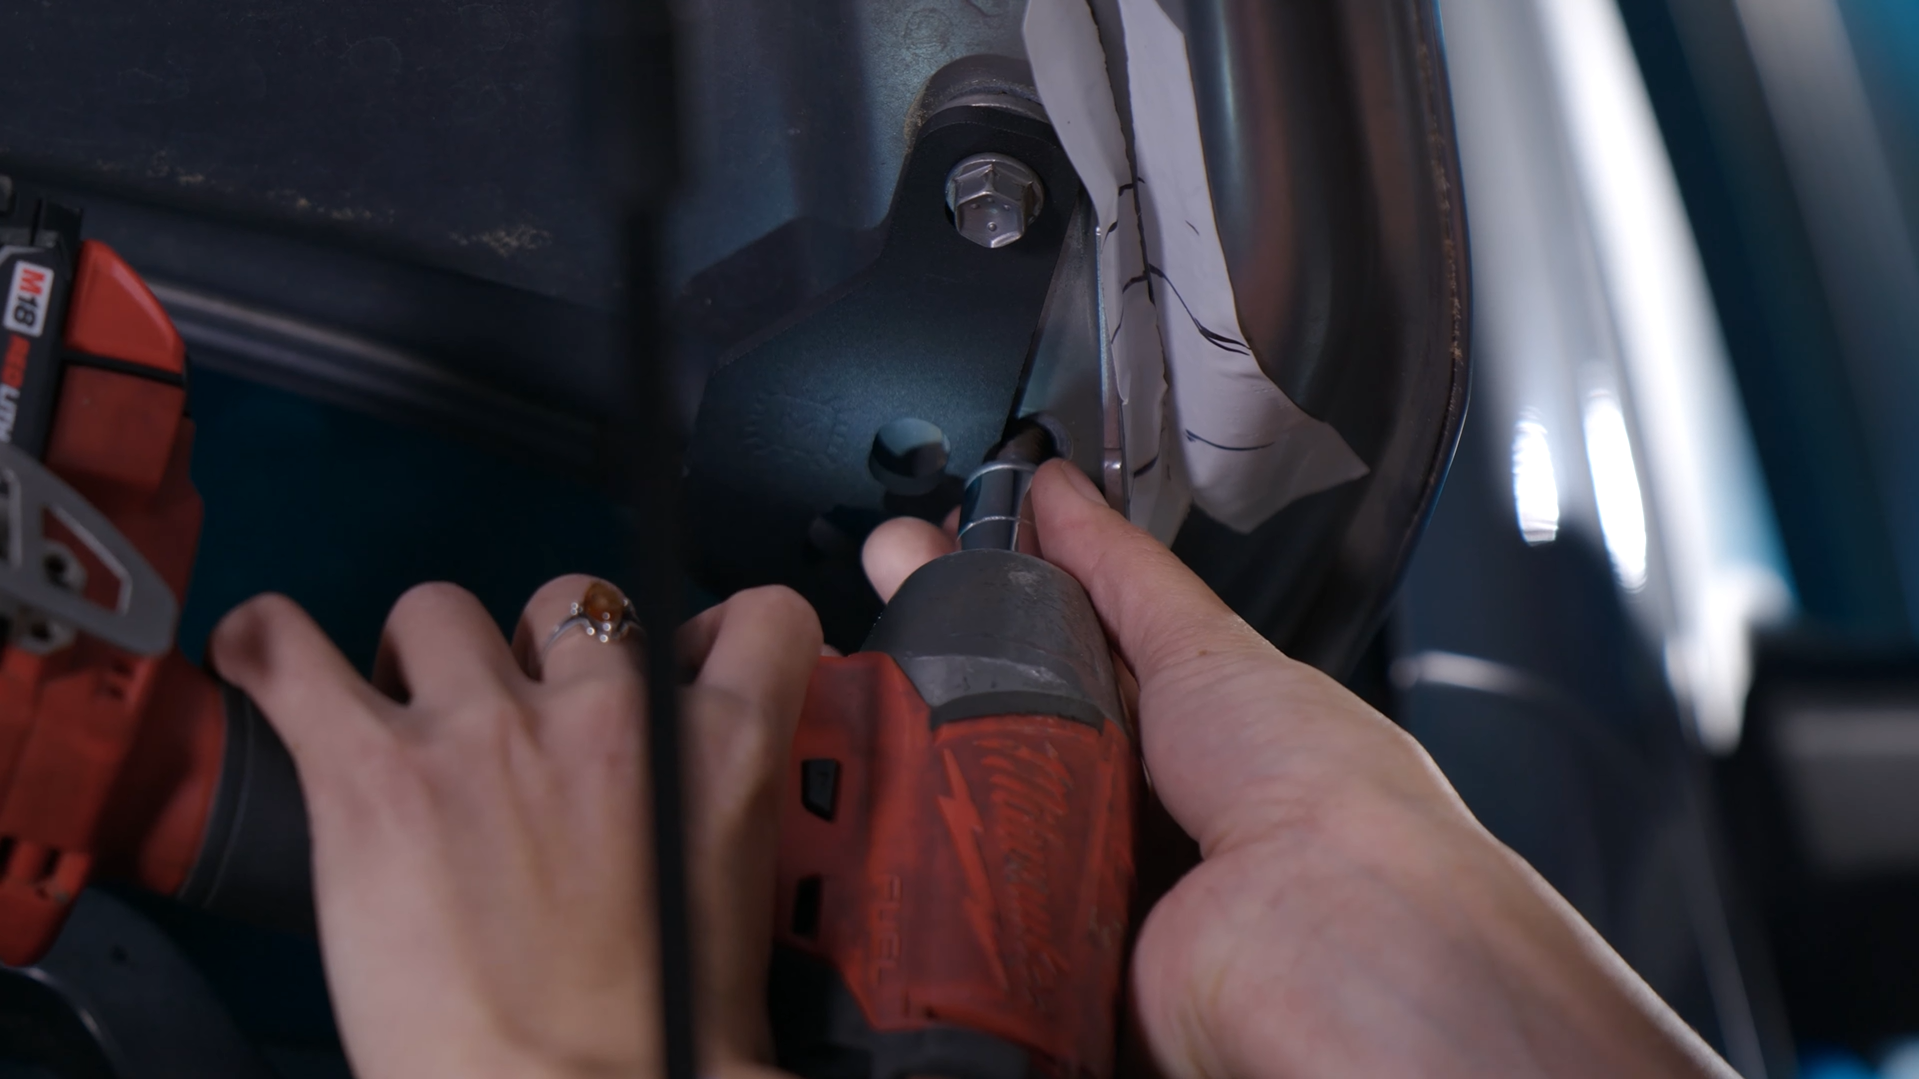
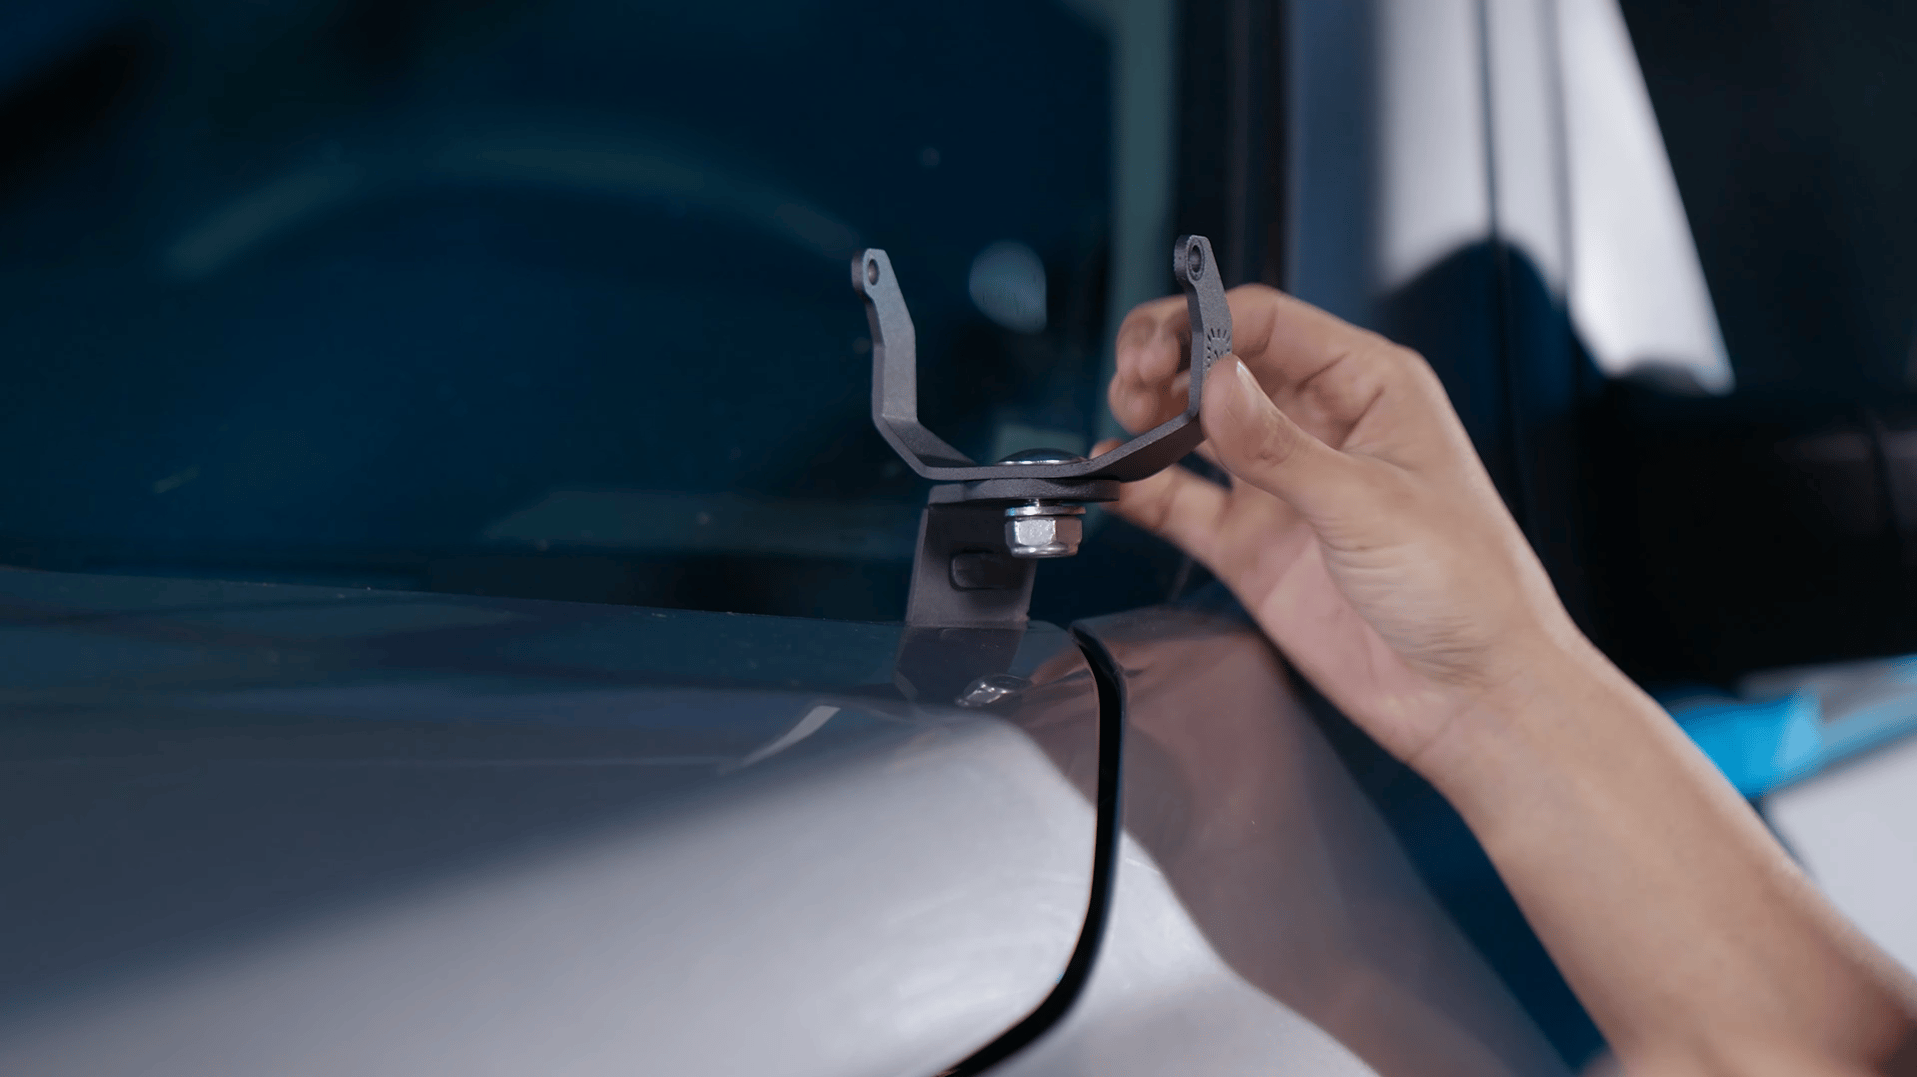
A-Pillar Install
Before taking the hood brackets off to connect the Morimoto bracket, you should start by placing a piece of masking or painters’ tape over part of the OEM bracket. Draw lines widthwise across the tape. Then use a razor blade to cut the tape down the middle. Doing so will allow you to line up the hood mounts after installing the 4Banger bracket(s).
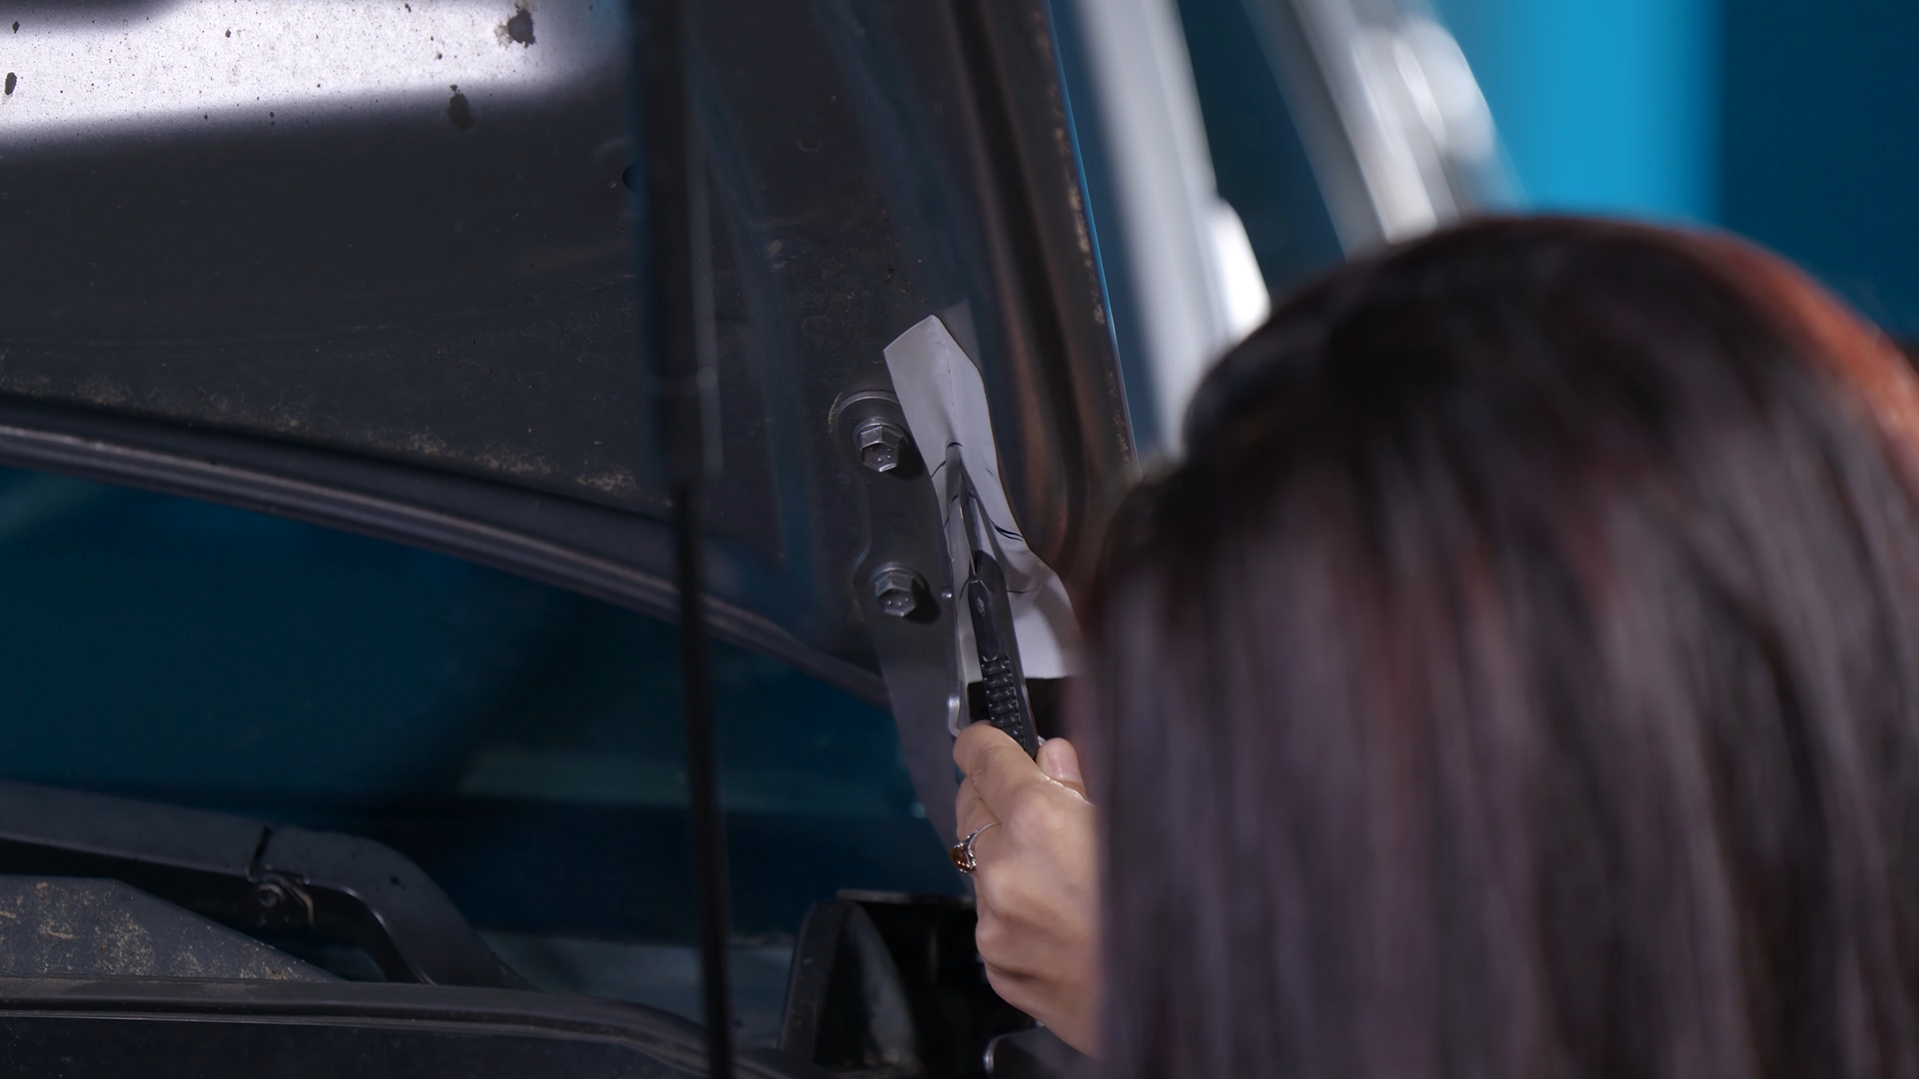
Next, grab your 4Banger bracket and insert the plastic pieces into the corresponding hole.
Then, remove the uppermost 12mm bolt holding in the hood bracket. Then, place the 4Banger bracket over the top hole. Then lightly screw in the bolt with your hand.
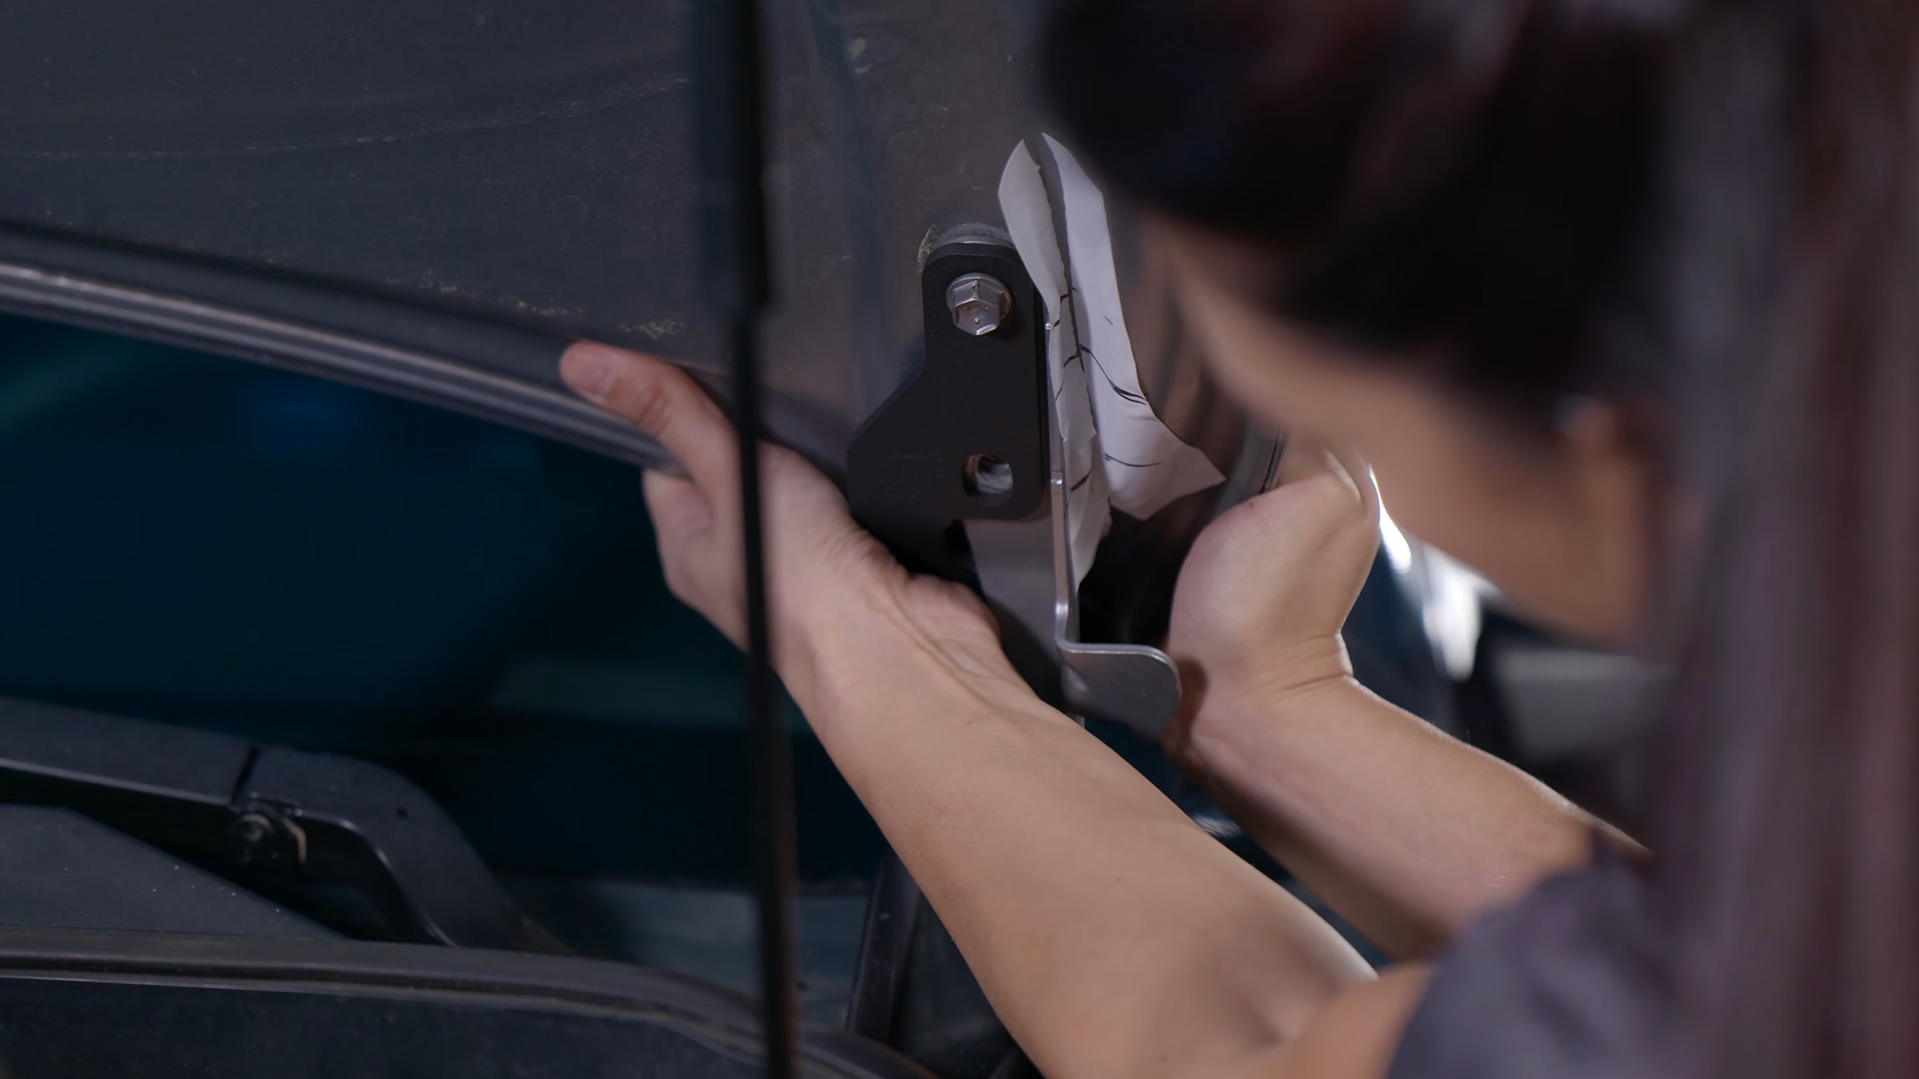
Repeat for the bottom bolt. Before fully tightening the bolts back in, be sure to line up the lines on the piece of tape you split in half. An extra pair of hands would make this task easier.
Once the A-Pillar bracket is installed, close the hood and grab the U-bracket. Take the screw, washer, and bolt and tighten loosely with your hand to get the bracket installed. Make sure the bracket is facing forward like in the image below.
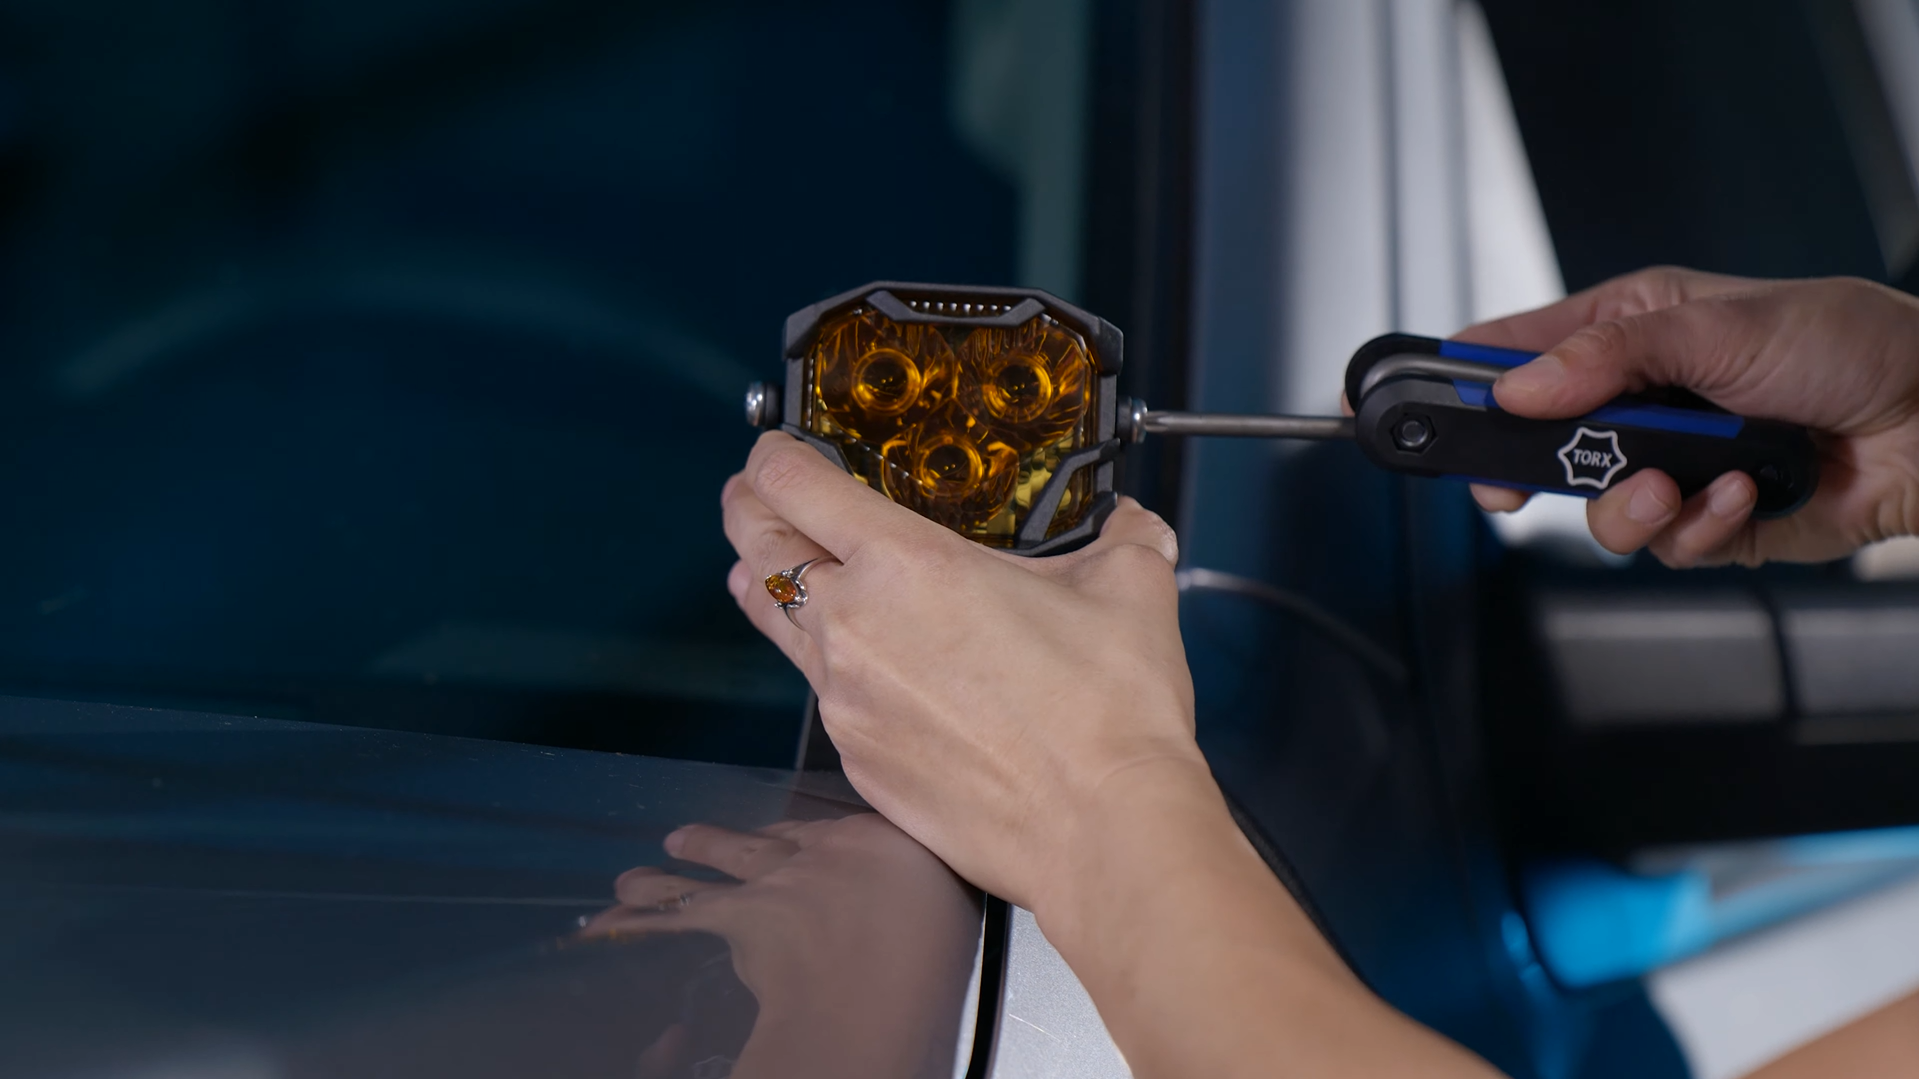
Next, you can grab your 4Banger LED pod and slide it into the U-bracket. Take the two T30 bits and tighten them loosely.
Repeat for the other side of your vehicle.
A-Pillar Wiring
In order to wire everything, you will be using the wiring harness that includes a ‘Morimoto’ switch, a power ground, two Deutsch connectors, and a relay.

Connect the 4Banger closest to the fuse box to the shorter Deutsch connector line, and the more distant 4Banger to the longest Deutsch connector line. Depending on the size of your vehicle, you may need the extension. In the case of this Tundra, you will.
Now that both the 4Bangers are plugged in, we will now mount the relay. Something to note, make sure the relay is mounted in a way that the wires are facing DOWNWARD. If this is not mounted correctly, it could lead to a short circuit.
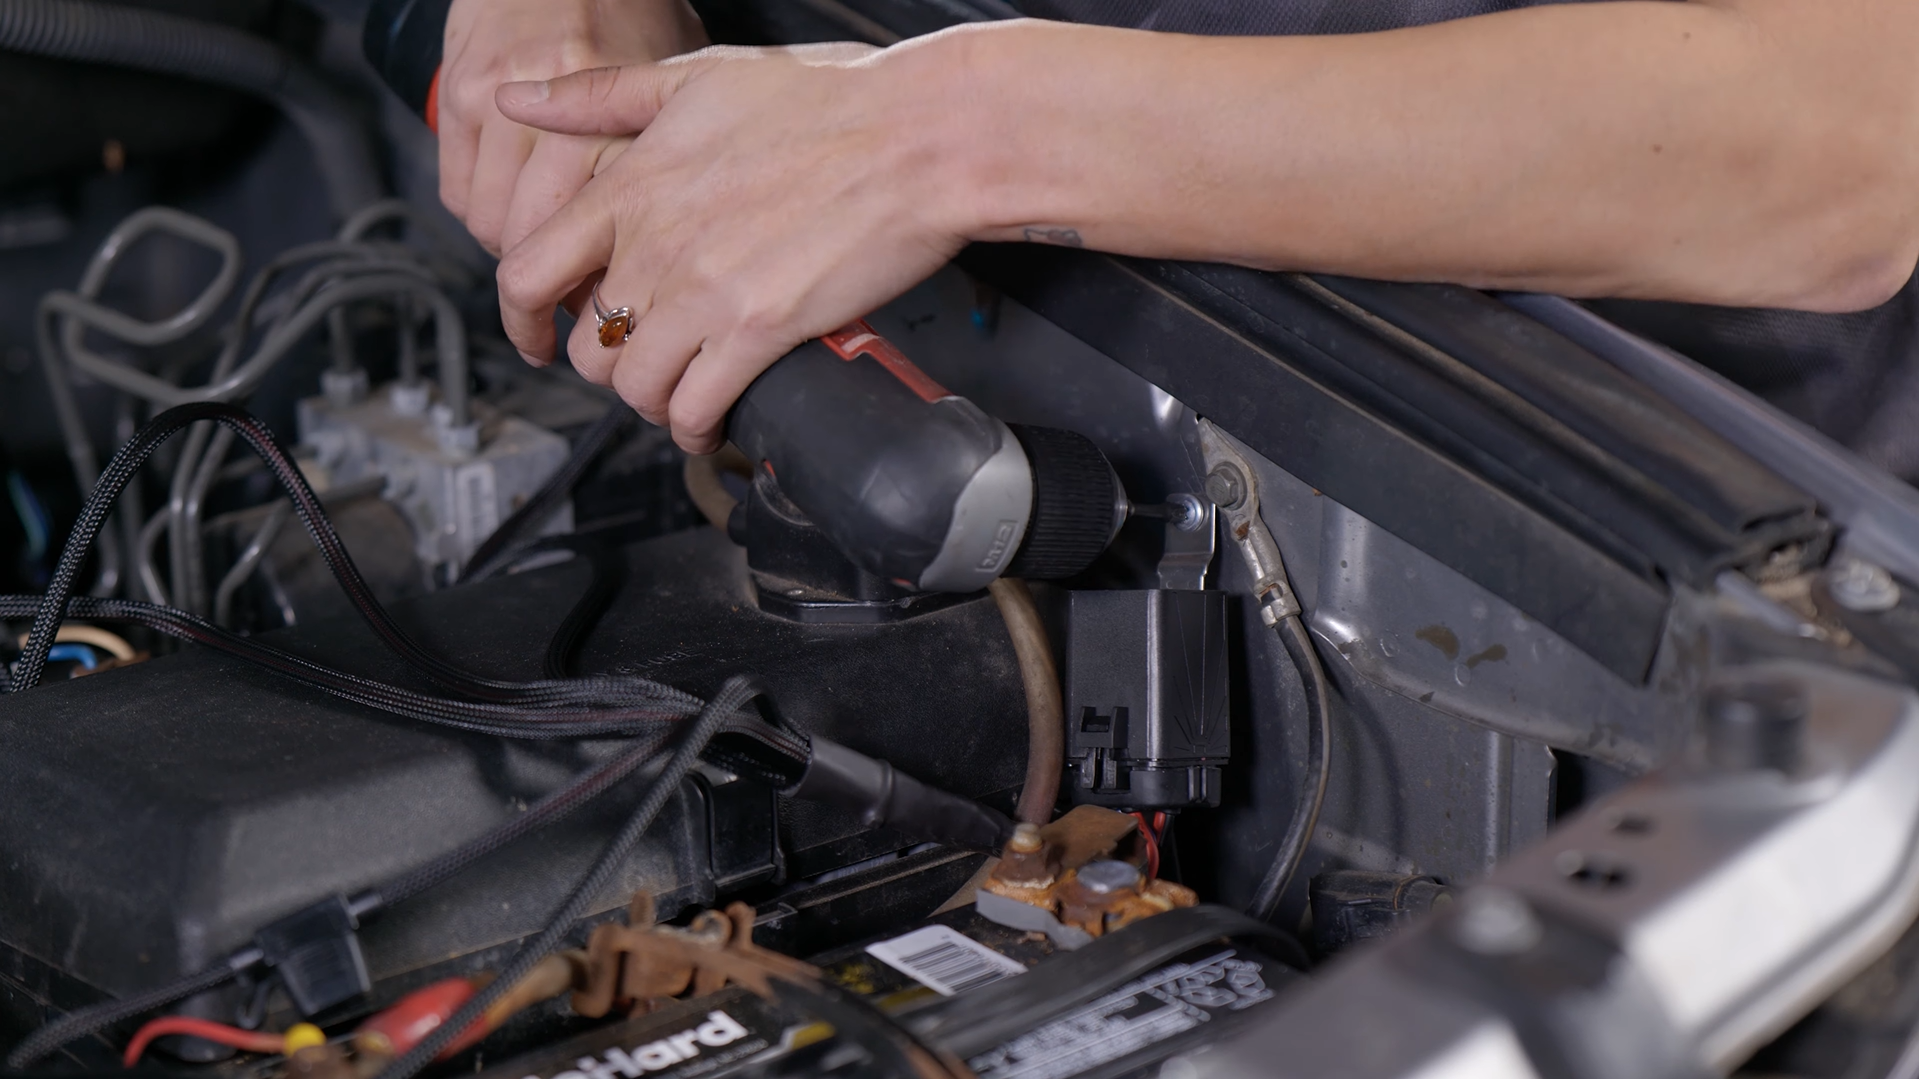
Before installing the power and the ground, we will install the ‘Morimoto’ button switch. To make things easier, you can remove the switch itself from the wire to make passing it through the firewall easier. From here, you can choose where you want the switch.
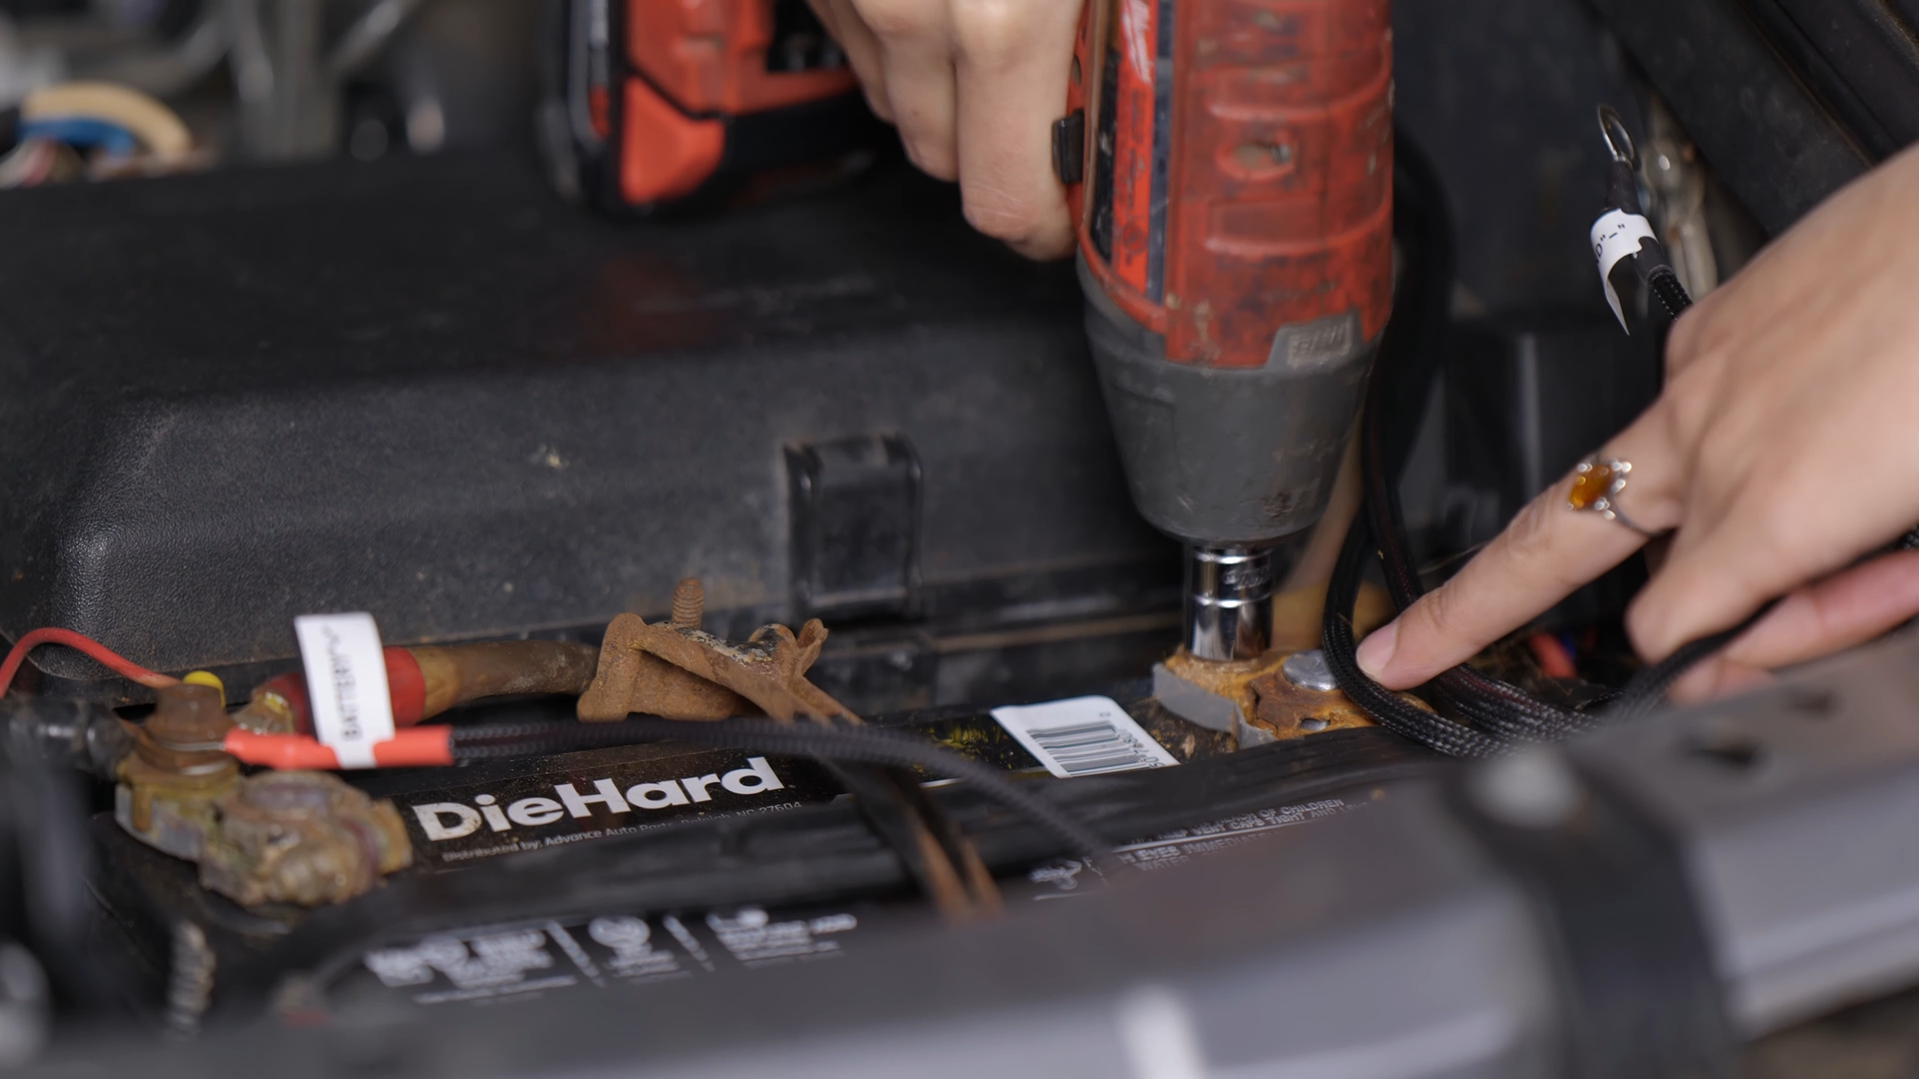
To connect the ground and power, just remove the 10mm bolts from each. To clean up the excess harness, use zip ties to tidy up your engine bay’s appearance.
 |
 |
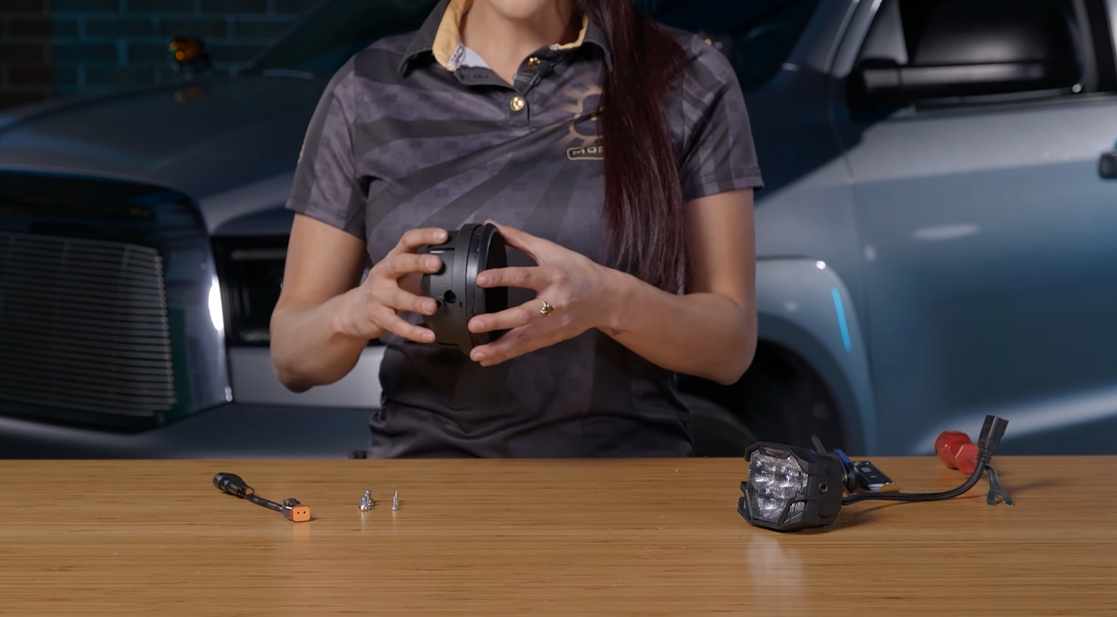
Fog Light Mount Install
This kit comes with a few pieces meant for assembly. Nothing too complicated.
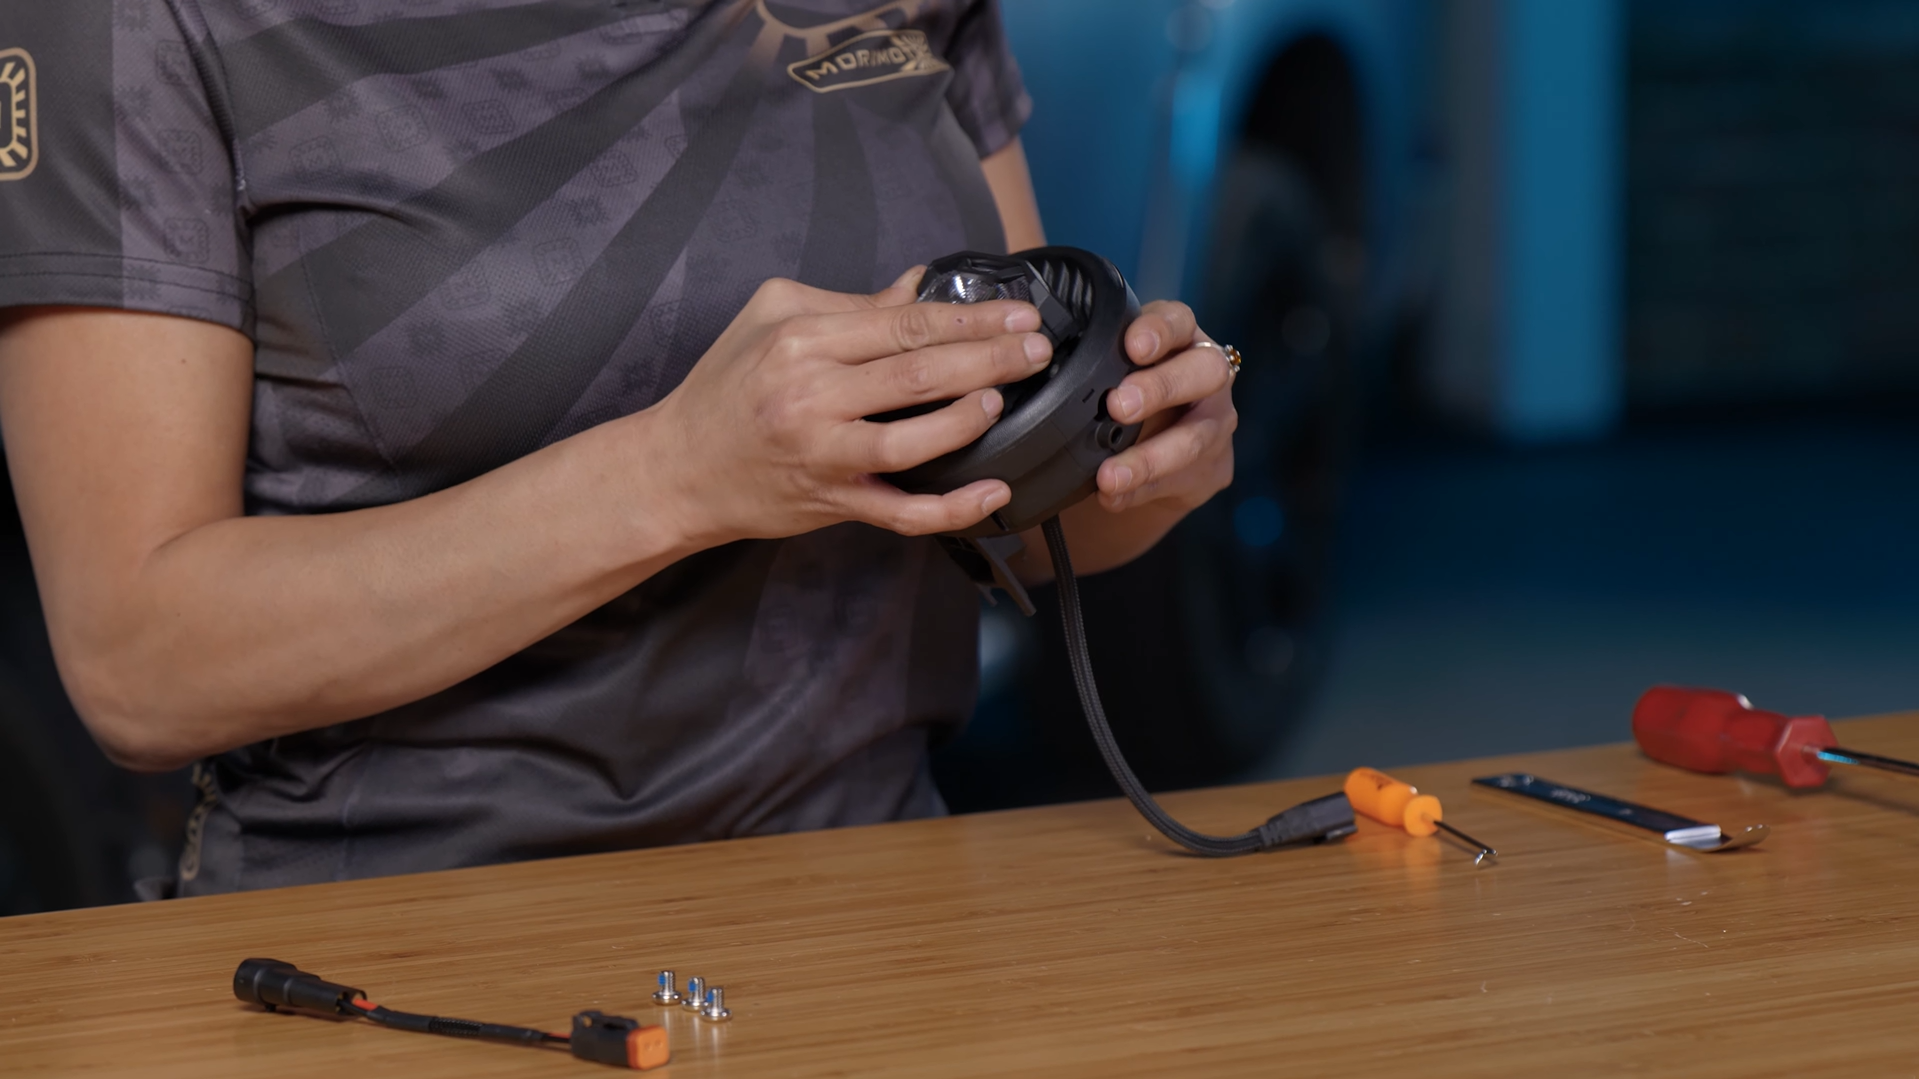
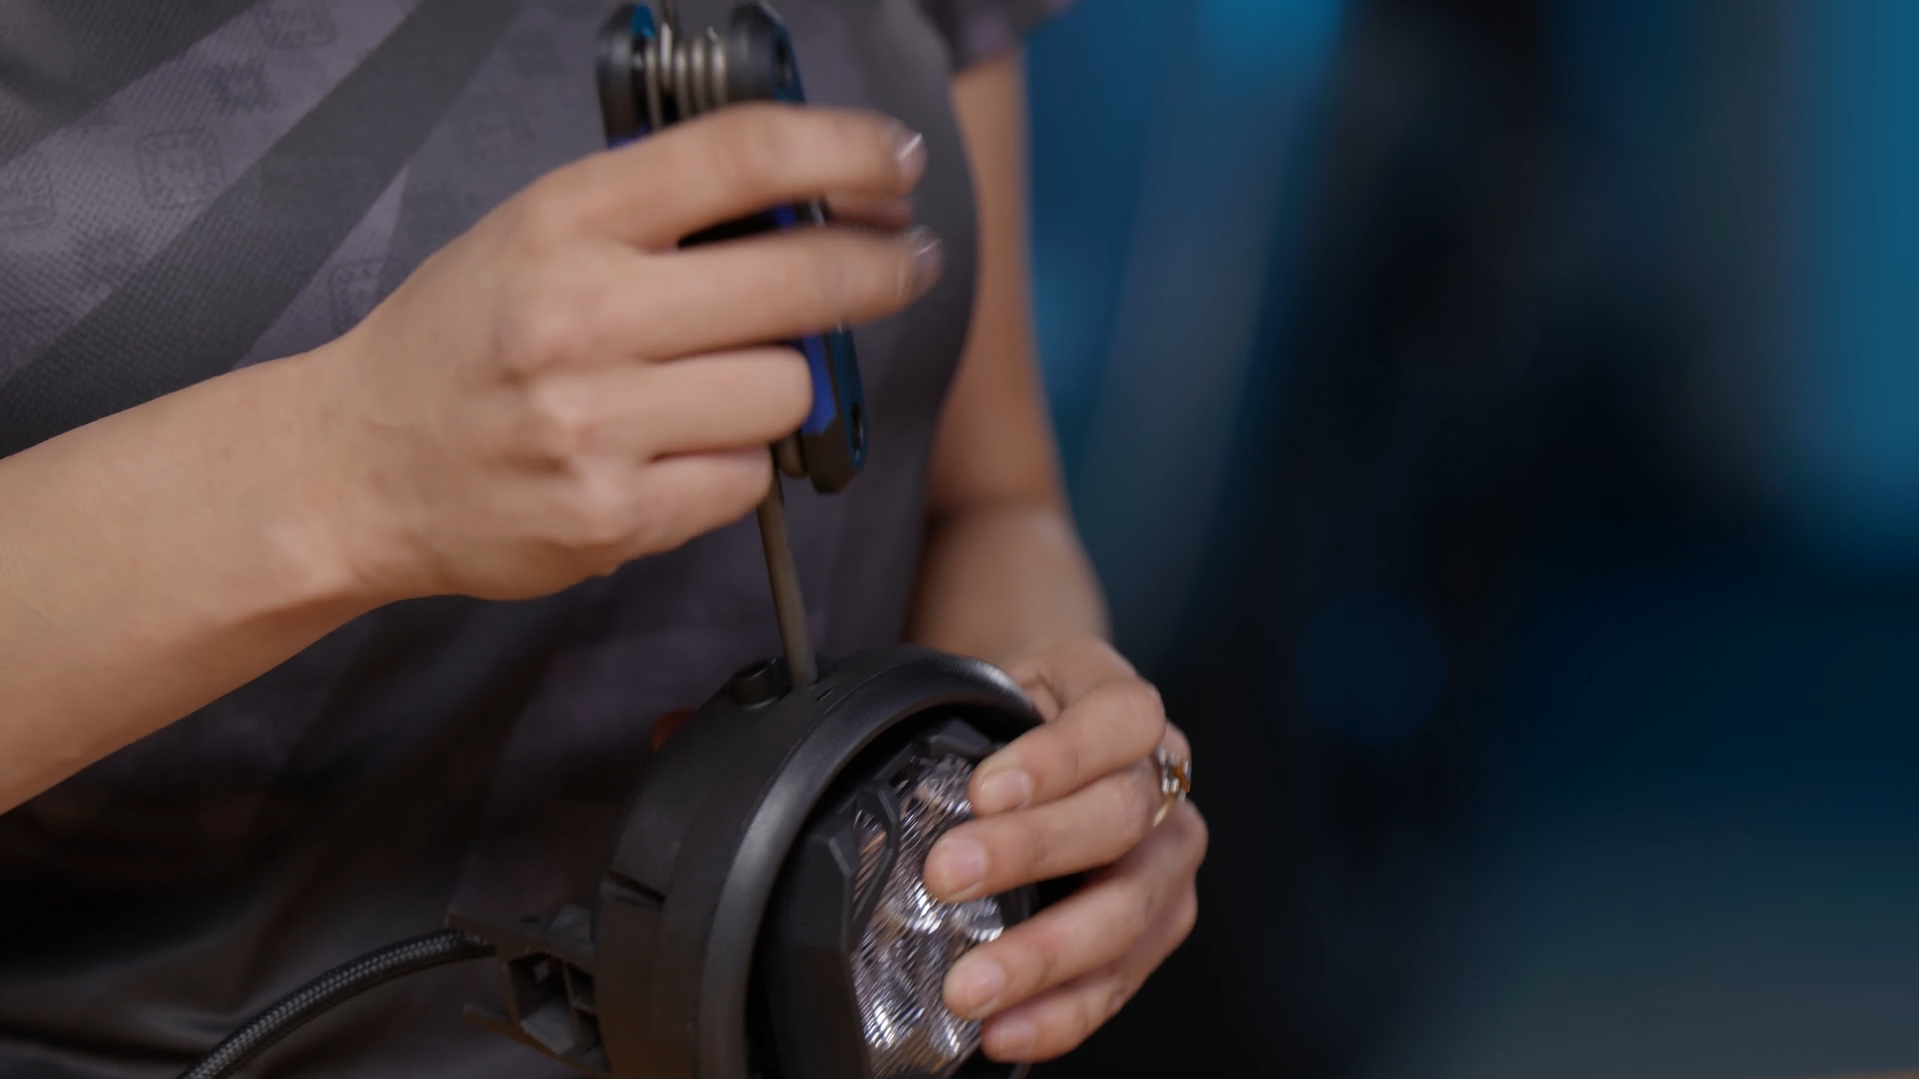
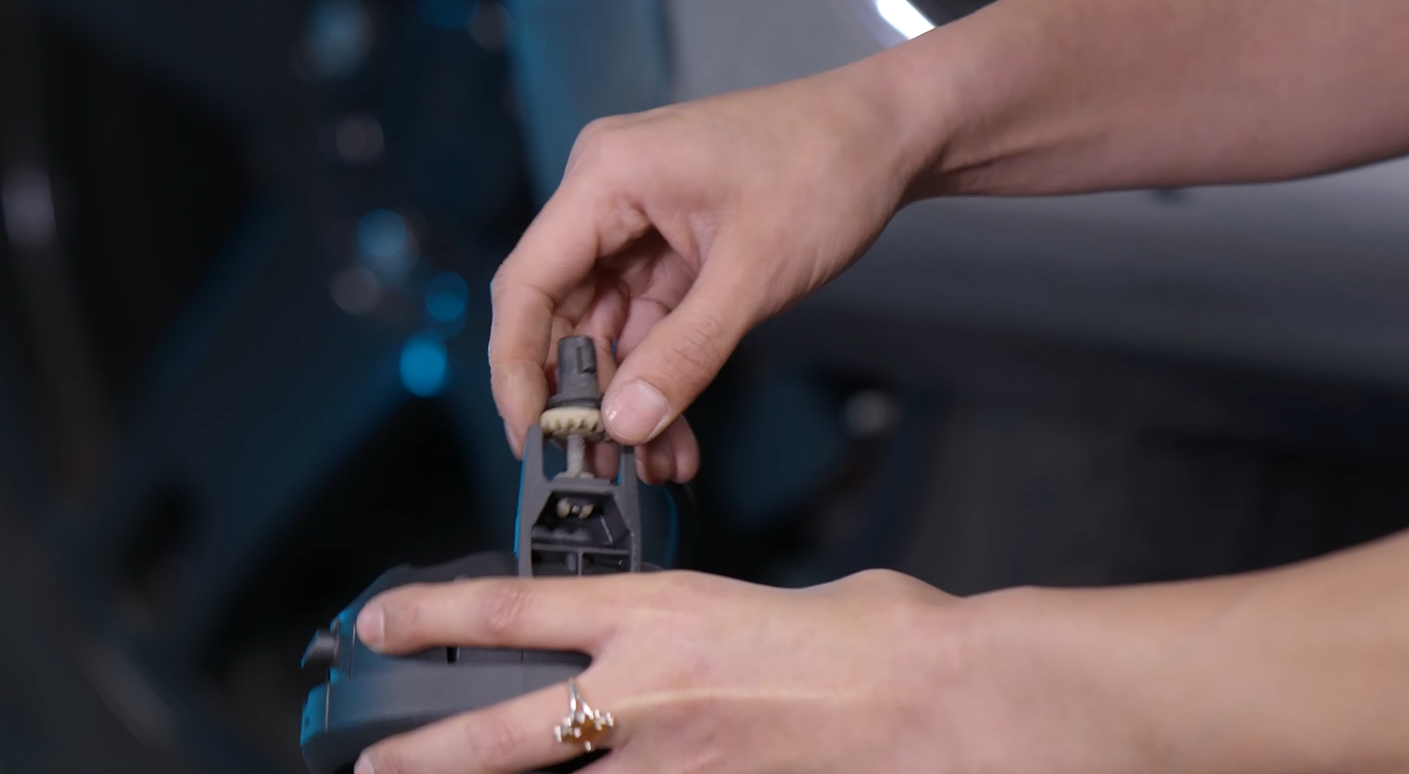
Firstly, take the two mount pieces and push them together. Connect them with the four T10 screws that come with the mount. Then slide the 4Banger into the mount, threading the LED pod light through the FRONT of the mount.
 |
 |
Once the 4Banger is in place, take the T30 screws and place them on the sides of the bracket. You will also need to take the harness adapter that came with the 4Banger fog lights and connect it to the 4Banger.
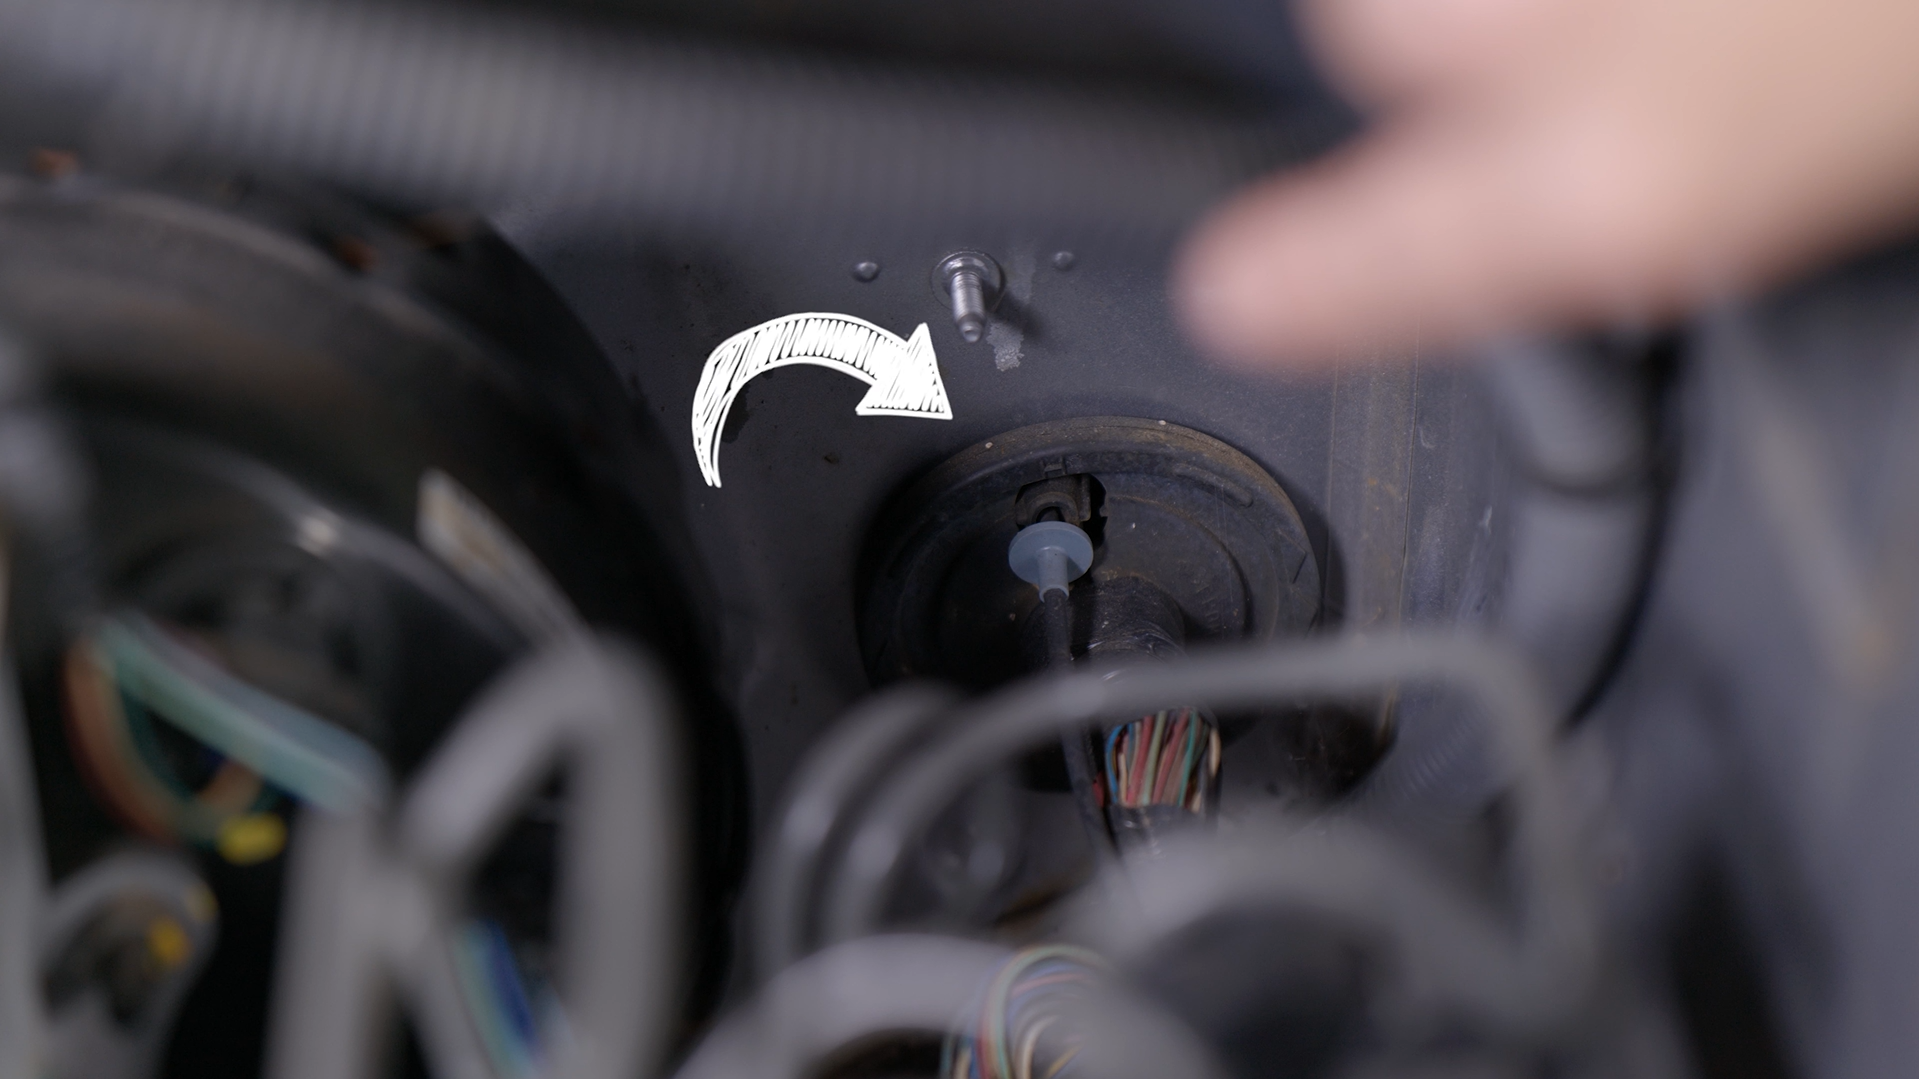
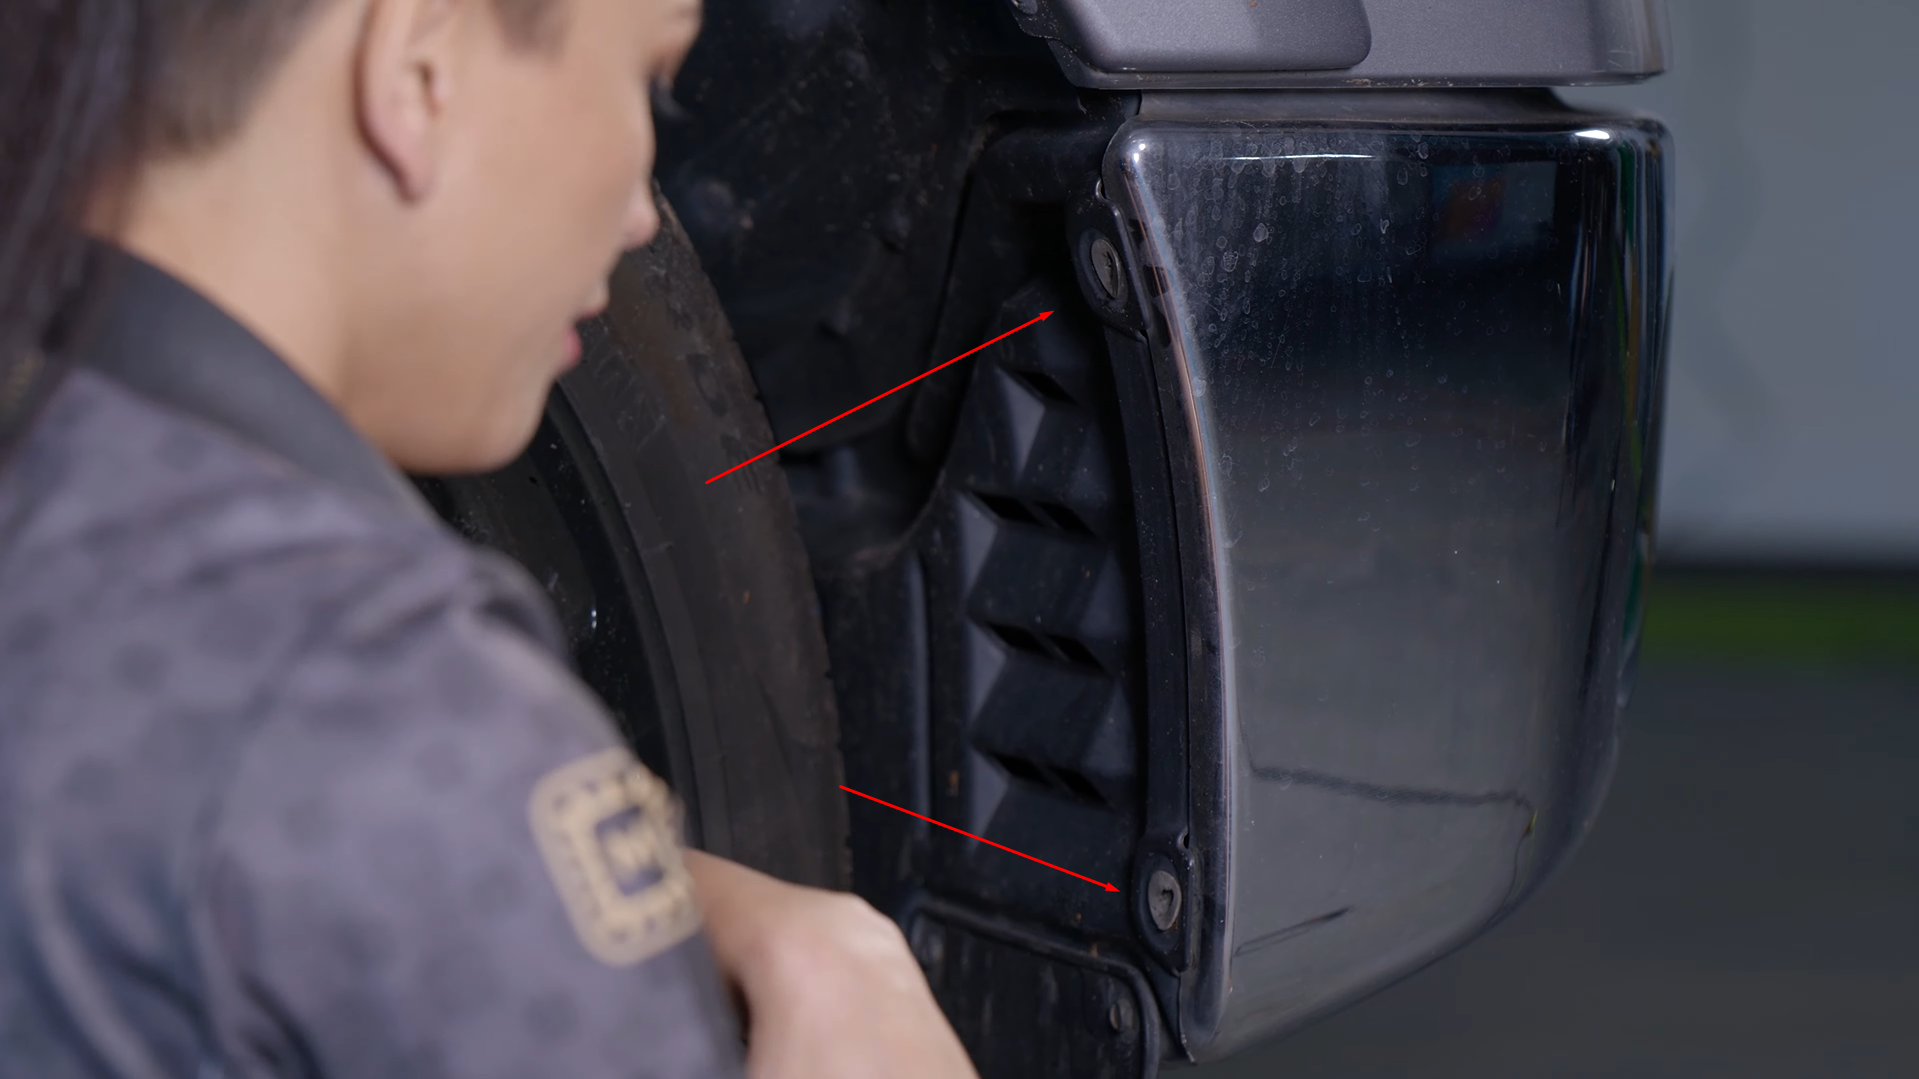
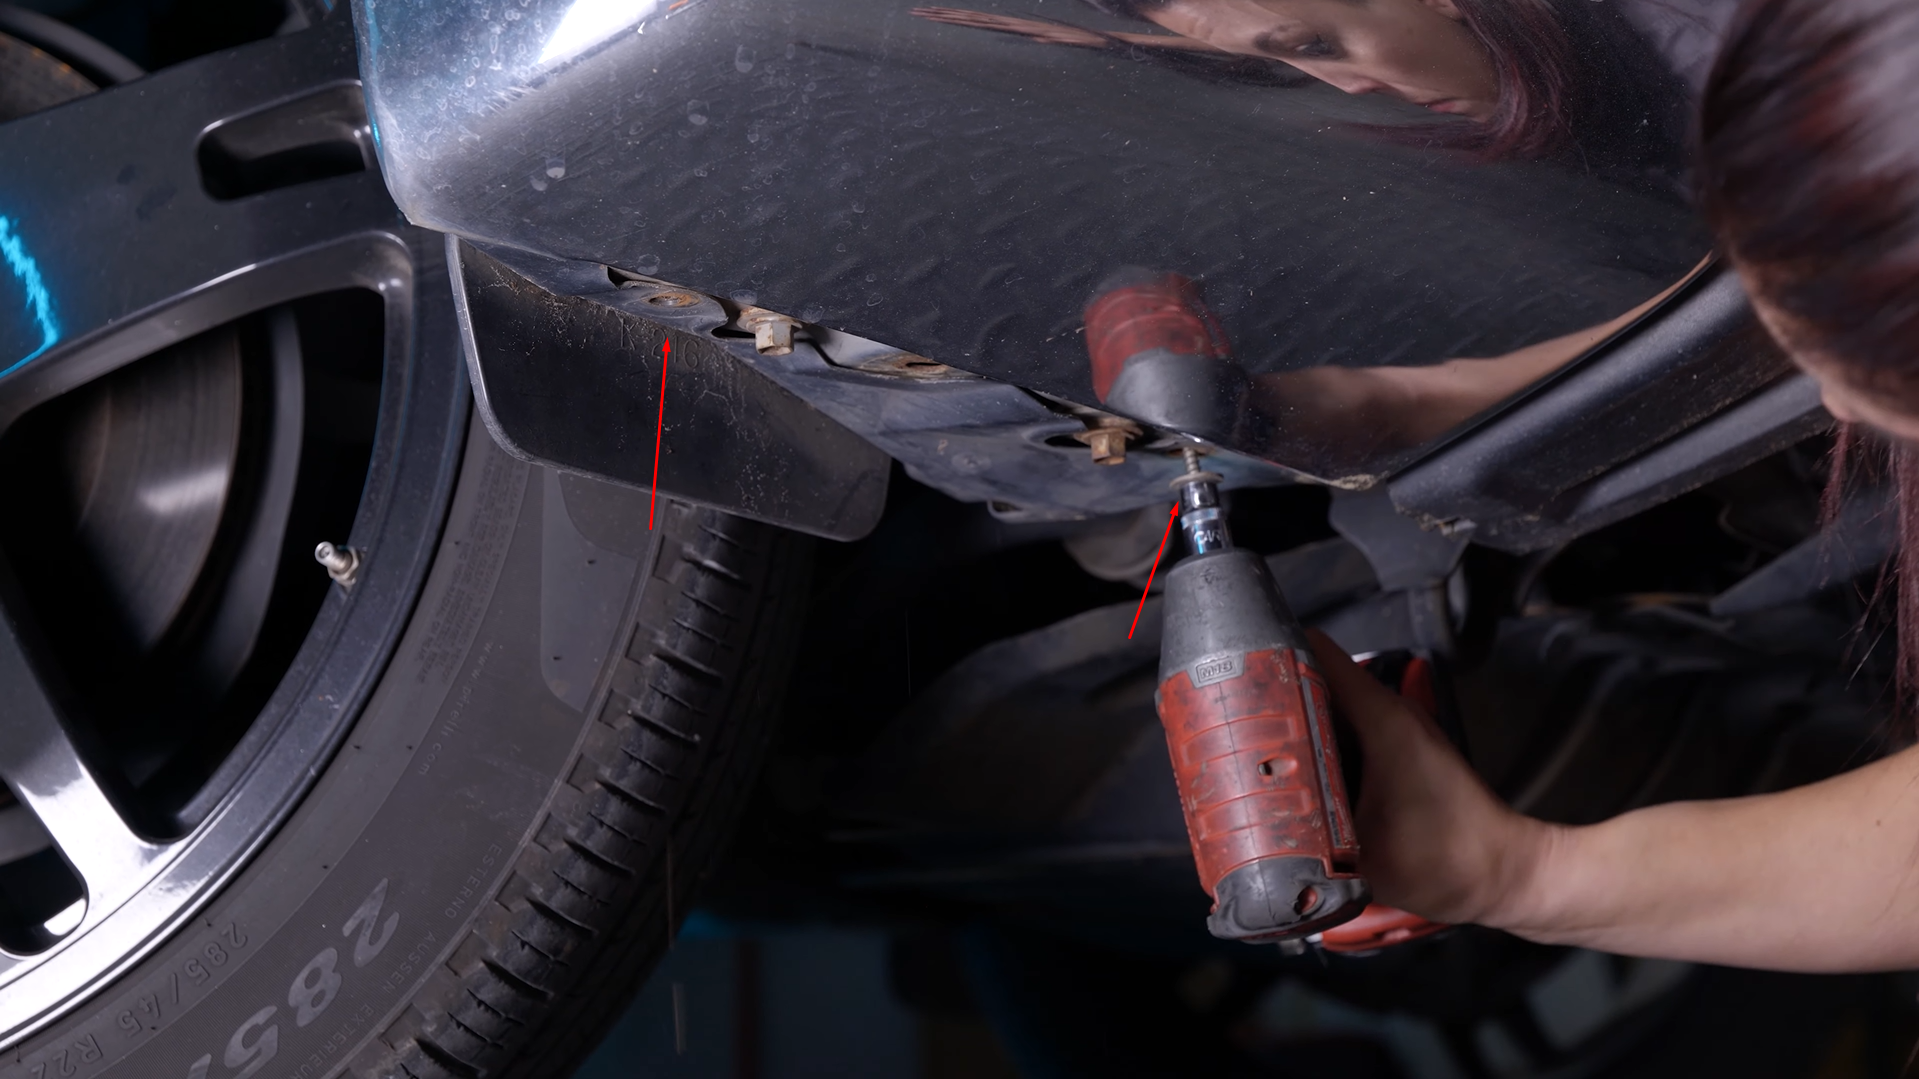
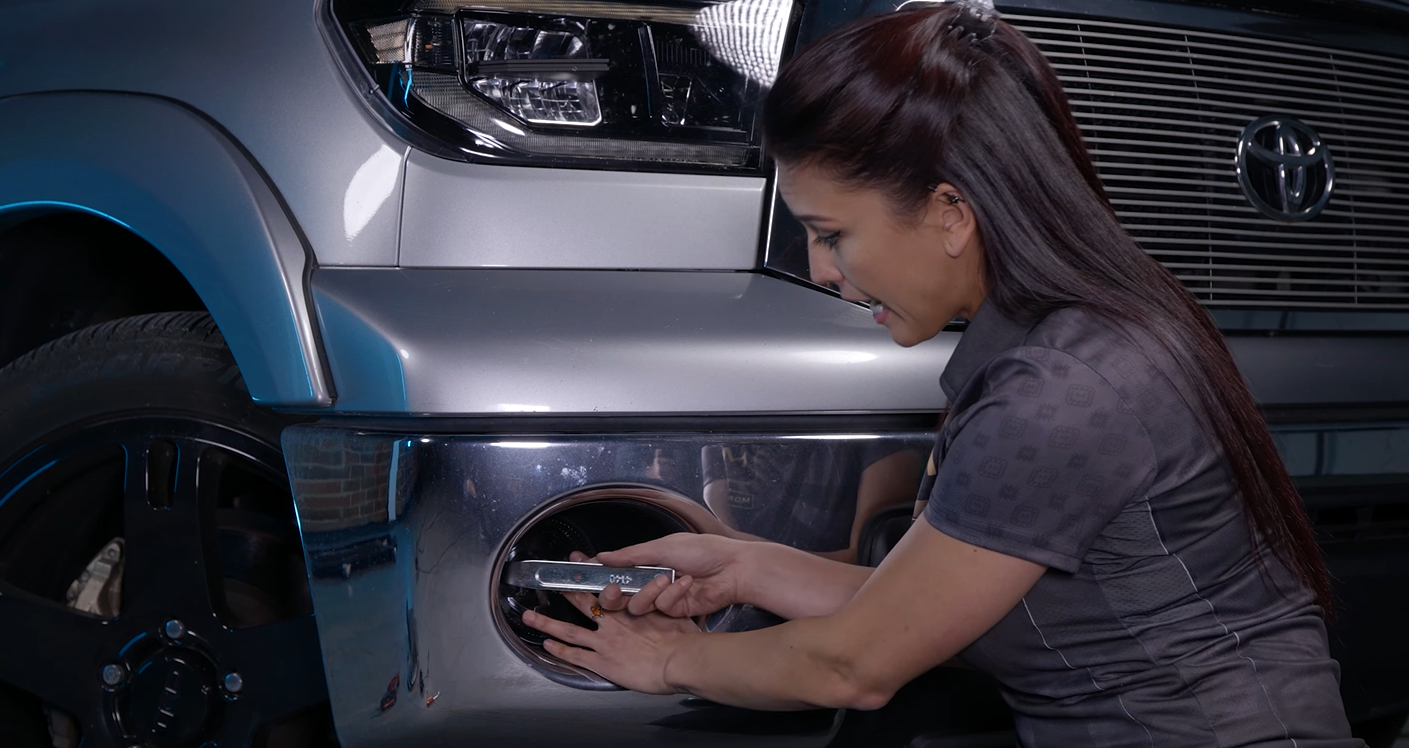
To remove the existing fog light assembly, remove the two plastic pins holding the wheel well guard in. Then remove the two 10mm bolts on the bottom of the car, located beneath the fog light. This will allow you to remove the plastic piece inside the wheel well and behind the fog light assembly.
 |
 |
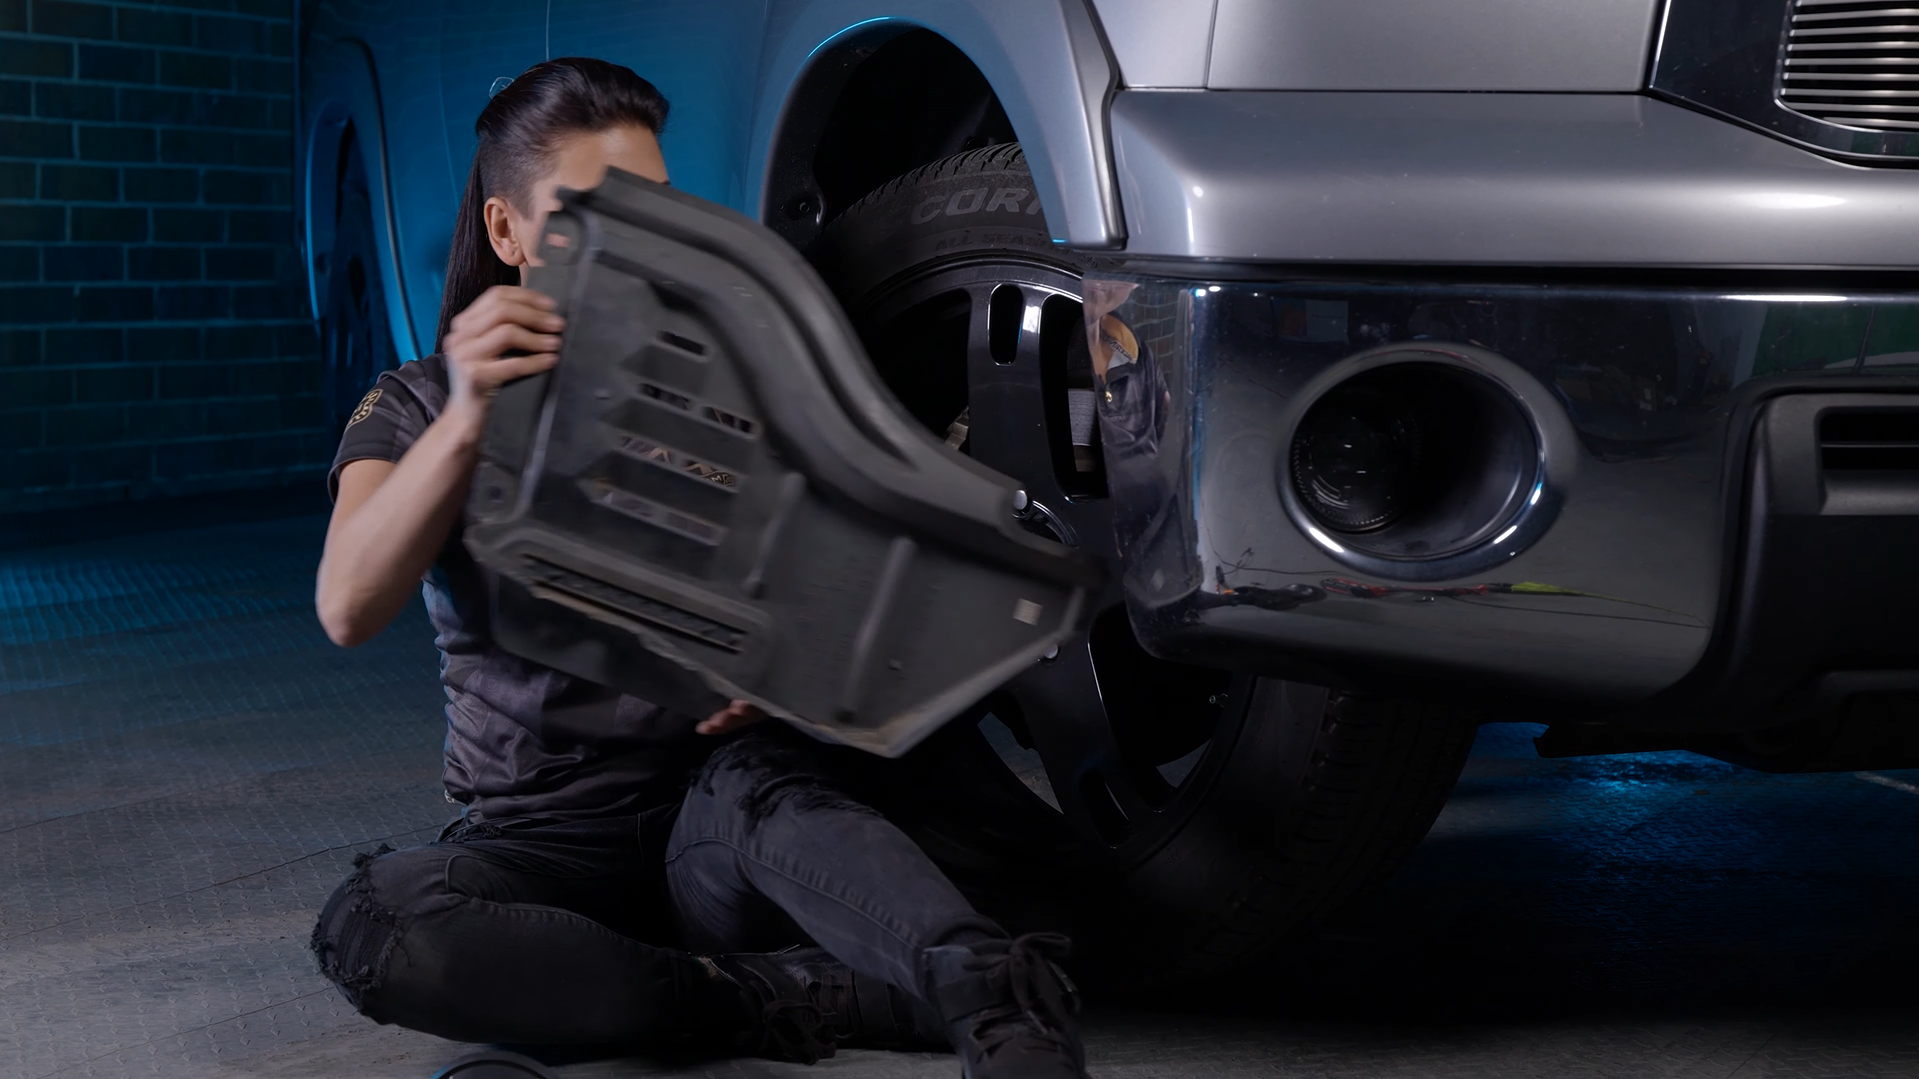
Unplug the fog light from the harness and push on the adjustment screw to move the fog light forward. Move around the front of the vehicle to work the fog light out of its assembly.
 |
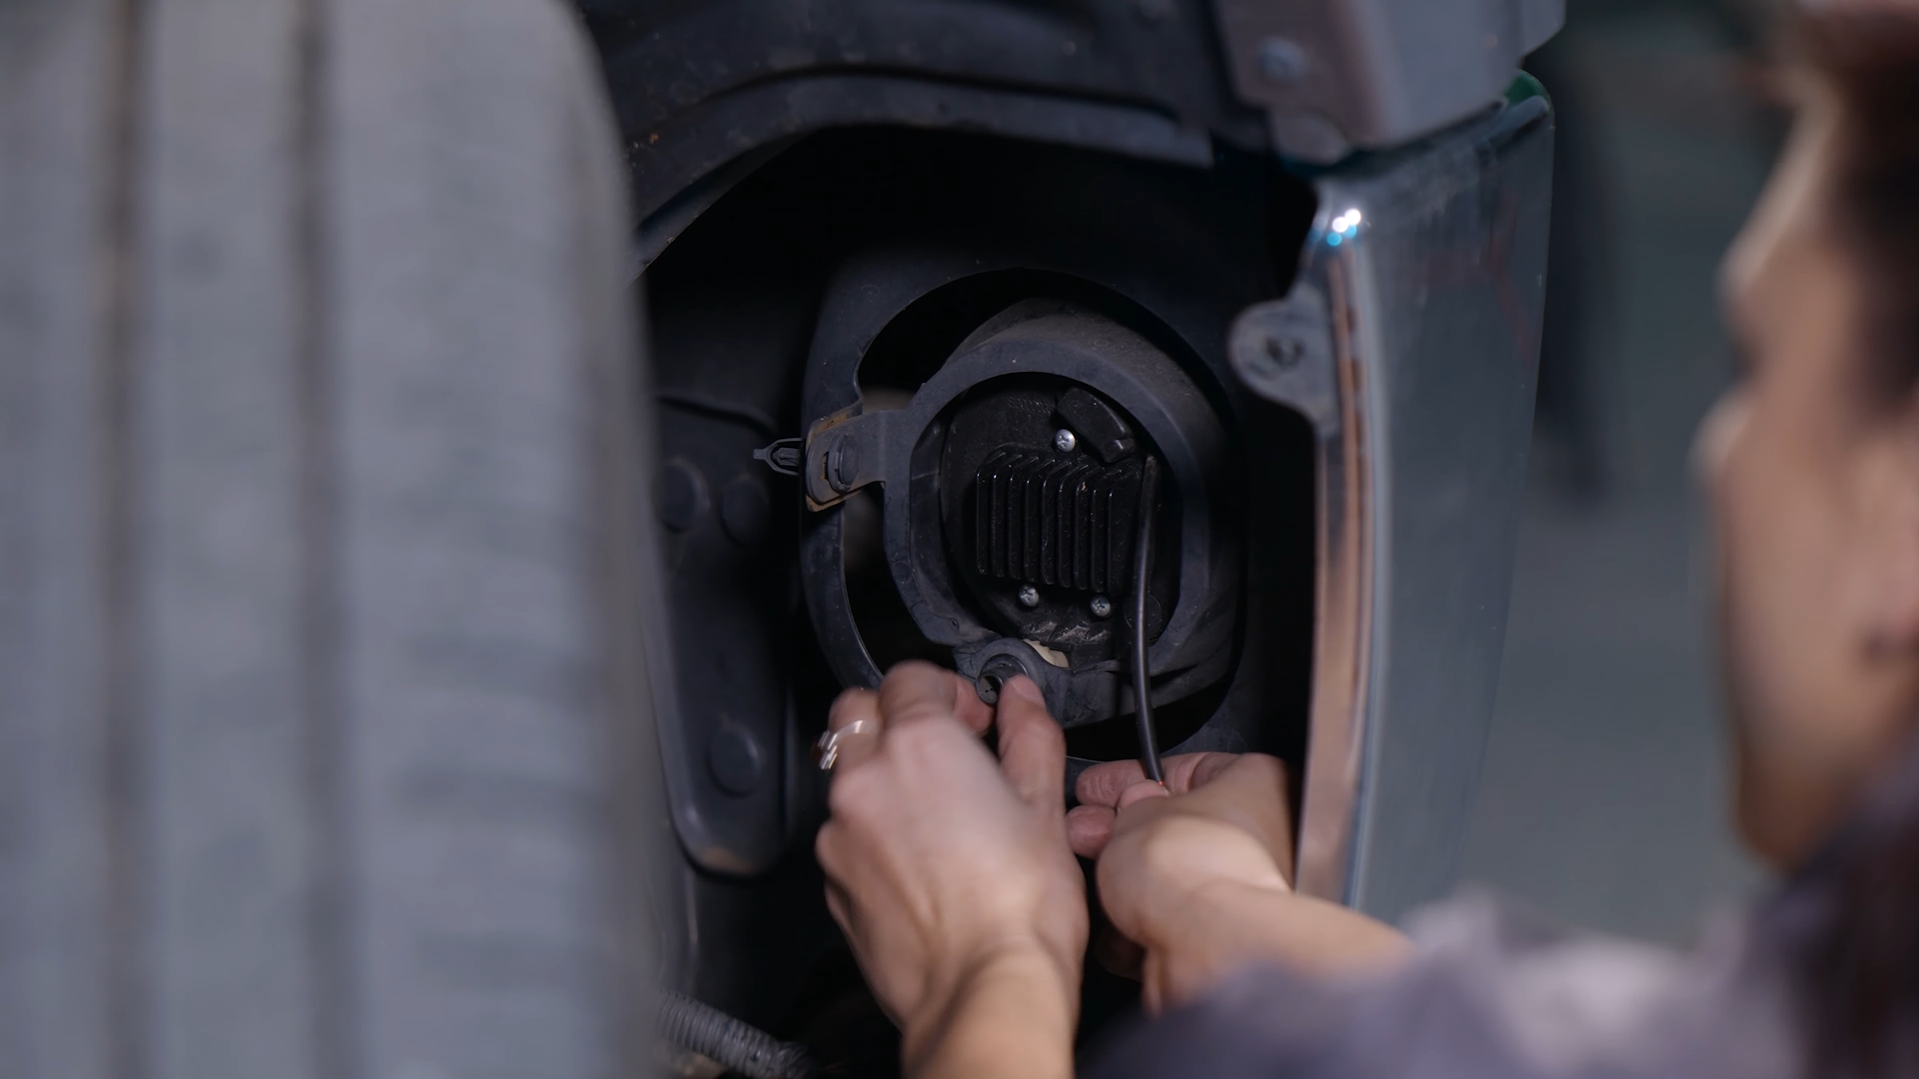 |
Once it is removed. Unscrew the adjustment screw and remove the plastic piece behind it. Transfer the screw and plastic piece over to the 4Banger fog light assembly.
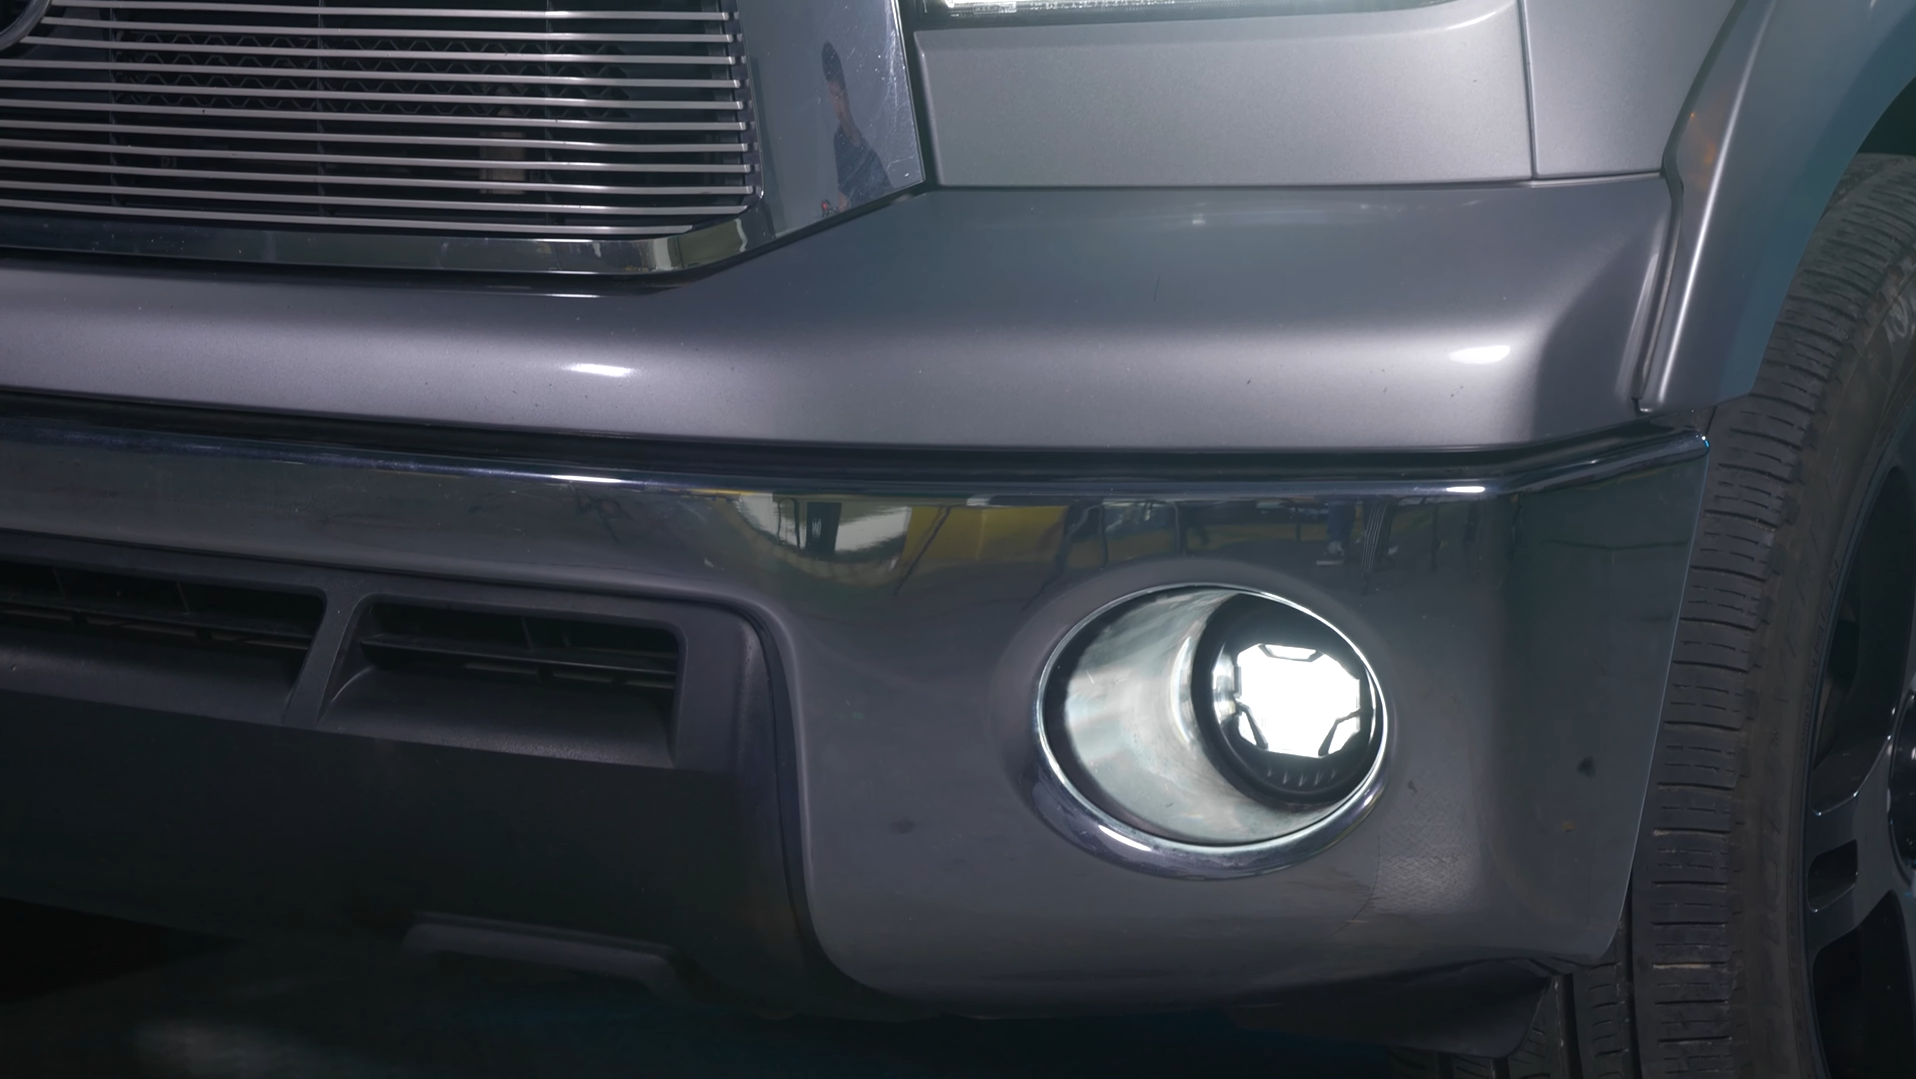
When installing the Morimoto 4Banger fog light assembly, make sure the plastic clips are aligned with the ones on your Tundra. Afterward, just use your factory connector to finish installing your fog lights.
Before tightening up all your screws, test all your lights to make sure the connections work and the lights are adjusted properly. Lastly, you should also ensure your hood is properly latched so that it closes correctly.
Conclusion
Now that you have your Morimoto 4Banger LED light pods installed, you can experience the full potential of Morimoto’s first entry into the off-road lighting category. The 4Bangers blew us away in respect to their quality, design, and performance. This leaves us wondering what else Morimoto could have in store for this market segment in the future.
Until then, keep an eye out on this space for any future Morimoto product releases and more! If you have any questions about the 4Banger, drop us a comment below or contact Morimoto’s customer support through their contact form at the bottom of their home page.


.png?width=300&height=87&name=logo%20(1).png)